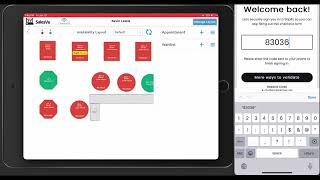
SalesVu tutorial on using Skipify Pay by QR Code for table payments. Select a table, add items, print a check with a QR code, customers scan and pay with tip options, then the POS notifies you when payment clears and closes the order.
Welcome. In this video I will be walking you through completing a transaction with the skipify Pay by QR code. In this example, as a server you can simply allocate your new customers on any available tables that are on green. All you need to do is simply tap on a green table and then proceed to take your customers order. Now in here all you need to do is tap on any products and they will simply be added to the table. As you can see here, the order will show at the right side of the screen. Whenever your customer asks for the check you can simply tap on. Next you can scroll down and then select the option of skipify Pay by QR code. What will happen is that your printer will immediately print that check with all the details of the order and at the end of the QR code your customer will be able to scan it with the phones and complete the transactions whenever they're ready. Now what you can do in here is simply go back and continue to take orders. If you would like to check the status of your orders, go back to the table screen and check for the yellow badge that says Skipify Pending. This means your order hasn't been complete the transaction, but once this is done this will be automatically be removed. On the right side your customer will simply continue with the payment. In here they can add the payment method, select the tip percentage amount and proceed to pay now. Now what will happen on the POS is that you will receive an immediate notification and the order will be closed and approved. From here you can bring the receipt or send it via email or SMS and the iPad will redirect you to the Availability layout screen in which you can go back and start taking more customers on the tables that are now available. Thank you and let us know if you have any questions.
 eCommerce, point-of-sale (POS), ERP and Data Analytics platform for retail and restaurant businesses