
SalesVu POS System: Basic Retail Bundle Demo
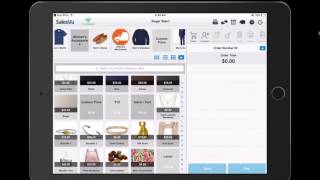
A walkthrough of SalesVu's Basic Retail Bundle POS system, showing how to ring items with modifiers and discounts, manage loyalty programs and gift cards, handle returns, track inventory with threshold alerts, close shifts, and integrate with QuickBooks and payroll.
Questions this video answers
March 21, 2017
$27
$100
24/7 phone, chat and email support
In this video, we'll cover a walkthrough of the SalesVu basic retail bundle. On the login screen here, you have different logins for each of your employees. Each of the logins corresponds to different levels of functionality on the POS app. There's also different access available for each employees on the website portal. Employees can clock in and clock out here and can sign on to the system here. If an employee tries to access something on the POS they do not have access to, you'll get this notification at that time. A manager can provide an override to give them access to that feature with their PIN number. When ringing in items in a retail environment, you can opt to use the.
Categories at the top.
Select a category, see the SKUs that are in that category, and select one. You can also opt to use SalesVu's barcode scanning. All you need to do is click here to activate the iPad camera or scan the barcode on the item with a Bluetooth external barcode scanner. When you've selected an item, you can select the appropriate modifiers, you can have value added modifiers, forced modifiers, or optional modifiers, and you can have as many layers of modifiers as you want. So here we have sizes and we have colors. So we'll select 40 regular and I'll select the brown tweed. You can also have special requests, all of which you will see on the ticket when you add the item. If you make a mistake and you need to delete the item from the ticket, you can simply left swipe and press delete. If you'd like to apply a discount to this item, you can click the percentage symbol here and you'll have the option to apply a percentage or currency value discount. You can also use a non time based discount by selecting this button. Here we have a few examples. There's a birthday discount and an employee discount. These non time based discounts can apply to either particular items, groups of items, categories of items, or all items. These can also require manager override. To activate when it's time to pay for this item, simply click Pay, select the tender and complete the transaction. When the transaction is complete on the screen, you'll have the option to email, sms, print or no receipt. When you're finished, simply press Done. The basic retail bundle includes access to.
The SalesVloY loyalty program.
If you have this feature activated, you'll get this pop up at the beginning of each transaction. All you need to do is simply enter the phone number of the customer at this time. If they've been in your store before and are already added to your loyalty program. You'll see their name appear right here.
We press this plus sign, we can.
See that we have their name and contact information. When we add an item to the order and pay, you'll have the option to partially or fully pay with Loyalty Cash here. See we have $27 available for loyalty Cash, so I can go ahead and click that. You'll see a partial payment was received. Press Done. We have the total amount, the amount paid, and then the remaining amount due. This amount can be paid with any other tender. This bundle also gives you access to the SalesVU gift card module. You can sell gift cards right from the point of sale very easily. Just select the Gift card category. Select the amount of the gift card you want to sell. In this case, we'll use the $100 gift card example.
Touch that.
Then the camera on the iPad will activate and you can simply hold the barcode Gift Card in front of the camera to activate it. You can also manually enter the number of the gift card. Press done. You'll see the gift card added to the ticket. Click Pay, select the appropriate tender and that gift card is now activated. You'll see this alert that that gift.
Card number has been recharged and what.
The new balance is on that gift card number. You can also take a payment by gift card very easily. Simply click Pay on the payment screen. You can activate the camera again here and use the iPad camera to scan the barcode on the gift card. Or you can use an external scanner to scan this. Alternatively, you can manually enter the gift card number. Click Done. You'll get a pop up with the balance on the gift card and you can select Pay or cancel. Select Pay and we'll see the transaction is complete, our card number and the balance remaining on the card.
To process a return with SalesVU, simply.
Select this icon here at the top.
You can search by customer name, customer.
Email, order, name, order id, or the last four numbers on the credit card that was used to make the purchase. Now that we have the order pulled up, you can select the R button here to return the item and if you'd like, you have the option to restock it. Then simply click Return.
The refund amount will be shown at.
The top and as per the notification, this amount will be added to the customer's loyalty account. We want to make sure that we have the customer's appropriate contact information in here. If we're missing anything, we'll be prompted to fill it out. We don't have a phone number so we'll enter it now. The amount has been refunded to the customer's loyalty account. The next time that customer comes in, they can use that loyalty balance to make a purchase.
As we previously showed, an important part.
Of the basic retail bundle is inventory functionality. Right from the iPad, you're able to do inventory adjustments by selecting settings, more settings and you can turn on inventory mode. What this is going to do is disable functionality. On the right hand side, you still have the ability to scan in items with the barcode scanner, the iPad camera, or you can select items from the categories and SKU lists here. To adjust inventory for an item, you can scan it with a barcode scanner to bring up the item.
You you can use this feature to.
Scan with the iPad camera, or you can simply select the item from the SKU list. On the left we'll choose this backpack. You'll see we have a pop up. We have the current calculated quantity. We can enter the new quantity and click Save. The discrepancy will appear in the inventory adjustment report. On the web portal, you can close out a shift and balance cash by clicking the piggy bank icon right here. Here we have a breakdown of all the tenders received during the shift. We can manage cash. If you need to deduct or add cash to the drawer, you can put a reason here. If necessary, you can do a deposit and you can close out the shift here. All of this information will appear on the web portal and is backed up. If you do have a printer connected, you'll have the ability to print off this report. As with other functions, the closeout report can be accessed by only certain staff. If you'd like.
In this section of the video, we'll cover the SalesView website portal. When you first create your 15 day.
Free trial, you will come to the.
Dashboard and you'll want to build your product list or menu. You can do that here. Our SalesVU onboarding team will help you enter all of your products, all the pricing, all the inventory, all the barcode information. And they'll do that for you free of charge. As soon as you're subscribed to a SalesVU module or bundled modules. To access any of the features, go into the Features tab. First thing we'll look at is products and services. Here you can select a particular location and this allows us to customize the different categories that we have. You'll see there's different levels of categories. You can have as many levels as you'd like and you can manage those here by clicking Manage Categories. When you click on a category, you'll see the products on the right hand side that are under that category, which you can then edit. You can also add new products. The product editing screen looks like this. We've got the name, selling price, a description of the product. You can select your category or subcategories here. Select if this is sellable or non sellable product or a service. You can enter a tax bracket. You can have various taxes that apply to a particular product. These can also be removed at the time of sale if necessary. You can either not track, you can track by weight or you can track by another unit. Typically if you're doing boxed items, it's going to be another unit and the unit is simply item. If you're doing some other unit cups, fluid ounces, we can accommodate that. If you need a custom unit made, just let us know and our support team will help you select your number of units. You can select a vendor. Enter their information here. If you have a barcode available for this item, simply enter the barcode here. Modifiers can be added or edited under the modifier groups and you can reuse these modifier groups multiple times. Components can be added here. So if you have something that is a group of products that you sell together, you can do that here. This can also be used for recipes, things of that nature. Or if you're selling a product that's being removed as a small portion of.
An overall inventory item, you can do.
That here as well. Next, we'll cover reports. There's several different types of reports available in SalesView. Sales reports are here. We've got average ticket sales discounts drawer report, which shows a timestamp of any time the drawer was open for a no sale. This is for security purposes. All of your closeout reports from the point of sale are stored here. ZReports tax reports, cash adjustment reports and modifier sales reports. We'll have a look at the sales reports. Sales reports can be expressed graphically or in table form. You'll see when you select table form, you're able to export this data in a CSV format. Select the period that you want. Hourly, daily, weekly or monthly or entire period. Do entire period. You can select a specific date, range down to hours and minutes in the day. Or you can do a quick pick today, yesterday, seven days, month to date.
Year to date, etc.
You can look at a high level report like this where you've got every store and all products, total quantity, undiscounted and total sales. You've also Got a breakdown of the tenders the sales were made by at the bottom.
If you want a more detailed report.
Simply select Show Cumulative sales for select the drop down menu and either select products or a specific category. If you have more than two levels of categories, you'll see more options here. We'll select products now you'll see all of the products that you have listed here. You can pull this down like so you can select an entire category of products, individual products, or you can simply select all Toggle this on and off to show products with no sales. You can further break down reporting by the point of sale the sale was made on. That would be the iPad, by employees. Or if you have multiple locations, you'll have the option to break down by store. Here's what a detailed product report will look like. We can sort this from highest to lowest and it's exportable as well. Next, we'll look at inventory. Again we have the option to select based on location. When you have multiple locations, you'll have the option to transfer inventory. With the SalesVu inventory transfer feature in.
This module you will have the ability.
To view and adjust inventory, create purchase orders, manage vendors, look at inventory adjustment reports, profitability reporting, create product labels and print them and adjust out of stock settings. We'll cover out of stock settings first. This allows you to customize what happens when inventory amounts show zero on the system and you can customize it for E commerce, the point of sale, and for a self order kiosk if you're using it. We'll cover product label printing next. This has been a very popular and common request from a lot of SalesVu retail merchants. So SalesVu has the ability to create.
Barcodes for you at the time when.
You create the products. Or we can import your existing barcodes. Please contact our support if you need any assistance with barcodes. Profitability Report offers you more reporting specifically to do with inventory. Again we can look at table, line or bar charts and select a specific period. We can look at profit margin, cost of goods sold, other metrics, and total cost of inventory. Again, we can select a specific date range, do a quick pick look at overall sales or break down to a specific product level just as in the other reports. Again you can drag this down. You can select all or select specific products or categories of products. You can further break down by stores just as before. Next we'll look at View Adjust Inventory. In the app section of the demo, we covered how to adjust inventory right on the iPad app. You can also adjust inventory from here. You'll have a complete list of all the items. You can filter this by specific categories or subcategories here, or you can look at all items and work your way down the list. All you need to do is simply adjust the quantity here. Go down your list, click Save, and all of those adjustments will show up in your inventory adjustment report. Threshold settings can be set universally or on an individual product level. In this instance, we have the threshold set at 9, so once this inventory number reaches 9, we'll get a notification.
Via email that we need to order more.
You can adjust those settings here. Next, we'll look at vendor management. Here's where you'll populate all the information for each vendor. You can select whether or not you want your vendors to receive purchase orders via email. Next, we'll look at purchase orders. Here's the portal to manage all of your outstanding and pending purchase orders. We can look at drafts, open purchase orders, and previous closed purchase orders. To create a new one, simply click New Purchase Order. Next we select our vendor. In this case, we'll use LMClothing. Click Next. We can copy a past purchase order or start a blank purchase order. From there, we select the products. You can simply filter by that particular vendor the purchase order is for. By clicking here, we'll select this particular jacket and add it. Since we've ordered this previously, our previous unit cost is here. We enter the quantity we want. We can keep the unit cost, or we can adjust it, add more products, and when you're finished, click Next. You can populate the fields on the screen as needed. You can assign particular employees, assign an expected delivery date, type of payment, payment method, purchase order name, any additional comments and shipping address. Then click Finish. Now our purchase order is complete. When it arrives, you can edit it as necessary and you can receive it. When you click Receive, you'll be prompted to enter an invoice number. Click Confirm, and those items are added to your inventory counts.
Next, we'll look at the SalesVU employee module.
There's a lot of different functionality available here. We'll cover the major points. Here's where you enter your new employee information. You can edit existing employee info here and add new employees here. Simply populate all these fields, the most important being their email and their phone number. You'll see why in a moment. Next, we set up access levels. Access levels are adjusted here. We'll edit this employee's access levels by clicking Edit. And here we can edit their access levels to the website and the payment device. We can also edit their access levels.
To Role access levels.
This allows you to customize whether or not this employee can create new payment devices, new customer kiosks, and new kitchen displays. Payment device access levels are extensive. You can customize pretty much anything somebody can do when they're logged into the Point of Sale app. The same goes for the web portal. Passwords and pins are configured here. Employees can be added to different locations here. Next thing we'll cover is the Scheduler. Scheduler is a very powerful and useful tool in SalesView. Again, select a location. This allows you to create a schedule for multiple employees. Simply select a shift, select the employee or group of employees that will be.
Taking part in the shift.
Edit the time, select a color if necessary. You can repeat this shift perhaps every week, every two weeks, etc. You can select an end date if necessary. And you can select which days of the week this shift will take place on. You can add comments and when you're done, click Create and Publish. Once you've created all your shifts, click Publish and Notify. This will send out notifications to all of your employees. You can adjust where they receive notifications here under Notification Settings. They'll be notified by email and or SMS depending on what you select here. SalesVu will also create ICAL and Google Cal events for all scheduling events for all employees. So they have their schedule right on their phone. This way everybody knows when they're working. Your employees can also access a read only version. Even if they don't have access to this particular module, they'll be able to access the Scheduler, the time off request and the shift trade request. We saw how you can clock in and clock out on the Point of Sale app. That information is overlaid with the scheduler you've created and a shift discrepancy report is available. This allows you to select a particular amount of time discrepancy. Let's say 20 minutes, for example. You can select the date range and SalesVu will automatically flag any shifts where somebody was 20 minutes late clocking in or 20 minutes early clocking out. Under compensation, you can configure employee compensation levels. You can also create commissions for different products or services. These commissions are customizable down to the employee level, so each individual employee can receive different commissions for different products and different services that they sell. You can have as many different commissions as you'd like. Those total commissions will be available in the labor report along with hourly or salary wages. This report can be easily exported to a CSV file. You can then send it to your payroll company or complete payroll internally. Next, we'll cover the SalesVU gift card and Loyalty Module. Setting up your loyalty program on the.
Web portal is extremely easy.
Simply click here, go to Loyalty Settings and all you have to do is enter two numbers. First, enter the percentage of customer purchases that will go towards the customer's loyalty balance. Here we'll use 2%. Next, enter an unlock threshold. This is the amount of loyalty dollars a customer must accrue before they're able to actually use it to make purchases. Click Save and you're all set. You'll begin getting the pop up on the point of sale. Requesting information for the loyalty program. We can import existing loyalty information here and we have a loyalty report available here. Next we'll look at gift cards. The SalesU gift card module shows you gift card numbers, customer names, outstanding balance status, and whether or not their account is linked. You can recharge cards and look at their history from here and edit balances. We can import existing gift card data from your existing gift card system. Please ask our support for assistance with this. If you'd like to create discounts for your store, you can do that here. Simply click Add Discount to create a new discount. With SalesVU, you can create non time based discounts, Time based discounts and coupon codes. Non time based discounts, you would press the key on the point of sale and see the drop down menu of different discount options. Time based discounts operate something like a happy hour. During a specific time the discount would be automatically applied and then after that time has expired it would be automatically removed. You can apply these time based discounts to products like this, or you can apply it to an entire category like this. You can select whether or not it's a percentage or flat rate discount. Enter the value here, enter the times here, enter the date which it starts, the recurrence and simply save it.
Last, we'll cover the Accounting module. The Accounting module allows you to use.
Stalezvue EasyAccounting, which will allow you to easily create a P and L expense categories and income statement. Or you can use our QuickBooks integration which connects with both the online and the desktop version of QuickBooks. Please contact our support if you have any questions about setting this up. As with all SalesVU accounts, your subscription includes 24. 7 phone chat and email support. You can connect with chat support instantly by clicking here or call our 888.
Number at any time.
To manage your subscription, simply go to the App center and select either the bundle or individual modules you'd like to subscribe to.










