
SalesVu POS System Overview
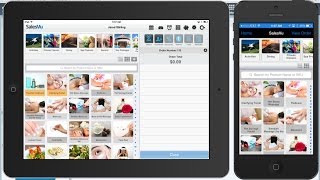
SalesVu Technical Support walks through their iPad and iPhone point-of-sale system, covering product management, order processing, discounts, employee management, reporting, inventory, e-commerce, and accounting integrations.
Hi. In this video I'm going to show you a complete Overview of the SalesVue POS for iPad, iPhone and our cloud management system which can be accessed from any web browser. First thing you'll see at the top of our iPad app is the categories for your products and services. So you can see that these categories can have images or no images. If we touch on a category, it'll show us the products that are in that category as well as any subcategories here at the top. If we touch a subcategory, it will show the products just in that category. You can also view these products as a list by touching here. If you touch and hold on any of the products, you can see some information about that product, the name, the category description, selling price, tax rate, UPC and SKU codes, and current inventory. You can also add to that inventory or deduct it down by touching the adjust button. If you're an employee that's logged in that has access can set different permissions for different employees, you can edit this product as well. If you don't have the access, you wouldn't be allowed. So you can make changes and touch Save now to add a product to an order, simply touch product and it'll add it to the order as well as compute the taxes. If you want to change the quantity, simply touch the number and put in your quantity. You can also do decimalized quantities. If you want to sell half of something. In this case probably not going to sell half a hat. Now to take the payment for that transaction you simply touch pay and you can see the different payment options that we have. So you can take cash payment, swipe a credit card or touch manually enter it manually. We offer our own gift card system where you can sell your own gift cards and track them through SalesVU. You can pay with check external credit card. You can also turn on external gift card from salesvu.com if you want to do a split payment you can simply touch split payment and put in the amounts or touch equally to split them equally and then touch pay. If you want to just take the full payment right up front, say they give you 100 Duc. You can either print a receipt, send it via email or touch done to skip over it. Next if I touch on the orders button you can see all the open orders on this device. Open orders are orders that have not been paid or have only been partially paid. This is great for opening tabs at bars, restaurants. Anywhere where you take a deposit such as repair shop or alteration shop. You can run an account for a customer. All you have to do is leave your order open. You can see it tracked by order number. You can have a customer name or also the resource in this case our resources table. But you can have other resources such as salon chairs, bowling lanes, massage rooms, etc. If you want to bring up one of these open orders, simply just touch on it. You can add to it and if you want you can check them out or you can go back to your open orders. You can sort these orders by employee touch here and choose an employee. If you need to invoice a customer, you can simply touch the envelope and send it to their email and they can pay the invoice right through their email. You can view the closed orders here. If you want to pull up one of these closed orders, simply touch it. This is useful if you want to print or you can re email as well. That receipt touch on the envelope, enter the email and and touch send receipt. You can also see the deleted orders and you can start a new order by touching new order. Next we'll discuss the discounting options. So currently we have four different types of discounts. You can have non time based discounts that you can create online which we'll show you later and select from here. Now here's one of the access levels that you need. So currently I do not have access to discount, so I'd have to choose a manager and put in their pin or someone else that had access and then it would apply it. We also have what's called a runtime discount for on the fly discounting. We have time based discounts which you can create based on time and they will automatically apply. This is great for happy hour specials or weekend flash sales stuff like that. And we also have under town view you can enter coupon codes or if you use our townview marketing on Facebook, your customers can give you coupon codes there as well. If you need to ever remove something from an order, you can simply swipe and touch delete. If you need to trash can an order, you can touch trash and delete it. It's another thing that can be set up as a permission. Both of those things. Deleting and deleting products off of an order and deleting the entire order. If you need to print something ahead of time such as to the kitchen, simply touch here, choose your printer from the list. Currently we only have one, but you can have several and print it. You can set attributes such as if it needs to be delivered, shipped, picked up. You can view that from salesvu.com and we also have if you have tips turned on, you can have three types of tipping. There's on screen tipping. There's tipping on the printed receipt which you can do here. Once they tip on the receipt, you would simply come to manage credit card batch and enter that tip. Or in the case of large parties, you can add the gratuity on ahead of time before you give them the check. Next you can see if we go to the next top row of buttons here you can touch the logout button. This will allow you to log out so your different employees can log in and out. We track all the sales by whoever is logged in so you can break down your sales reports by employee. You can also set commission rates. If you're using our employees feature, it'll automatically calculate based on how much each one is sold. To login you select their name, put in your pin and touch login. Next, if we go under settings, you can see there's an auto logout that you can set. At the bottom we have the ability to show the resource map after each order is closed. This is where you're going to set your card reader type. You can have the latest items go on top. So currently if we add products, the next one that gets added goes to the top as you can see. You can switch this so that it's on the bottom. This is helpful for different types of receipts for different businesses. Next, if you touch Returns and exchanges it will log you right into salesvu.com and take you to the orders screen so you can process refunds. You come back to the app. You can also launch salesvu.com right there. It logs you right in with the permissions of whichever employee you are. Printer settings will help you set up your printers and syncwithsalesview.com will manage manually sync with Sales View. Next button over is the shift management screen. This currently keeps track of your cash and all your other subtotals. So the beginning of the day you would come in, go to manage cash and you would add your starting cash. The end of the day or end of your shift you would look at your cash drawer and count out all your cash and checks, credit card receipts, and then you would do a deposit to safe. So if you want to do the full amount and then you would perform a closeout and all your numbers go back to zero. You can print this if you'd like and then the next day you can start all over again. Next button over is our resource management feature. Now this feature allows you to set up different resources, whether that be bowling lanes at a bowling alley, massage rooms at a spa, tables at a restaurant, etc. And you can see how long the customer's been there. You can see what the order total is. If you need to utilize that, you can just touch on it. You can start adding products to it and you can come back to it. It'll show that table and information about it will print. If you print it to Bar kitchen or you print the receipt and then when you take the payment, that table or other resource is free again. Next we have a clock in, clock out button and here you can clock in. The beginning of your shift will show you when you clocked in and then you can clock out at the end of your shift. This button here will open a cash drawer. Again, I don't have access, so I would need to choose an employee that had access and put in their pin and then it would open the cash drawer. The last button here is for our scheduling feature, which we'll cover more in depth when we discuss the cloud portion. Now, the iPhone app is very similar to the iPad app. It's just a little bit different layout. So, so you can see you still have a lot of the same options. Logout, start new order, view all orders, shift management, syncing, launching, sales view, etc. So you can see we can start a new order, see all our products. Here you can have the list view, just like on the iPad, if you touch a product, it'll get added to the order. You have all your buttons here for accessing orders, accessing customers, discounts, townview, coupon codes, trash can, attributes and gratuity. You can change the quantity here, touch pay to take the payment. So it's very similar. Main differences is that we do not have the clock in clock out on this device as of yet. So next we'll show you the cloud portal. So here we are and this is the login screen for salesvu.com the login screen has a latest news blog. So we post updates here. You can click on these, we'll post frequent updates. You can use this search over here. So if we go to features news is what we're looking at. If we click on products and services, it'll ask us to select a location. So if you have multiple locations, you can have a product list for each one you click here, it'll take us to our products, which is right where it would take if you only had one location. You have all your categories on the left hand side. If you click on the diamond next to the category, it will show the subcategories again. You can see the third level subcategory here. All the products are here and they exactly mirror what is on the iPad app. So the first product in the iPad app is going to be the first product here. If you want to move them around so you can move your most popular items to the top, simply click and drag it and it will automatically save. You can create new categories by clicking the add category button. You click Add product. So here's where we can enter the product details. We can put in names. If you want to create a product, we put T shirt put in your selling price. You can upload an image here. So we'll choose our image from our downloads and this is the image that will show up on the point of sale in the app. And also if you're using our E commerce you can enable it for E commerce here, choose the button color. You can put a description in here. You can choose your categories or right here you can add a category. So we'll throw this in the men's apparel category. You can say whether this is a sellable or non sellable product. So you can have things in inventory that you don't actually sell, but maybe you sell it as a part of something else. Maybe you want to track nails and you make furniture or bags every time you make a sale can do that. You can set up a weight for the product which is used for weight based shipping or inventory. You can turn on tracking another unit since it's a retail item. We'll do item and we'll say one comes out of inventory. You can put a UPC code in and this is for if you're using a barcode scanner, you'll enter that UPC code here. SKU code is for your own internal tracking methods. If you go into modifier groups, you can add different groups or select an existing group. So we select we have some different food options. You can also use this for small, medium and large. So if we wanted to do a size option, what we do is we'll go to the more option and we'll click on merge. And what that does is it'll create an inventory unit for each size and each color. When we add the color option so you have one product but multiple inventory units. And so we'll save that and we'll add our item and we'll do small, medium, large. If for some reason one of these is more, you can add an additional cost here and then you can add another group and we'll Call this one color and we'll do the merge option again and we can put in maybe red, blue and green. Then all those options will be available in drop downs on the ecommerce and also in a pop up when you touch the button in the app it will show you those options and they'll have to be one of them will have to be chosen by your employees. We also have these options for modifiers if you want them to be mandatory. Mandatory is automatically on if you do a merge and then a max choice too. So if maybe you have special where there's three options and they can only choose up to three. So if we click save that product will be saved and you can add modifiers here. You can do an import your products through a CSV file here. If you click here and click here you can see the demo file. Very easy way to import hundreds of products at one time. You can export your products as well. So next we'll go to the orders screen. The order screen basically will show you a list of all your transactions. So you can put in any date range. Here we just put it in a quick pick Today, it's just going to show us today's transactions. You can break this down by payment device or by business location. If you have multiple locations you can choose if it's opened which means it's not fully paid, closed which is paid and deleted. You can see by payment method. You can do by order source so it's E commerce or invoice or recurring billing. You can do by order id, customer name, customer email, the last for their credit card. You can set different statuses which we'll show you in a second and you can search by those statuses, the shipping status as well, reconciled status and then batch date which is the date batched. And then also you can search by products and by order amount. So let's just do for today. So this is a list of the transactions we have today. It's going to show us our order total at the top total amount here. Across here you can see order id, the date time it was processed, the employee name here, the device it was done from. In the customer name you can see I'm the employee and the customer on this one different employees and customers here. Now if we click on this order, it's going to show us customer detail. It'll show all the detail, like their address, etc. If it's there, it's going to show you what they purchased, you know how much they paid for. If there's any sort of discount on here, what the tax was and you can re email a receipt here. You can refund or exchange it. You can click delete, print. This order can do a reorder. So basically if I wanted to purchase again, you could click reorder and create another order for me using the same credit card information without having to get it again from the customer, which is very useful for some subscription services. Now if we click on Exchange, you can do a return for just one product. If you want to refund all, you can click that. Let's say we wanted to return this one and put it back in inventory, you can click that. You can also do an exchange, so you can choose a different product instead. If you click Continue, it'll automatically show the refund amount, which credit card it's going to go back to. And if you click Next, it'll process that. Otherwise you can go back and just cancel it. You can also create new orders from here. So if you need to process transactions from the website, you can click create new order, choose your location. If you have multiple locations, search for customers, or just click Continue and then it will ask you to add products and take the payment just very similar to the point of sale. And you can also export this list to a CSV file which you can, you know, again added in Microsoft Excel or another spreadsheet program. So next I'm going to go to features and reports. So here we have several reports. First one we're going to look at is the sales report. Sales report can be broken down any number of ways. So we have first of all a report type option. And this is the way you can visualize it. Whether it's pie, line, bar, table. If you change it to any other than pie, you're going to have an option to change it from an hourly, daily, weekly, monthly. So if you wanted to look year to date and see how your monthly sales are, weekly sales in a month, or weekly sales throughout the year, you can do that. We'll leave it for the entire period for now. We have a date range down to the minute. You can also do quick pick for, you know, whatever periods we have populated here. Let's do year to date and then you can break down by product or category. Let's do category for this example and we'll click submit and you can see a bar chart for each of your different categories. Now you can further break this down and do it by product if you want. And let's change this to a table. If you a table, it's going to show it to you like this. And this is exportable to CSV which you can open in Microsoft Excel or another spreadsheet program. You can click at the top to sort it by, you know, most or least sold. If you want to see it by total revenue, you can do that here. You can further break this down by pos device by employees. If you want to see how all your employees sales are, you can do that. You can see each employee, all products, which location. If you have multiple locations you can also do it by store. So if you have multi stores you can compare the sales of each store. So next let's go back and we'll go to our saved reports. And so here we have a bunch of default pre populated reports and we also have ones that we've created here we just have one but this is the same report that I just pulled up which is the year to date product sales table. Now if we want to see one of the pre populated reports, just click on it. This one shows you category sales and a pie chart. Next let's go back again. And the average ticket sales basically show you your average transaction size over a given period of time. The discount report is going to show you each individual discount that you've processed for customers. The drawer report will show you each time the cash drawer was open for a no sale. The closeout report will show you each individual closeout which is the shift management screen we showed you on the iPad app. And you can see each individual one, what time it started, when it ended, all the totals here so you can look back and see what those shifts looked like. And then lastly we have the Z report which is going to show you whatever time frame you put in. Again is going to show you all your payment methods. So you can see the date range at the top, gross and net sales, how much cash and credit card, what type of credit card. This would also show Discover and Amex if you'd taken those, you know all these payment methods. At the bottom it's going to show you how much tax you collected, you know how much taxable sales you had and how much you had non taxable sales. So next let's go to the discount screen and we'll talk about the different types of discounts. First of all we have time based discounts. And if we take a look at that, this is based on time frame. So this is good for happy hours, whether you have something in the morning for selling coffee or sell drinks, or maybe you have a weekend special that you want to do where it automatically applies. Basically you choose discount name. Here's where you put the type in. Whether it's a flat amount or percentage, you can choose what products and or categories that it applies to. If it applies to, you know, just one product, you can make it limited and put one in here. Or you can make it unlimited. You can put the start time, end time, the date that it's starting and then how often it recurs. So it's daily, weekly, every weekday and when it ends. So the other types of discounts are the non time based discounts. And let's take a look at one of those. So non time based you have to actually manually apply it by touching the discount button in the iPad app which we showed you previously. And these again apply to certain products or categories. Can be a percentage or flat amount and you can have it limited or unlimited. Coupon codes have the same parameters, but the customer would actually have to have the coupon code. So you can issue a certain number of codes. If you need to add more, you can come in and add more. You can put in a max usage. Looks like we have a very high one here. And then when it expires you click save. It's going to show you a pop up of all the coupon codes you have, how many times it's been used, if it's been used at all. And then you can download these into a CSV file which you can open up in a spreadsheet program. Next let's go to our settings page. And here you can manage your categories, you can set up your different payment methods. So this is where you would turn on these alternative payment methods. Turn on gift card, external gift card, etc. Cash is on by default. Credit card will get turned on as soon as you get a processing account with one of our partners. Color management is where you can set all your products to different colors. So if you wanted to change these two, change it, click save and they'll be changed. Modifier group management is where you can see all your modifier groups move their position around, edit and delete them. Tax management is where you can set up different tax brackets. You can add new ones from here or edit them from here. You know we have a couple pre populated in there for you. Now the unit conversion comes in handy if you're using our inventory feature. So you can set up, you know, new units to track it in. So maybe you have 15 gallon kegs or you track things in case we have all these pre populated in here. But you can add your own units that are associated with these as well, you just have to click add unit and then once you've created the unit you can add the conversions where you put in a 15 gallon keg and then you say that it's 15 gallons. Under general settings you can have your email receipts come from your own email. Right now it comes from a do not reply at sales view email. You can also have the custom price be different text and then also have no back button if you pay with cash on the iPad app on the print screen so you can't go back once the transactions have been taken. Here we have a bunch of different cash denominations. So these are the pre populated ones. You can add additional ones or remove these and those are the buttons that will show up on the iPad app. The printer settings for mobile devices. This is where you'd set up your different printers. You can name them here. So we want to Change this to Receipt 2. You can change it from a receipt printer to a kitchen printer. As soon as you do that you can select which category should print to it. So if you wanted all your wine to print to this new one, let's call it bar, you can set that up and then you just click save and sync your devices and then it would print accordingly. The cross device sync allows you to see open orders on multiple devices. So you can come in here and turn this on, enable it and choose the devices that you want to sync from the list and then click Save. Signatures Tips and tabs allows you to have turn on or off the signature screen. The on screen signature where people sign with their finger ability to open tabs is right here. So if you want to have that off, you can do that if you're maybe a retailer that doesn't have tabs and then you can set up the tips on a separate screen on printed receipt, etc. You can set up different email notifications so anytime you close a shift it would go to multiple emails. You can have it also set up for anytime an order is paid. You can upload a logo that will show up on your emailed receipts. And you can also add a receipt message to put at the bottom such as thank you for your business. And this will show up on both the emailed and printed receipts. So next let's talk about manage Town View. So this is where you can publish your store to our current app called townview, which is basically a listing of all our companies that use SalesVU. You can publish discounts from there as well. So everything we've shown you so far in the salesvu.com web portal is completely free. The POS app is also free with the exception of the resource or table map, the scheduling feature for your customers and also the customers feature. Otherwise, like I said, both of those things are completely free. Now we have several paid features that you can access from our app center. So if I go to the app center, you can see that I have all the apps enabled here. You can view demos. So if you click on the view Demo button, video will load up that shows exactly how that feature works. We can talk about each one briefly. We'll go through it a little bit. And then also we have these bundles. So we have bundles that are specific to each different types of businesses. So retail, restaurants and bars, beauty and wellness. And we've sort of curated that for those specific businesses. You can also purchase any of them all a cart here again, you can view all the demos and stuff from there and anything you have enabled will show up under my apps. So let's discuss each one of these quickly. Under recurring billing, this would be used for like a wine club or, or any sort of monthly billing, like a gym membership, anything that's on a recurrent basis. So you can set this up to bill your customers automatically once a month, every two months, every four months, whatever time frame you want. Or you can just use it to set up customers that are charged a certain amount at a certain time. Maybe you deliver water to them and they just bill you when you, when you call. So you can come in here and just execute anytime you do that. We have a listing of the recurring billings here and historical data here. The next thing is our invoicing feature. So this allows you to send invoices to your customers. It looks a lot like the order screen. So you can create new invoices. You would send these directly to your customers via email. They get a listing of the products that they purchased and they can click Pay Now. In the email it will open up a web browser that will show payment screen so they can enter their credit card details and then as soon as you're paid it'll notify you. The inventory so works for multi locations. You can view, adjust inventory. You can see how many of each product you have, what units it's tracked in. You can set thresholds so you get notified. You can tell these statuses of when they should be delivered, shipped and picked up. You can print and export this and use the search field here. And there's no limit to how many products you can track in inventory. You can create purchase orders, manage vendors so that they get emailed whenever you create a purchase order. The inventory adjustment report will show anytime you make an adjustment down. So if you do a manual count at your store and you find out you only have five of something that we show as six, it will show that adjustment here. If you have multi locations, you can do an inventory transfer here. And then last we have profitability report where you can see we have the data for table, line and bar. So you can see it that way you can do how much money you've made in the last 30 days. You can break this out by category. So if you want to see each category's profit and bar chart, you can do that. You can see the cost of goods sold data based on PO and selling price. You can see your last selling price and the last PO cost and then your total cost of inventory. You can see this on any specific date. So if you wanted to go back and say what was my total cost of inventory on April 30? You can put April 30 in here, May 1, it's going to show you that total cost of inventory. Any of these can be exported if you do it in a table and you can print this as well. Next we'll discuss the E Commerce. So basically you can come in here, set up all your settings for E Commerce, the look and feel, how you want your customers to pay, whether you offer delivery or it's only pickup or it's going to be shipped. You can set up the shipping rates and then you can have a website and we'll pull up our website for the store. You can see if we click on apparel, we have all our products here. People can click on them and order what they want to order. You'll get notified at the point of sale as well as you'll get an email to whatever email addresses you set up when people place orders. Next we'll look at the employees. So here you can set up all the employees. You can set up their different access levels, what locations they work at. You can see their individual hours. If we click click on the labor report, you can see let's just do year to date. You can put any date range in and see how many hours they worked, how much compensation they earned based on either hourly overtime. You can have salary or commission set up based on who was logged in when they made the sale. And then we show a labor cost ratio, which is basically the ratio of how much the customer the employees cost you versus you know, how much revenue is generated underneath them. Here's where you Set up the compensation. We have a scheduling option so you can create employee schedules. I'll go back here and look. You can see this is our weekly schedule for last week in April. You can set up a calendar sync so you can take this link and put it into iCalendar on iPhone or Google Cal on Android or on your computer or Outlook and it'll automatically sync your schedule. When you publish the schedule, all your employees will get an email and or a text message with the shifts that they have based on what you set up. Go back here. Your employees can log in and post time off requests, shift trade requests. They can send messages. You can send them messages, either all or just one employee or a couple employees. You can upload documents. You can do performance reviews. Shift discrepancy report will show you basically when an employee was scheduled and then when they actually clocked in or clocked out. Looks like here I was four and a half hours late. Obviously, since this isn't a real store, the data is not very consistent. But maybe you see employees that are constantly clocking in, you know, five or 10 minutes late. It's a good way to manage that. You can export this data, print it, etc. Lastly, if we go back, we have notification settings so you can set if they'll get emailed or sent an SMS text message for these different options. So scheduler notifications, all these different options. The employee can set that themselves as well. Next, if we go to the table, reservations or resource management. So here's where we can set up our resource management. You can rename this we have it lane right now. It could be table or massage room, however you want to do it and click save and that's what's going to show up on your reservation widget. If you want to move these around, just click and drag it and click on it to change any of the details and then you click save to save it. Here's where you can set up your available time slots for your reservations, how much capacity there is, and you can just do that here. You can edit it, how many were used, etc. Next, if we go to the schedules, you can see any available time slots and your customers that have booked them or taken them. You can add new bookings here. This is also available on the iPad. If you touch that button that we talked about, you can put in their name, email, phone, etc. You can set up different payment options. They have to pay a little bit ahead of time. Widget. This is where you can get the code for putting this on your website, you can change some of those translations that we have. So if you need to translate it, you can put that in there. And then we have some general settings, what devices will show the table map, which devices will get the notifications for reservations, and then the ability to allow a sub resource which is like a seat number. Next we'll discuss the accounting options that we offer. So currently we have a QuickBooks integration with QuickBooks Online and QuickBooks Desktop for Windows. Unfortunately, we don't have a Mac version as they do not offer an API for it. And then we also offer our own easy accounting. So we have an expense categories. So you can set up different expense categories. Basically, we have three different types, variable, labor and fixed. And then you can enter these into a transactions list. So if we go back a little bit further, you can see all the transactions that we put in the type. You can also put in your bank deposits by default. We have that one in there. You can import transactions from a CSV file, etc. And then lastly, we have a PL report which is going to show you your total sales by category in terms of quantity up here, by revenue here, revenue by payment method down here. And we have this cool feature where you can reconcile. So basically, if you put all your bank deposits in here, you can see how much revenue you had and how much your bank deposits were and whether it's over or short. So it looks like here we had the right amount, here we were a little bit under, here we were a little bit over. So you can make sure that your sales, the money from your sales is actually getting deposited into your account. Then you can see all your variable costs, labor cost, fixed costs down here. And you can see your earnings before interest, taxes and depreciations down here. And this is printable, exportable as well. Next we go back and we'll go to marketing. So we have two types of marketing. We have social media, Facebook marketing, where you can post discounts to Facebook. Those discounts will basically show up on your business Facebook page. Your customers can click a link. It'll give them their own unique code that they bring into your business. You'll enter that at the point of sale by touching townview and entering the same place where you enter the coupon codes. And then as soon as they redeem the discount, Facebook will post automatically to their page as well, saying like, oh, I just got 10% off at Spa, boutique and restaurant. And it would show up on their friend's news feed or on their page so that people would see it it's kind of a viral marketing. And then we offer an email marketing where basically you can set up different rules. In here, for example, we have this 15% off repeat massage within 30 days. And we have it set so anytime someone buys a massage, it'll check once a day at midnight and it will send them an email saying thank you for the massage. You can bring this coupon code back in for 15% off. So here's where you can set up the rules and we have a bunch of different rules. So you can set what city. So if you want to just give a discount to people in your city for local, discount, country, state, zip code, you can do purchases amount spent. So you can say every time a customer hits $1,000, let's send them a discount of some sort. You can do date spent frequency. So if they purchase five times or six times, you can send them a discount. Then you can do it by products which we set it up here by. Category recency is pretty cool because you can send out discounts to customers that haven't been in in a while. So let's say, oh, we want to send out any of our customers that haven't been in since March 1st and it'll check and see that all the customers that have been and I'll send these ones a customer discount. And then you can also do it by customer group and you can add multiple conditions. Once you have it in there, you can count customers and it'll do five matched, it'll do it right away for those five and then for new customers that it finds it doesn't resend it to the old ones unless they re meet the requirements, cancel. Then you can set up the email template that they'll get. And so basically you can use, we have these different kind of codes that you can use. Just copy and paste them for right here. And so they look personalized. So basically it would say hi and it would say the customer name that you have in sales view. So it wouldn't show this, it would show you know the customer name, it would would show their discount code here and they can bring it back in. So it's automatic once you set it up and hopefully it drives more sales for your customers. The last thing is this customers page and you can see all your customers. You can search by all these different search filters. You can see information about them if you click. You can expand it, you can see comments if you want, you can edit them, see their past purchases, etc. So I hope this video has been helpful. If you have further questions about SalesVU, please check out the other videos we have in our App center as they're more in depth on those additional features that are paid. You can also give us a call from 8am to 10pm Central Time, seven days a week at 888-900-5819 or send us an email to supportalesview.com.










