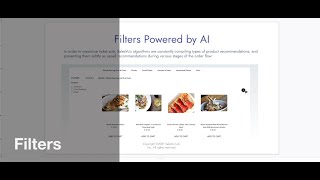
SalesVu's filter feature lets you organize products with tags and tag groups, then show customers a way to narrow down menus themselves. Set it up in Recommendation Settings for OrderUp, kiosk, or eCommerce. Filters reduce labor costs and work for any business type.
In today's video, I will focus on the premium feature of filters. This feature is part of the AI recommendations group and it can be enabled on the OrderUp, kiosk or e Commerce webpage. By enabling filters, customers can narrow down the menu based on their personal preferences. This helps visualize what they would like to order and prompts. For a better experience, businesses can get creative and add tags and filters to specific categories and products. Let's get started with the setup and then I'll walk you through an example of how filters look like on these platforms. The first step is enabling filters. They will be found on the back end on the Location settings page, which is located next to the name of the account's owner. If this is a multiple location account, remember to always select the correct location by using the drop down menu. Then what we're going to do is click on the drop down menu on the right side, scroll all the way to the bottom, and we're going to click on Recommendation Settings. Then we look for Order up and E Commerce settings and enable the first option which is to show filters. Once you have filters enabled, you will be able to create tags under products and Services. In here you have two options. The first one is go to your categories or subcategories. So for example, we're going to go for melts. I want to add tags to edit my category. And at the bottom you're gonna see a feature called tag groups. You can see that I already have some tags created, but you can add as many as you like. Everything is customizable. You can type anything you like. So for example, dietary restrictions, protein options, calorie count, just to name a few. Now let me show you how to apply it to a product. For this you have to apply tags by the item level. So let's say I like to add these tags to my melts itself. So I'll go back to product listing and then I filter by categories and click on Melts. Then what I have to do is go one by one, click on Edit and then I'm going to have to scroll all the way to the bottom and then I'm going to see that for default the tag group will appear automatically. Now all I have to do is select the tag. So for example, I'll select non vegetarian chicken and Hot save this. And now you have the filters created and the products added. Filters will be shown in the specific category. You create them. You can create tags for categories and then you create multiple options. So in here I have three tag groups which are options protein and spice level, I can keep adding tags along as many as I like. Customers are able to narrow down the menu specifically to what they want to use. So for example, a customer today wants to get a spicy chicken. So from the order up up they will select the category and then they'll select the options and automatically the menu will narrow down to show the two chicken sandwiches that are very spicy. This is the way it's going to look here in the order up, but if I go to the website builder, it's going to be the same thing. We're going to have the category icon and the filters. To conclude, filters can adapt to many environment with versatile ordering options. They are optimal for post pandemic, for self serve or order from stop. And finally, they can reduce labor costs by streamlining ordering processes.
 eCommerce, point-of-sale (POS), ERP and Data Analytics platform for retail and restaurant businesses