
SalesVu Spektrix Admin Training
SalesVu Technical Support walks through the Cloud admin portal: logging in, setting up product categories and inventory, managing employees and access levels, creating discounts, and connecting SalesVu to Spektrix via API credentials.
Questions this video answers
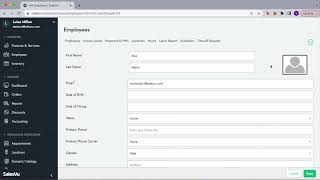
First name, last name, and email.
salesvue.com
Sellable, Non-sellable, and Service.
Location Settings → Spectrix integration (client name, username, API key fields).
Welcome. Today I'm going to walk you through the admin side of SalesVu. So that has everything that has to do with the computer that you can.
Access, you know, again from any device.
It could be your desktop, your laptop.
Your iPad, as long as you have Internet connection.
So the first thing that you're going to do is log in. So what you're going to do is go to salesvue.com and then you're going to enter your credentials. Once you're here, you're going to be able to see this main screen in which you can have all the information of your business. Here on the left side you're going to be able to see this bar which you can access to all the different models. In here you have the dashboard which shows you the sales transactions, inventory, employees, customers, marketing, gift cards, reservations from Live Data. You can also, if you have different locations, you can access the information of.
The live data by going to this.
Drop down menu and selecting the one you would like to see. For example, we're going to go to Milan at Art center and then we can see more data in here. Perfect. Now I'm going to walk you through some of our modules that are right here. I want to show you how you can add favorites to your tab. Here you have different ones. The one of Manage, Streamline, operations, grow and support. So what you can do in here, for example, you can simply drag and drop the ones that are your favorites or the modules that you will be accessing in more frequently. For example, I would like to have products and services, inventory, right, I could have also employees.
This could be the way you want to perfect.
You can also choose this star to remove from some favorites or to add them. So let's begin with products and services. So in products and services we have multiple drop down menus.
The first one is the one that.
Lets you access to your different locations in case you do have them.
And this way you can see the.
Menu that corresponds to that location.
So whenever you're gonna make a change.
Make sure that you are on the correct location. And now in here we have product listing, Manage categories, modifiers, tax management, unit conversion, color management and tax rules. The first thing I'm gonna walk you.
Through is Manage Categories.
And the reason for this it's because.
Whenever you create a product is mandatory to select a category. So we strongly recommend to create the categories first.
So in here you can see that I have different categories and some of them have this arrow which if I open it I can see that there are different subcategories so this is how you would view them. Let's do an example of how to create create a category for this specific case. I'm just gonna come here and edit the one that I have already created. So in beverages, I have to select a category name. That's the only one that has the.
Red star, which means that it's mandatory.
But you can also add a description. If you choose a parent category, that means that you will make this a subcategory. So for example, I would choose wines to be under the parent of beverages. And then in here you can select any images of your choice. You can simply add any ones that you have saved on your computer. And also you can do color coding. For example, you would like to have all your drinks under the color white, all your snacks under the color yellow, and so on. And at the very end we have the tag groups. The tag groups are utilized to filter your menu. So then your customers can narrow down whenever they will order from order app or from their website. Perfect. Now I'm going to show you how it would look like for a product listing. This is where every single item that you have in your account will exist. So let's go ahead and I'm going to walk you through how to create a product.
So I'm going to go with a.
Margarita just as an example for this. I'm just going to come here and edit this product. But if you would like to add a product, you can simply click on add product or simply click on the plus icon. So let's go ahead and I'm going to walk you through how to create a product. So I'm going to use the Margarita as an example in here. I'm just gonna go and edit this product. But if you want to add the product, you can simply tap on the add product icon or you can simply click on the plus icon. Now anything that has a red star at the top means that it's mandatory. So it means that you have to put something in the system, for example, the name, the selling price, the price type as well. The description is optional, but we recommend to have something because it helps a lot with online ordering. You can also do color coding for the category or subcategory. Or you can actually utilize any pictures that you want and you can simply add them right here. Perfect. Then you can select the category, which is why we recommend to have it created before having products. And now we're going to go through type, which is going to be sellable, non sellable and service. Perfect. So One thing to take into account in here is the difference between them. So everything that is in your menu that appears on the iPad, it's sellable. This means that the product has a price and maybe for example, it could be a water bottle for $2. Right. And I can sell that item and deduct it from the inventory. Now a non sellable item are usually ingredients or modifiers. So an example could be a T shirt. The modifiers can be the size, the color, and then you don't want to sell small or red.
Right.
So what you're going to do is whenever you create those specifics in a product, those are going to be non sellable. And then the service is going to be for different industry. For example beauty and wellness fitness studios and that they sell yoga classes, packages or for example barbershops. So that's another part of the industry that we have in sales view. So it's really just to know what is sellable, non sellable and the service. Perfect. Now in here we have the tax bracket that belongs to this item. In here you can actually create your own or you can actually select multiple ones. Perfect. The next part is inventory setting. So in here you can choose whether you want to not track this item on inventory, track this item in inventory by weight, or track this item in inventory in another unit. Perfect. So in this case for margarita, we do not want to track this item in inventory because our margarita consists of different components of different ingredients and that's what's going to be deducted from the inventory. So for example, if this was a water bottle, I would definitely move the inventory tracking to buy the item because it means that I sell one water bottle and it will deduct this way from the inventory. But since this is a cocktail, right. This is a margarita, it comes with a recipe. So that's exactly what I'm going to keep track on. The components, which is another section that we'll walk you through in a little bit.
Perfect. Now let's continue with UPC code and skus. So if at any time you have.
Any specific prepackaged snacks, maybe some nuts or something that has a bark on.
It, you have the ability to add.
UPC codes for products and maybe to speed up the transaction at the concession stand, you can also scan those products automatically.
So this is where you have the ability to do this.
Also for retail purposes, it's optional to add the UPC code or SKU number, but it's going to be available right here. Then if one of our items have modifiers for Example T shirts by the.
Color by the size. All of that can be added by groups. In here you can add the group of sizes, half S, M, L and so on and create another group for colors white, blue, yellow and all of that will be shown right here on the modifier groups.
Now components.
Here we have a good example for our Margarita components. As I was explaining before, these are the ingredients that will be deducted from the inventory. So in this case we have Don Julio, the quantity Triple Sec, the specific unit and the quantity Ice, the unit.
Which is going to be a scoop and the quantity one.
So all of this can be edited as according to your own recipes and your inventory.
And the last three options will be.
Enabling for E Commerce, Enabling for Brander.
App and Enabling for the Tezitura discount.
Once this is ready you can simply click on save and all the changes.
Will be saved on your product listing. Now your product will be successfully added to your menu and usually whenever you add new items they will appear all the way to the bottom. So this is where you will be able to see them. And then a little trick that I like to show. If you click these two arrows you will be able to rearrange the products so that they will show this way on your apps. And you can show specific items, for example the best selling items on the top and you can drag and drop the products according to how you want them to be displayed on the POS and online. And we also have the ability to export this particular menu. Let's say if at any time you like to do price changes for everything, you can export the menu and then re import the menu with the new changes. So those are type of things that you can do in bulk like editing by bulk. It could be also the category level, sub category level. You can make those changes as well. So that's something that you can do with this drop down menu. You can click on export and then import for these bulk edits.
Perfect. Now let's go to the section of employees again.
All I'm doing is go to this.
Left sidebar and clicking on employees. The first thing I'm going to show you is how to add the employee which is going to be in this main screen with the add employee green section in here or with the plus icon and then I'm going to walk you through these other different parts of this employee section. Perfect. So in here we can see all the list of your active employees. In here in parentheses we can see what is the role. We have managers, cashiers, the owner, volunteers and you can create these roles according to your company. So for today I'm going to do an example with Alex Martin, which is going to be an admin. So again, in here I'm just editing, but you can just simply click here. On Add Employee, there are only three main things that are mandatory whenever you create an employee, which is the first name, the last name, and the email. In here you can also add an image of all of your employees. You can add all the information according to the date of birth, status. The phone number is something that is not mandatory, but we recommend simply because you you can sync your calendars. Once you create their own calendars, they can sync to their phone and receive notifications not only by email, but also to their phones. So that's a very good best practice. In this section now at the end, if you scroll all the way to the bottom, you can select the employee group. If you have different employee groups for volunteers, for admin, or for cashiers, at the end you can also select the roles. This is going to help you have a quick access to the access levels. For example, you can create the access levels for all the managers. And then whenever you want to create a new manager, you can simply select the role of a manager. And then you can skip the part of doing individually the access levels for each one of your employees. But of course it's available, so you can do it specifically to each one of them. And then at the end the employee type, admin or employee is just going to be useful for us in salesvue to know which one is logging into the account.
Perfect.
Now, access levels. So in here, as I was explaining before, the access levels can be divided by roles. So cashiers, IT managers, server servers, they can do different things on the web access. So in the portal in the back end, which is what we're going through right now. And also they can do different things on the pos and you can restrict or give access to according to what you want your employees to do. So we can go here and go through the manager's access. Just to show you a quick example of how this would look like.
Perfect.
So we, as I was explaining before, we have the web access levels, the device access levels, and the sales view app modes. So here we can see that as a manager you probably want this person to have access to all of it. The product management, employee management, inventory, all of it. This person has access to to everything here except for the last part of it. This could be according to you. You can simply add whenever you want this person to have access or not, it's just simply clicking through it. We have very good articles that explain what each one of these axles mean. And you can always ask us in case you have any specific questions about one of these access levels. At the very end, you can see that we have restrictions, which is what you don't want this person to do. Right. So in this example, you don't want your managers. Managers to not have access to edit their own our report or to hide the filters. These are some things that you probably want these managers to have access to. So that's why they are on. Yes. And then again, if we go to device access levels, we can see again that the manager has access to absolutely everything. To open the cash drawer, to delete the order, to maybe process discounts on the spot, things like that you want this person to have access to. And then at the end restrictions, you don't have these ones activated. For example, you do want your manager to have access to all of the settings, so that's why this is not activated. Or to hide the current shift details. This is something that you want your manager to have access to, so that's why they are not activated. Right here.
Perfect. Now let's continue with password and pins. So we're gonna do the same example. We're gonna go with Alex Martin, we're going to go with the admin. So a couple of things here to take into account. A password is very important for anyone that has access to to the computer, which is exactly what we're doing in this training video. I'm logging in and I'm doing all the management on the back end. That's why it's very important to have a password. Now, a PIN number, it's very helpful for anyone who works inside, for example, managers, cashiers, servers, anyone who's going to touch the iPad, the POS, they will be using the PIN code for accessing each one of the apps, clocking in and clocking out. If that's something that you would like to implement as well. And it's also a quicker way because a pin, it will be shorter than the password. So you can actually reset the password and the PIN number from here. You will be able to reset it in case your employee forgot the print number. You can do it. Everything back here from the back end. Perfect. Now let's go to locations. So if you have multiple locations, you can assign the locations to your employees. It happens sometimes that the employees can rotate through different locations. If you have.
Many in one same.
City, for example, so that's when you can enable and disable them according to your locations. Now we're going to go with hours. You can set the hours to then have a full complete labor report. In here you can see when did they clock in, when did they clock out and how much they registered in here. Now the labor report is something that is super useful because you can use this calendar to select specifically when do you want to get this report for? And then the advanced options for, you know, employees locations or job titles. So if we go through locations, maybe you want to select Milan Art center. And then we will be able to see what is the labor report of this location with the name of the employees, the job title, the total hours and any any other extra information such as compensation, overtime hours. If you want to keep track of salary, you can do it as well. Commissions can also be taken into account here. Total sales tips, rewards and deliver cost ratio. Now let's go to scheduler. Perfect. In here you can do the exact same thing. You can select if you want to see the scheduler for one of your employees. Using this drop down menu you can also select for example the location. If you have multiple locations, you can actually select where is the schedule for all of your employees.
So in here we can see that.
Each one of them have a color coding that was designated when the employee was created. The nice thing about it is that we can see in detail all the information of each one of the employees their time.
If this is a schedule that you.
Want to be repeated for every day. Or it could be very particular. For example, this is a volunteer that only works on Mondays. You can totally set it that way and also select when this will be end and then have any comments. And these can be saved for only one shift if you have something in specific for the past for the next month. Or you can actually save it for all future shifts. Now you can create different shifts or schedules for your employee or have even for employee groups. You can also save any specific schedules that you want to work on as a draft or whenever you publish them. Your employees will receive the notifications on their phones or emails if their phone number and their email was already added when they whenever you created the employee. So those are nice things about this schedule. And also if you use this drop down menu, you can do the calendar sync. So if you do any updates, your employees will also receive these updates automatically. Perfect. Now I'm going to walk you through the location settings.
In order to find the location settings, you have to click on this drop down menu.
That is next to your name and.
Go to location settings. In this specific setting you will be.
Able to.
Allocate the payment methods that you want to be available on all of your devices. So it could be on the point of sale, the customer kiosk on the customer display screen as well. You can also set them up according to your locations. If you have multiple locations in this drop down menu. And one of the things here that you can do is actually changing the name. And the reason why, it's because you.
Don'T want your staff members to get confused about if you receive Apple Pay, Google Wallet.
So instead of just having credit card.
You can edit the name and have.
The ones that you receive. Also in here you can set up the cash denominations. There are ones that are already set.
Up, but if you want to change.
Them, add them or edit them, you can simply do it right here. Other things that you can do as.
Well in the payment methods, it set up your house accounts. And how is this done?
All you need to do is simply click on other payment methods. And in this demo account we have these different ones. House account number one, number two, Marketing VIP event. You can always activate them and deactivate them. And even if you deactivate them, you will still have access to the information that was used when this house account was active. So it's not deleting all the information permanently. And you can definitely edit it or.
If that's the case you want to.
Delete it permanently, you can do it as well. Now a couple of things that you can do in here as well is.
Using this drop down menu and setting up the tips.
So I'm just going here on tips and then in here if you simply scroll down, you can select the denomination type if it's either percentage or by amount. And the percentages that you want to have displayed, you can totally add different ones or delete the ones that are already in here. And now, last but not least, the receipt settings. You can customize your receipts up to a certain point.
Here are some things that that you.
Can activate or deactivate, such as print the employee name, custom fields printed on the receipts, generate a QR code. These are some things that you can activate and deactivate whenever you want. Here are the receipt message that you can have on email and printed and a couple of examples on how this would look like. You can have here your logo and all the information would look like this.
Now we're gonna go through the section of discounts. So then again I'm gonna go to this left side menu and I'm gonna click on discounts.
Perfect.
Once again discounts as many other features can be also selected by the location. So I'm gonna click on the right location. And then as you can see in here we have different discount types. We have coupon codes, non time based, time based. We have also received discounts for the next day coupon code and all of this can be done from the back end. We have multiple articles that explain how these discounts can be created. But for this example I'm going to show you how to create a coupon code.
So what I'm going to do in.
Here is simply click on add discount or you can also click on the plus icon and I'm going to come in here and I'm going to select the discount name. So for example we're going to go with fall 20222022 we're going to select the discount type. So this is going to be a coupon code. The percentage we're going to go with a 20%. And if you want it to be by product level or order level, it's completely up to you. In here we can select the product details. What would this coupon code will be applied for? We can select the category. So in this case I just want it to be applied for my beverages and then I'm going to click on continue. I can apply the discount to one product in order or all the product in order. So I'm just going to going to go with all of it. The maximum usage I can go with maybe 10. In this case the start date and then the end date. I want this to be only for one week and then the coupon code you can just leave this field empty and then a random 10 digit code will be created. So that's what I'm going to do in here and I'm just going to click on save and that's it. Now we have our fall discount created for our location of Milan Art Cent enter. The next section I'm gonna cover will be inventory. So once again I'm going to this left side menu and I'm gonna click on inventory.
And once we open inventory management it will redirect us to the view adjust page which is exactly this one. So there are many things in here.
That you can see.
Mainly it's about seeing your products on each one of your locations. So if you use this drop down menu you can actually select the location you want to see your menu. So in this example I have Milan Art center. So I'M just going to give you a quick overview of the multiple things that you can do in seeing here. So let's start here with product. So here in product you can see all the products that are listed it on your menu, right? The name, you can even have it separately by for example glass or bottle. In this case for, for the drinks, right? You have the quantity. This is exactly how much you have right now of each one of your products. The unit. You can create your own units from the unit conversion. So in this example we have bottles or we have a bottle bottle of 750ml. You can have cans, fluid ounces in the case you sell glasses of wine and you want to deduct a fluid ounce right from this part of your inventory. The threshold alert is how much you want to be notified whenever you reach a certain amount. So for example, whenever you hit 10 you will get a notification on your email saying you need to restock on this specific product. You can change absolutely the quantity according to your needs. And the way to set the notifications on the threshold is by going to this drop down menu right here, settings and then threshold settings. So you can activate deactivate them. You can add any other email addresses. Right now by default is added the one of the owner of the account. You can set the notifications, the frequency and all of this.
Right.
So once you're done you can simply click on save and that's it for the threshold. Perfect. So other things that you can see and doing here as well is checking the last cost price, something that is also extra that it's super helpful as well is organizing your inventory. So for example you want to have this specific place for your bottles. For example this in this one it's the aisle number two and you can check for example if this is the top or bottom bottom shelf. So this is just extra that you know can help you organize your inventory and your products. And also as well in here you can search by product or by sku. You can also filter all of your products for example by category. So in this case I just want to see all the beverages, right. So it's going to show me exactly right here. What do I have? You can also do do it by products, on components, by vendors.
Can you?
Because you can also attach vendors to specific products and then you have the advanced options. Perfect. Now I'm going to show you a couple of ways to receive inventory. So the first one and the most common one is by purchase orders. So that's what I'm going To do.
Right here you can create your purchase.
Orders and even add a vendor. So in the section of vendor you can create the vendor and add all the information that is relevant to this specific vendor. And whenever you create a purchase order, it's going to show you all the details, the order ID number, the open date. It normally will show you the open orders that you have right now. But by using these drop down menu you can search for close orders, draft orders, or even by looking for any specific custom date range. Now what I'm going to do in here is I'm going to create an example of receiving a purchase order. So I'm going to come here, use this drop down menu and I can actually do a couple of things. I can view this order, I can see exactly what this order was created for. So in this case we have the purchase products, the unit numbers, the SKUs, if that's the case, the quantity, unit cost and the total. So we can actually see all this information right here. Now we can also edit this purchase order. Let's say that you want to add a product or change the quantity of a product that you, that you made.
The purchase order for.
So that's what I'm going to do in here. I'm just going to come here and click on edit and you can go through these three sections and change whatever you need to change for the specific purchase order. If it's either the products, you can delete it or edit it specifically, or any purchase order detail at the very end, the purchase type, the purchase order name, and things like this. Perfect. Now other things that you can do here super quickly is just simply deleted it, clone it as well or receive it. So when we receive an order we can add the vendor invoice number.
And.
Then once we receive order, purchase order, if we go back to view adjust, the items will be added to our inventory automatically. So we can see here that the products and the quantities have been changed automatically without any extra steps needed.
Perfect.
Another way to update your inventory, it's by doing it manually. So for this case I'm just gonna go to this drop down menu and I'm gonna scroll down and click on adjust quantity. Now the view is very similar as you can see here. It's almost the same. However, it has this extra column right here that says additional units received. So if I want to say that for example, for this specific bottle, I actually received 50 more bottles, I can do it here, I can add it manually, I can add any vendors, right? And at the end I can add Any reasons? So in this case I'm just going to save it all and it will again update the quantity on my inventory automatically. Perfect. As you can see in here it moved now to 73. So these adjustments and any changes that you made can also be viewed in adjustments. If you have multiple locations and you don't need to make a purchase order but to do an inventory transfer that can also be done. In here we have the profitability report. So I'm just going to show you super quickly how this would look like. We have different drop down menus that you know you can use. However you would like to see this specific report, you can do it by table, line or bar. You can do the cost of goods, most recent metrics and the total cost of inventory. You can even use this custom date range to see for example the last month, the year to date or select anything in a specific. And then you also have, you know, the advanced options. So this is something that could be very useful in case you want to see all the different specifics about the profitability of your inventory. Also this report can be printed, it can be exported, or you can also save it. Perfect. One last thing I want to show you of inventory management is the out of stock setting. So the out of stock setting is just basically deciding how you would like to show your products that you don't have on stock. So we have multiple options. You have the option to allow the sales to continue to show the product with the out of stock banner, to show the product without the out of stock banner and won't allow to purchase or to remove the product completely. The nice thing about it is that you can decide how you want to show this on each one of your on your apps for example, on the POS you want the sales to continue, but on the kiosk for example you want to remove the product completely and on E Commerce you prefer to have the out of a stock banner. So those are things that you can decide on. However you prefer to show this. Perfect. Now I'm going to walk you through the last module in this video which is going to be reports. So I'm going to this left sidebar and I'm going to click on reports. Now in here you can see all your sales reports. So I'm just going to do a very quick example of how to pull up one of these reports and I'm going to explain you some of our features that we have right here. So in here you can see the store, the products, the date, the quantity, undiscounted price and then the total sales. In here you can see actually how much you have received in cash, credit card, gift card, loyalty, cash check, other payment methods and the total tips. If you would like to customize your report reports and view them in a specific way, you have all these drop down menus that can help you have the information that you specifically need. So if you don't want a table and you're more of a graphic person, you would like to see it maybe by line, pie or bar, you can select the period, you can actually select a specific date, range. We have also advanced options that can show you the sales for products, categories, employees, stores, pos and then also instead of using all these drop down menus and you just want to access to some of these reports in a quicker way, you can go here to save reports and check the specific reports. So in this example I want to see the top categories for a year. I just want to access to this report in a weekly period. I would like to see it constantly. So that's something I already have saved and I would like to see it as pie chart. So that's something that you can totally save. And then another nice thing about these reports is that you can update the filters. You can save the filters, you can schedule an email. So for example, you would like your manager, the store to get this specific report on a weekly basis. So you can change the title, change the frequency, select the day that you want this person to receive it. So maybe every Monday morning you can change the time right here. Let's suppose for 9 or 7am and then the start date, the email address, you can enter as many people as you want and at the end you can save it. So what it's going to happen is that this person will receive this report on a weekly basis automatically without you needing to come back to the back end and sending this report. So those are one of the things that we can do in here. You can also save the report, print it or save it. Now let's suppose we want to see a specific report of the best selling item. So what I'm going to do right here is I'm going to go to the advanced options and instead of categories I'm going to select products and by default all the products will be selected. So I'm just going to click on apply and now we can see all the different products that have been selling. So you can actually select the quantity, you can see sort by which one was the one that was less sold or the one that was, you know, the best selling product in this case it could be by quantity. We can see our peanuts were the best selling product or you can even see it by sales in this case. So which one didn't do very well at this point? Which one did the best in this case is the margarita. So these are different things that you can can do in here. You can totally save it or export it in a CSV file as well.
Now I'm going to walk you through.
The spectrix integration, which has some very few items that are key to make.
The whole integration work.
Now in order to see and set.
Up the integration of spectrix the first.
Thing you need to do is go to this drop down menu next to your name and email and then go to Location Settings. Now from here you'll see the screen.
That we've talked about before with the payment methods, general settings and so on. But to access the xpectrix integration you.
Need to go to this drop down menu on the right side, click and then scroll down a little bit and.
You'Ll find spectrix integration. Now from here the first thing you.
Need to do is go to the.
Corner correct location, make sure you're there and then you can add the information.
That has been provided to you. The client name, username, the key. This is the API key that is.
Created on a spectrix site.
There are three steps on spectrics which is first adding Sales view as an API user and that's where you need to gather that information that use it here.
Then setting up a custom payment type for SalesView and then creating merchandise items.
Once that's done, you come here and add the information requested in here that.
You gather from spectrix.
Then you have the spectrix product in.
Here you can select the product and.
Then you can set up the Spectrex custom payment type, which is the one.
You have already created, which is celsiu. Now once that's done, you can come.
Down to this drop down menu and go to set up spectrix discounts. Now remember how we were talking about discounts before? Those discounts need to be created first.
So then when you come here to.
This spectrix integration, you can actually link.
A tag group with a tag and.
Then with a discount created on SalesView. Now all you need to do is simply click on add more and in here you can do the exact same.
Thing of just selecting the tag group.
Whatever was created under Inspectrix, the specific tag again according to what you select in here and then the discount. So just like that, super simple to do. For the full integration of Course you can totally get in touch with us.
And we'll help you with the whole process of setting up spectrix.
Perfect.
Now this is the end of the admin training session.
Now before we go, I would like to show you two quick modules on the left that will help you have a better knowledge of your locations and.
Administration of all your devices. So that is going to be under streamline operations and the first thing is locations. So in here is just to, you know, simply have all the information of your multiple locations.
If that's the case, if you would like to change the name, address and any other details, you can totally do it. From here you can also see what.
Was the date this location was created, the payment processor that is linked to that location, and you can always edit this and add new locations and on premise apps.
Right here is simply where you're going.
To be able to see the information of each one of your devices, meaning iPads.
Now in here you can see all the devices by location, by name, by application you can use the filters to.
Narrow down the information of all your.
Ipads so it's easier for you to.
Manage them and and also to even.
Keep track of the ones that haven't been updated.
So in here you can see the name, the locations where each one of your devices are set, the app of that specific one, the type, the model, the version.
Sometimes is good to know the version.
Because if there are any updates on the software you're not seeing this is.
Probably because the application hasn't been updated.
So it's good to know that. Now the version when was this iPad created and the last time it was synced?
So if you haven't seen any changes that you made on the backend on your pos, it could probably be because you haven't synced this device yet. So just simply keeping track of all.
This information can be very useful at any point.
Also you can enable and disable the devices and add new devices. Last but not least, simply knowing where can you get in touch with us.
How can you reach to customer support.
And to any different materials that we have, such as guides and videos.
So support has different things. The first one is manage subscriptions where.
You can simply add more devices or locations. Knowledge base articles is simply guides with the step by step with any kind of information that you need. In this specific space we have all the information separated by box. So in Here we have SalesVue Cloud Portal and if you would like to see how to create job roles, for.
Example, you can simply come here and.
Scroll down to employee management and select the article that's about creating job roles. Now in here you can find different articles that may include screenshots, mini tutorials or videos. They are super, super useful, but if you're more of a graphic person, we also have videos specifically that will show you the exact same thing on the.
Articles, but in a more graphic way. So so these are the video tutorials.
They're separated by bulk as well. You can see by salesville Cloud portal.
The apps, the integrations and the website builder.
Now you can always get in touch with us. The quickest way possible is by chat. You will be talking to a live agent.
They will respond within minutes.
You can schedule a demo. If there is any new feature you're interested in and you would like to know more about it, you can schedule.
A demo right here.
If you would like to get in.
Touch with support by email, you can request a support ticket or if you.
Like support to have access to your web portal and simply troubleshoot any type of inconveniences that you may have, you.
Can totally.
Ask for support access. Thank you for watching and let us.
Know if you have any questions.










