
SV Retail Demo
SalesVu demo shows a retail system across online and in-store. Customers reorder online for pickup, return items at POS, and sign up for loyalty. Backend: inventory syncs every 10 minutes, staff can track sales by employee, and run profitability reports.
Questions this video answers
lockyme23
Every 10 minutes.
30
November 8, 2023
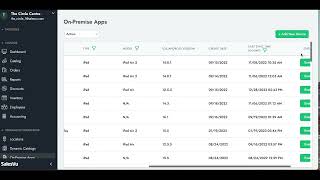
Welcome. In this video I will be walking you through some retail scenarios that are into the online experience in the store. And also from the back end we have seven different cases and we will go through each one of them with some specific details. So in the first scenario we have Veronica. She's navigating through a multi location website. What she's going to do is that she's going to log into her account, navigate through past purchases, then pick a book that one of her friends really liked and she's going to buy it as a gift. Then she's going to pick it up as a pre order so she can pick it up later into the closest store to her friend's house and finally finish the transaction with a gift card that is going to be through PayPal. Now let's go to the ecommerce and from here I am going to start with logging in. So all I need to do is click on login and since my information is already saved all I need to do is continue. Then from here I can go through my account and navigate through my purchase history. From here I can see my different orders and all I need to do is click on one of them to view them and see what are the details of that order. In here I can see the that my friend really like. So I'm going to simply reorder with this button right here. Now I'm going to continue shopping. I want to see what else is there for myself. I navigate through the images, through the different products and now I see a nice necklace and I just simply add it to the cart. Now I continue with the checkout process and I see my information, all of my email address, phone number and then I click on delivery preference to be picked up. Now all I need to pick is the address. So this is going to be the domain since my friend lives closer to this address and I simply click the hour that I will be picking it up to. Now I can add any discount codes or a gift card which is going to be this case. So all I need to do is tap here the number, apply it and it will show me the balance and the number. Then I click on continue and finish the transaction. Now I can also see my receipt from here. But I also got an email that says all my details of the order. Now moving into the second scenario we have here Sebastian who goes to the store to return an item. He wants to change the T shirt for a smaller size and he sees a nice piece of jewelry and decides to buy it. Then the cashier makes the Return and also returns the item to the inventory. Then the cashier also uses a barcode scanner to scan the piece of jewelry and then finish up the transaction with a gift card. So now we're gonna go through the POS and proceed with this example. Here is the POS and now Sebastian goes into the store and Melissa the cashier goes to the customer's screen to find Sebastian's order. Now from here you can utilize the filters on the top to find any close orders. Tap on the plus icon and find the information of the order. From here you have the option to make a refund and you can also refund it by amount or by products. Now in this case we're doing it by amount. So all we need to tap on is the full amount of the product. Now this is going to be here 30. And then we come here and add the reason for the change. Then we finish up this refund process. It says the order amount and the details and then it says the product has been refunded successfully. Now from here we go and tap on new order and we can continue taking orders from the customers. Now since Sebastian is already a customer, we just simply need to go to the salesview customers and find him by email, phone number or by the name. So we tap on the name and select the customer and from here we can just simply add the products. In this case we're going to use the rear back camera as a scanner for adding the product to the order. You can also use a barcode scanner too. Now we attach the product to the order, proceed a payment and finish up the transaction with any payment method in here. Now in this case we're going to utilize a gift card again. It will show us the balance amount, the gift card number and then you can send the receipt via email or SMS that has been saved since this is already a customer from SalesVu. Now we're gonna go through the third example. Here we have a new customer that is called Claire. She is going to store and she wants to get an item for St. Patrick's Day. She makes a new purchase and she decides to also buy a gift card. Now Melissa the cashier lets her know about the special promo for the holiday of a 20% off. And then she also lets her know about the benefits of being a loyal customer. And Claire signs up for loyalty. Now we're gonna go to the POS and do this transaction. Now Melissa the cashier lets Claire know about accumulating loyalty points that can be used as cash for as a payment method. So Claire Decides to sign up for the loyalty program. Melissa takes her phone information and since it has not been registered, the screen will show this message and activate her to a loyalty program. Now all she needs to do is simply change the name for Claire to keep her CRM record and then proceed to take the orders. Now here we search by the product. So here we have the T shirts, Irish T shirts, and then all we need to do is simply add the coupon code. So for this we're going to simply tap on coupon code on the top and write lockyme23, which is the marketing program that is running right now under social media. Now we can see that the discount has been applied successfully and now we can finish the transaction. Now here Claire decides to buy a gift card. We go to the gift card category, use the barcode scanner or the rear back camera to add the gift card. We can also add it manually, as I did in this example, and then finish the transaction with a payment method. Now here we can see that the transaction has been completed. We can see the loyalty earned, the account balance and the loyalty points that needs to be unlocked for her to utilize them as a payment method. Now let's continue with the next example. For this we're going to switch to the back end portal. We're going to see reports and some other functions that can be done from the backend. So we're going to go through some scenarios that will be done on this part. First we have Tom from the IT team and here are some of the benefits. He would like to review all of their devices and check that they are updated to the latest version. This will reduce the cost and hassle associated with having to manage multiple software solutions. He can manage all the locations in one same place, view all the devices status and ensure they are updated and control all the employee permissions. Last but not least, you always have support at the tip of your hands to reach out for any help. Now we're going to go to on premise apps and Tommy here can see all of the different devices located in all the locations. Here we can use filters on the top to narrow down the information too. If we scroll to the right, we can see when these devices have been synced and also the iOS version. This is very important because sometimes they could be running a little bit slow and the only reason it could be that they haven't been updated. Same thing goes for the last time they were synced. Our iPads do sync automatically every 10 minutes, but if you just want to make sure that if you change A price, add a product that these changes show on the pos. All you need to do is simply sync them and this is where you can find some answers. If you're not seeing the items on the pos. Also you can add a new device from here. And as I said before, the filters will help you narrow down the information of all of your multiple devices as we're doing right here. Filtering by the POS and also by the location. Now if we scroll a little bit up, we can see the locations. This is also very important to see all of the different locations. City, state, country, phone and creation date. Now if you have multiple locations in different countries, you can have them in the same place. You can have different contact information for each one of them if it's the same location. But multiple stores, for example a cafe, a bar and so on, you can also have them in here for multiple gift shops as well. And if you want to narrow down the information or reduce the columns because maybe for you it's not relevant to see the country because all of your stores are in the same country, you can hide that information. Now if we scroll down, we can see support. Here is where you can reach out to us. Chat is the quickest way to get in touch with one of our team members. A live agent will be able to answer any of your questions. And we also have knowledge based articles which are guides that show you step by step with images. But if you're more of a graphic person, we have also videos that are like mini tutorials for the apps and also for the backend. The next scenario that we have here is the inventory benefits. Luisa here is the inventory manager and she would like to review the orders and receive and transfer inventory. This reduce the hassle associated with having to manage multiple locations from different inventories. Creating orders, changing the vendor, adding vendor information as well, transferring inventory without creating positive viewing all your orders and prepare them accordingly if you do pre ordering and receive partially or fully an order. So Luisa goes to the back end and then she goes to orders. Here is where you can see all of the orders that have been placed on all of the devices and also on E commerce. So in here we are going to simply go to the correct location and we can see all the orders that are in this specific date range. This has been the orders of the last seven days. And we can also use the filters to find information about a certain product, about orders that are open, closed by payment methods by source. If we want to find orders that are only E commerce, we can see it in here we can also see shipping status. We can also narrow down by the order channel the order amount as well. And if we keep scrolling down, if you have events or if you have time slots for pre ordering, you can also narrow down the information according to that. Now this is an example. We find an order and we simply click on the plus icon and we can see in detail all of the customer information and the order. From here we can do multiple things such as emailing the receipt, also doing a refund or exchange from the backend if it's necessary. You don't need to always do it from the positive. Now if we go to inventory management here we can see all of the inventory of all the stores. All you need to do is simply click on the correct location and that way you can access to inventory of that specific place. So in here we know we're in the gift shop and we can see the items that are specifically of this store. Now we can see here the quantities, we can see units, we can set up the threshold, threshold. And if we keep scrolling to the right, we can see other things as well, such as the aisles and the shelves. You can allocate the products on different areas of your store. You can also see the last cost price, the final retail price, and then the other shipping status that you create them as well. You can customize your own shipping status and then they will show up in here too. Also from here you have the purchase orders. You can create them from here. And if you add the vendor information, you can automate this process and make it a lot quicker. You can also do inventory transfer if you have a storage room and you only want to change it from one place to another. Or if you have two stores and you want to change some inventory information, but not by making a purchase order, but by simply transferring from one location to another, you can totally do it. From here. This is just an example. You can see the product name, the amount and the unit. Finally you see the source availability quantity and then you can simply type on the transfer quantity. So in this example we're going to transfer 30 and automatically it's going to show us the availability quantity and the destination availability quantity. That in this case is going to be 30. Now here we have the out of stock setting. You can choose how you want to show your out of stock banner on your different points of sale. So for example, for E commerce, you would like to show the product with the out of stock banner without allowing the purchase to happen on the pos, allowing the sales to continue and on the kiosk to remove the product completely so your customers don't get confused on what's available and what's not. Next, in the third example from the back end, we have the talent benefits. So management hire a new employee and she needs to find who will be the person coaching and deciding who's going to be the best person to do the training. So here you can collaborate with IT members for roles and permissions. You can view reports by employee payment or per store, and you can get insights for the performance of your employees as well. Now, in here we're simply going to go to reports. We can go to safe reports. Safe reports are reports you created by yourself and you just access them with one click. As we see here, we have the average ticket sales by employee and we can see the total tickets and the average ticket sales by each one of them. So this way, if we filter this information, we can see that obviously the store manager has the most total tickets in a period of time. This will be the best person to maybe train this new employee, but maybe she's a little bit busy. So we pick the second person that has more tickets. So in this case it's going to be Tom. Now this is a report that you can export or if you want to delete these filters and not save it anymore, you can do it too. Now, last but not least, we have the finance benefits. We have Martha, who wants to see a Profitability Report of 2022. Now what she wants to see is all of the information of the revenue of each one of the locations for each one of the online merchandise, maybe also for the POS or the gift shop she wants to run and create reports for specific needs of profitability, best sellers by date range, employee and so on. She can schedule also some of the reports, save reports and also export them into a CSV file. Now here in the backend, what we're going to do is simply go to reports and we see here a dashboard that allows us to simply access reports in one click click. In here we have the only one sales and profitability report. I access to this and then I go to advanced options and get this report by all products. I simply submit this and then I get all of the information. Now in here what I can do to gather more information is simply filter or organize by vendor so I can see all of the vendor information, all of its profitability information by product, by category. So in the beginning of this report we have all of the product information and also the location. And if we scroll a little bit to the right, we start seeing the profitability data of this. So we have the percentage of profit quantity sold, we have the net margin. So with this report, we can actually see what are some of the items that are maybe having a high cost and not so much profitability, and maybe take decisions on like who can we change for the vendor? Or we can also see the best sellers as well in here and see their profitability and the inventory information as well. All we need to do is simply keep scrolling to the right and then we're going to see the sales performance as well. And at the very end, we see the inventory information too. Now this is a report that can be printed or exported. You can also select the columns you would like to see. Thank you for watching and let us know if you have any questions.










