
Website 2 Author:Writer
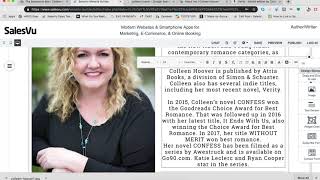
A walkthrough of building an author website with SalesVu. Upload your logo and book images, customize the About and Contact pages, set up a shop to sell books, link your social media, connect a custom domain through GoDaddy, then publish.
Hi. Today I'm going to show you how to use our author writer template with the Sales View website builder. So I'm going to click on edit to begin. So here is our default template. Of course you can edit this, you can add text, you can add pictures and I will show you how to do that. So the first thing I'm going to do is edit the image or the logo. So I'm going to go ahead and use this website as an example. I'm going to use the author Colleen Hoover signature as the logo. So I'm going to add a new image and select the file from my computer, click on resize to automatically resize and then that's how it's going to look like for our logo. So I'm just looking at the website, the author that currently has and I'm basing it off of the website that I'm going to be doing. So I'm gonna edit the about and change a few text. So I'm gonna copy what she put in her website and then change it to all about me. So I'm gonna click on the three dots, click click edit and then change the text and then click on save. I'm going to do these for some of the category names as well. Then I'm going to edit some of the text by clicking Edit text and I'm going to put the text that I want to put in it. So for this one I'm going to put number one New York's best selling author, just as you see on her website. Then I'm going to add photos of some of her latest released books. And I'm going to do that under design elements and I'm going to click and drag image and then I'll select the file on my computer and upload it. Then I'm just going to resize the image as how I want it and drag it onto the place where I want to put it. So in this case I'm going to resize it the same as I did on the first photo and then we're gonna just align it so that it looks really. So now what I'm doing is I'm just clicking and dragging everything in place as how I see fit. So you can change the background color of the text as well by clicking Settings and choosing the background color available. Then after that I'm just clicking and dragging the pictures so that it all lines up. So right now what I'm doing is I'm replacing some of the text with text about praises for the author. So, so you can of course you can choose whatever you want to put here. But seeing as we're doing a website for an author or writer, I see it fit to put praises about her book. So now we're going to edit some of the other pages. We're going to edit the all about me page. So basically this is where you introduce the author and you tell a little bit something about them and put a picture. So what I'm gonna do now is I'm gonna look for a picture of her online to put in the photo section and then I'm gonna copy the about me page as a reference on her website and put it in the sales. Now that I found an image that I want to use, I'm just going to click edit image, add new image and replace the image that's existing with the image that I want to put in. So I'm just going to click save. Then I'm going to edit the text on the side by clicking edit text to whatever you want to put. But I'm just going to copy what's in her website. At the moment I'm just clicking and dragging it in place. So this is what's in her about me website. So I'm just going to copy that and then mimic what it is on the salesi website page Sa then we're gonna move on to another page. So I'm gonna click on contact us page. So I'm gonna edit that one. So from here you can have. We have a widget for you to use that shows the name, email and the message that your website viewers can send you directly. But what I'm gonna do is I'm gonna contact the little text that she has on her website and put it there as well. So now I'm adding a text under design element. I drag text section onto the website and then I'm just gonna edit the text from there. It so now we're gonna go and add products to her shop. So I clicked see the shop then scroll down. I'm gonna click on products. Then I'm gonna reference the actual products that I'm gonna put in the sales view website under her shop in her actual website. So we're gonna use the posters as an example. So here the important parts to remember is the name of your product, the selling price, the description, and you can also upload an image of the product as well as you see me doing. After doing all of those, make sure to put in the category. So for this one I'm just going to use posters as the category, I'm going to click Save and add new as I'm going to add a few more posters to the shop. So now I'm going to show you how to link your existing social media website. Click on Add social media icon. So referencing back to the original website you can can see that she has Facebook. So I'm gonna use her Facebook link. As you can see, I'm gonna copy the Facebook link, then I'm gonna post it onto the SalesVU website, then I'm gonna save that, then I'm gonna add other social media links that she has. So Instagram for example, just copy the link. Again, she also has Twitter which I'm also going to copy. So I'm going to open the link to her Twitter, copy the link and then go back to the SalesVU website and add that social media icon as well. So now I'm going to show you a preview of the website and then I'm going to scroll down and click on the social media links that we just did. So I'm going to click on Instagram and as you can see it automatically links to the Instagram that you put in earlier. Now let's link your domain to your SalesVU website. So I'm in my domain page GoDaddy. Click on DNS and it will show you the records you're going to add. Click on Add, then referencing back to the SalesV website. We have put instructions under setting and website settings as you can see there. So this is how it should look like on your DNS page on your domain. So save. Then you're gonna copy your domain name and then go back to the SalesVU website where you can see website URL. I'm just going to copy my domain name, then I'm going to click on Save and then I'm going to hit ok. And now we're ready to publish. Click Publish. And we're going to use the connect your own customized domain. Just enter the domain that you got, then when you're done, click on Publish. Now we're ready to open a new browser. And then I'm going to type in my domain name. And as you can see, this is the website that we just created. If you have any more questions or need further clarification, you can reach us via chat or our support email supportsalesvue.com and we'll be happy to help you SA.










