Tom House Baseball Pitching Mechanics (Problem Recognition & Solutions) - 1989 Pitching Tutorial
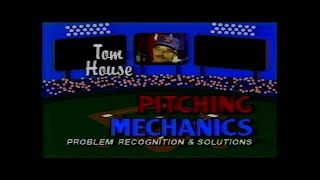
Mark Holtz and Tom House, a major league pitching coach, break down pitching mechanics and biomechanics to prevent injury. House explains how physics applies to pitching motion and offers practical coaching techniques for players at all levels, from Little League to the pros.
Hank Aaron does it. Number 7:15. Many fans remember the joy of Atlanta relief pitcher Tom House, who caught the record setting home run in the Braves bullpen. It's a memory House will cherish for the rest of his life. A Hall of Fame moment all the way. Pitching mechanics, Problem recognition and solutions by major league pitching coach Tom House. Presented to you by the Texas Rangers and Home sports entertainment. This 90 minute videotape is divided in four major segments. Motion analysis and mechanical efficiency. Discussion on field clinic with Little league to college players, troubleshooting individual throwing motions. And a comprehensive section on weight conditioning for all ages. Plus many drills proven effective for small frys to big guys. A tape for the player, coach or parent wanting that edge to become the best he or she can be. The magic distance is 60ft 6 inches. As all baseball people know, that's where everything starts. Baseball just doesn't happen until the man 60ft 6 inches throws the baseball. Hi everyone, this is Mark Holtz, the voice of the Texas Rangers. And I told you on tape number one that we had a pitching guru in Texas by the name of Tom House. Those of you who have seen tape number one know about pitching mechanics and a guy who has put in a lot of time to tell you about mechanics, and that is the guru, Tom House. And Tom is back for tape number two. Tom, a tremendous response to tape number one. As I mentioned, everything starts 60ft, six inches away in baseball. And until you've got a guy that knows what he's doing out there, a team just cannot win. And in tape number one, I guess we picked up a lot of new winners.
Yes, we did. And you know, the feedback from it has been remarkable. I mean, I really feel good about people writing and phoning and getting in touch with me. And the reason we're pursuing this second tape from all over the world. We've got tapes in Italy, Australia, Japan, as well as all over the continental United States and in Canada. And coaches want more. They say, hey, look, this first tape, pitching absolutes was really enlightening. Can you give me something more to chew on? When I'm looking at a pitcher on a mound, I want to be able to see what he's doing right and what he's doing wrong and help him correct it. So the bottom line on this whole thing is that through this is now showing up to prove objectively what good pitching coaches and good baseball people for the past hundred years have been teaching. We now have the technology through something called motion analysis to actually show these coaches what they should be seeing. And how to correct it.
When we talk technology, we don't want to go over anybody's, specifically mine. Now, Tom, we're going to take this real slow, but the idea here is to help the Little Leaguer so the dad can talk to the young kid about pitching, to help the high school pitcher, the junior college, the college, every age bracket, every different strata of pitcher, we want to cover, including the professional pitcher. And the idea is they now know what to do mechanically. But what happens if something goes wrong, you don't feel right, and then the big question is, how do you correct it?
You've dealt with me for the past couple three years, and if there's a criticism about what I'm bringing into baseball, it's that it is quote, quote, too technical. The goal with today's tape is to keep it very simple. And I'm going to call out some vocabulary that's not really used in a baseball environment, but we will also show and bring it into baseball vocabulary so everyone from the little league coach right on through other major league coaches or other professional coaches, if they so choose, can use their words to apply to what I'm talking about. And I'd like to, at this point in time, point out where I got the data, where we get this objective research that I've kind of synthesized into a professional baseball environment, into the pitching of a baseball. And I'll call out Dr. Atwater out of the University of Arizona, who got my curiosity started about four or five years ago when I saw that research. There's a Kathryn Bartels at University of California, San Luis Obispo, Dr. Alan Blitzblau at Biokinetics, a motion analysis firm in Laguna Hills, California. These people have provided pieces to a puzzle for me that I've taken and tried to bring into baseball to explain this ballet we call pitching. And believe it or not, it's. It's quite simple. The goal is we don't treat symptoms, we cure illnesses. And for 100 years, the best pitching coaches in the game have had an intuitive feel for how to cure illnesses. What we're doing now is showing you specifically what these illnesses are and can make anyone, Little League coach, professional coach, understand how to cure the illnesses that a pitcher faces.
Motion analysis. Very briefly, what does this mean?
Well, any athletic movement mark requires motion. And specifically, the more efficient the motion can be, the better the athlete has as far as him applying his ability to do whatever task it is. The physical act of throwing a baseball from a mound is, I think I had mentioned earlier, a very difficult Ballet with so many things that can go wrong that what we try to do with this motion analysis is identify for each athlete for his body type, tall, short, broad, skinny, what is best for him. There are certain things, as we talked about in the tape, pitching absolutes, in today's tape, there are certain things that are based on laws of physics and they are undeniable. You cannot get around the fact that it is a law of physics that makes motion work. We'll use baseball words to talk about laws of physics, but it's very predictable. And like I had mentioned earlier, the motion analysis people, Dr. Blitzblau out of Biokinetics at Water at University of Arizona and Bartels at San Luis Obispo have shown how to match research from the physics side of things, the biomechanics side of things, into physical movement on the athletic field. And it's going to be a fun time today while we look at this.
And everyone is different. So you are not going to prescribe one set theory or, or one set motion analysis for everybody. It has to be broken down as your first tape was, with each individual body size, motion, right handed, left handed, even, and step to the plate, your release points. Again, it has to be broken down to a specific individual and we're trying to help each individual no matter what his size or from what side he throws.
That's a real solid thought process. Every person has a style that he does his specific activity with. Every pitcher throws a certain way, but within his style there are certain things that he must do to be biomechanically efficient, to keep himself from having wear and tear on a certain part of his arm, to make sure he can be strong enough to throw a baseball day in and day out over the course of a competitive season. And again, it's bottom line information. It works for all age groups. And believe it or not, when I work with little leaguers in coaches clinics at that age group, the information that we use there is the very same information that I'm using on the major league level, delivered in a way that can be understood by the athlete.
And you will help coaches throughout this tape able to recognize no matter what level, again, when someone is wrong, what checkpoints to look for.
One thing I would really like to accomplish with today's filming of what's going on in this video and that is to be able to allow a coach and or a pitcher to see the physical act of throwing a baseball like I do. Now, I'm not unique, I'm not horribly bright, but what I've been able to do is, is pull information from outside of baseball, synthesize it, so to speak, and see things based on laws of physics, based on kinetic energy links that will allow an athlete to perform his skill with a minimum risk of injury to his arm and enable him to do it day in and day out for a career, not just a good year.
Now we're sitting in the Texas Ranger clubhouse and you're talking about motion analysis, laws of physics. At times, Tom, these are not big topics in a Ranger clubhouse or any clubhouse. Tell me what you mean very briefly in layman terms right now. The laws of physics, quickly, how does that come into being a baseball pitcher?
Now, you and I laugh about this because we know that my skipper, Bobby Valentine, finds me every time he hears the word laws of physics.
Major money, I understand.
Yeah, it gets pretty expensive around here, but it's called I'll just pull one out of the air. Newton's third law, which is for every action there's an equal and opposite reaction. And if you apply this to a pitcher, if he's throwing his hands away from his body or he's kicking his leg, and that is taking him away from his ability to go towards home plate that is inefficient for throwing a baseball. Motion analysis, kinetic energy links.
What is a kinetic energy link?
Okay, the best analogy here would be that when a pitcher goes through his ballet again to throw a baseball at home plate, he, he's generating energy from feet, through legs, through hips to upper body into arms and out into release point with the baseball. If anything in that energy link is abbreviated, is working against itself, is not maximized as far as efficiency is concerned, he's going to have a long term problem with either physical health or his ability to get the ball to home plate.
So if you can physically understand what you're supposed to do and you feel out of sync or look out of sync or you're not throwing strikes, you can go back to the checkpoints and say, hey, for each given there has to be some kind of result.
Perfect. You go back to what is right. You go back to the illness, you don't treat the symptom, you cure the illness. And how do we come up with what is right? There's new technology out now with high speed video filming anywhere from 30 frames a second to 1000 frames a second. With two cameras at about 90 degree angles, you can film an athlete going through his motion, whether it's a hitter or a pitcher or a high jumper or whatever. You break that process down, you Take those two camera angles and you digitize them. Digitizing is a computer word for turning a visual image into something the computer can grind out mathematically.
It's a stick figure that moves.
Perfect. It's a stick figure that moves. And with these stick figures that move, the computer can look at that athlete from any angle. In other words, filming in a major league environment, you cannot get over the pitcher's head unless you have a helicopter over the field. That can't be done economically or legally. I don't think with two cameras and the high speed digitization, the computer can actually look at the athlete from any angle you want, underneath him, over his head, behind, front, whatever. And this gives you a tool for analyzing exactly what the pitcher is doing according to laws of physics, according to kinetic energy links. And you can specifically say for this athlete and his body type, this is what he's doing right, this is what he's doing wrong.
And once it's on tape, the coach and the player or pitcher knows exactly how he should do it. And then you can go in and those are the checkpoints. You can see where he's off on the stick figure. You can see release, leg kick, everything that's right.
And we all know that there's a couple, three ways that athletes learn. They learn by seeing, they learn by hearing, and they learn by actually performing it, feeling it. And that teaching philosophy at the end of this tape, you coaches and you athletes will see how you see it, feel it and do it. And that's the bottom line.
Let me ask you one thing. You see a pitcher who's had a bad day, he goes in and he says, I cannot throw a strike mentally. What should you do at that point?
We talked about this in the first tape, pitching absolutes that I think Yogi Berra said it best. 90% of the game is 50% mental. When an athlete is having confidence problems mentally, he in effect, is letting his computer, his software, get in the way of what his hardware is capable of doing. That's an experience thing. Information plus experience equals awareness. If the guy is aware of what's going on, if he can identify his problem, then he's got half the solution. And that's the basis of this tape. Identify the problem and you've got half the solution.
Then when you feel out of sync, this is a supplementary tape to say, okay, now this is wrong. Go back and check this.
All right, that's a pretty good thought process. The first tape, pitching absolutes, addressed four areas that are very important for that foundation. The bricks you were talking about earlier. This in effect, will become the next floor, the mechanic side, the biomechanics side of pitching a baseball or throwing a baseball become the next floor in the construction of this building.
Tom Injuries to pitchers always play a big role, it seems in a major league season, a college season, whatever you always hear of your elbow going out or your sore arm. Now you talk about mechanical efficiency. Will that help ease or erase the pitching injuries that we always hear about?
Nothing is ever going to completely eliminate injuries to a pitcher. There's just too many variables involved. But if you can reduce that risk of injury, Mark, then you've accomplished your job as a pitching coach and a pitcher. For example, we now know that if a pitcher throws 90 miles an hour and in a given game he throws 150 pitches with perfect mechanics, perfect mechanics, he's going to be putting over 13,000 foot pounds of stress on his upper body.
Stress leads to a bad arm, doesn't it?
Stress leads to a bad arm and the less efficient you are with your mechanics, the more stress you're going to put on elbow or shoulder, for example, we know now that pitching is a directional skill with rotational components. Big words for you want to take everything you've got towards home plate and release the baseball as close to home plate as you possibly can with a minimum amount of stress on elbow and shoulder. If a pitcher, for example, gets too rotational, if he kicks his leg one way while he's trying to go to home and spins off, this will be the right handed pitcher that falls toward first base or the left handed pitcher that falls towards third base. If he's a spin off guy, he's going to have tenderness in elbow and shoulder as he gets fatigued throughout the course of a game and or a season. Guys that have improper weight transfer as they take their route to home plate and they release the baseball, if they don't have a good weight transfer, they the back of their shoulder is going to bother them. We now know that three muscle groups accelerate the arm and two muscle groups decelerate the arm.
Now, to be efficient mechanical efficiency, what are we going to do on this tape?
We are going to show you with throwing mechanics and pitching mechanics what is biomechanically efficient for anybody that throws an object.
This is how you should avoid injury. If you do it right, you're going to avoid injury and you're going to have a foundation to have success.
Exactly. And we are also going to take the cameras into the weight room and show you a general weightlifting program from light weights through some heavier weights with a total explanation on how to condition ourselves to meet these three muscle groups that accelerate and two muscle groups that decelerate the throwing arm.
And you'll show each individual how to set his own standard of weightlifting and mechanical efficiency.
That's right. And the concept here is a concept to tolerance. Every athlete is unique to himself through a maintenance, a power and a base cycle of weight training. You will go to tolerance what your body can handle with the weights so that you can remain competitive, reduce your risk of injury and and be biomechanically sound while you're throwing the baseball. Big words for what they used to tell me. Here's the baseball, son. Go get somebody out.
Tom, we now know the philosophy of what we want to accomplish. How are we going to show the people what to accomplish?
We're going to go out on the field and I'm in working with a group of youngsters, a college kid, a couple high school kids and two little league kids. I'm going to show you how dealing with them is just like dealing with the athletes I work with on the professional level. The information is sound, the problem identification is the same. And I will give some specific solutions to the problems that we see as we work with these youngsters today.
And it's any level, you can use this from the little league level right up to the major league level. The principles and the philosophy are the.
Same, consistent across the board. What works for a 12 year old works for a 29 year old flamethrower like Mitch Williams. Alright, now what I do, normally the best way to determine what a kid's going to do when he gets on the pitcher's mound is to watch him play catch on flat ground. Let's go down to Steve and Chad's twosome here and have a look at what they're doing. Alright. I'm going to call attention to feet I look at feet first. Alright. Remember the phrase squaring off your back foot. Remember the phrase squaring off your back foot? Let's look at elbow. Alright. Now I've never seen Steve throw before and as we get to pitching mechanics, I'll guarantee you this fellow is a low elbow guy. Remember the phrase low elbow guy. Alright. And looking across at Chad, as I watch Chad throwing, let's see what he does when he catches a baseball. Okay, not bad. Think about the term center of gravity. Belly button and center of gravity are the same thing. When I'm watching Chad play catch, I watch where he puts his hands as he starts his throwing motion. Okay, a couple things with the bigger guys. Okay, let's go to Brian, the little guy here and Tim, the little bit bigger guy over here. Let's watch them. Now these guys are little league age. Let's see how they're doing catching the ball. Elbows up, let's watch the feet. Let's see if the feet are squared away. Not bad. Alright, now I'll have to admit I've worked with both Ben and Brian here, so they're going to do a few more things right than they are wrong. But you can still look at what they're doing when they catch the ball. Where do they take their hands? How are their feet placement doing? Feet are a little shaky. We're going to talk about this in a second. Okay, let's go down and look at Tim and Mike down here playing catch, getting their arms loose. Alright, watch, watch again for height of elbow, squaring the back foot off. Okay, when they receive the ball, where do they take their hands? Where is their head after they finish their throw? As you watch Tim throwing out here, watch where his head is after he finishes his throw. Not bad, Mike. Same way. Alright. Okay, what I'm going to do now is after they. I'm assuming you guys all have your arms fairly loose. Feel pretty good. Alright, let's all come to this area right here. I'm going to give you a little mini lecture on throwing mechanics. Let's all gather around. Put your bodies on the line here. Face me this way. I'll take the sun in my face. You guys all square around right here. Now I'm going to give a little lecture and if you have any questions, if I don't make sense, stop me. Alright? And then we'll expand on it. Alright, everybody have their glove on. Put your glove on, Brian. Alright, hold your glove up and repeat after me. My glove side is my directional side. My glove side is my directional side. What? My glove side is my directional side. Little embarrassing, huh? Okay, Steve, I'll pick on you. Why do you think that we would call your glove side your directional side? Do you have any idea at all? Well, maybe because you use it as your lead in before your follow through. Right? That's not a bad answer. That's not a bad answer. In effect, your glove side is hooked to the side that you're going to take towards where you're throwing the baseball. Therefore your directional side. Nothing magic. Right, Ben, that makes sense to you? What's your glove side called? Directional side. What are you going to do with your glove every time you Go to throw a baseball, you're going to point your glove towards where you're going to go. Now I don't care whether you point your glove palm forward, palm back, or like Jose Guzman on our major League Ranger staff, actually turns his glove inside out. I don't care about that. As long as what, Timmy? As long as it's pointing towards where you're throwing. Exactly. As long as you take the glove, point the glove towards where it's going. That's what direction is all about. Okay, everybody stand on the white line. Everybody stand on the white line. Alright, now as I was watching you guys throw, I voiced over on the video, I said look at their feet when they go to throw. Alright? Now Brian, I'm going to pretend I'm throwing right at you, alright? I caught the baseball and I took a step to throw. Now you see which way my foot is pointing? Right here, alright? And as I go to throw, that's what every one of you guys were doing. Your foot in effect was pointing away from where you wanted to throw. Now what I want you guys to do is stand like I'm standing right now with your hands at your sides, okay? You're all right handed, so you're going to be just the opposite of me, alright? You guys are going to do with your right foot what I'm doing with my left foot. Take your right foot and do this right foot, Brian. Attaboy. See how I squared that foot off? Alright, good, good, good, good, good. Every time you go to throw a baseball, whether you're an outfielder, whether you're an infielder, whether you're a pitcher or a catcher, your back foot has to be in this position. Why? I'll show you why. Everybody do like I'm doing right now. Alright? Now leave your hands at your sides and don't do anything except put your weight on that foot and watch what happens to your directional side. What happened to every one of your directional sides? It all turned toward me, didn't it? Let's do it again. Let's put it back. Everybody stand like I'm doing right here. I had an infield coach when I was at usc. Say you throw with your feet. And I used to say to myself, what the heck does that mean? You throw with your feet. Every time you go to throw a baseball, you have to square that back foot off at a 90 degree. Everybody do that. Square the back foot off at a 90 degree. Put your weight on it and feel how your body turns. We got that? Alright, now we've talked about glove and directional side. Now we've talked about our feet. Okay? Now what do you do when you catch a ball? When I was walking around watching you guys play catch, I talked about what your hands did after you caught the baseball. And I talked about something called center of gravity. Ben, I'm going to pick on you again. What do you think center of gravity is? It's a little not bad. Let's talk a little louder so the cameras and everybody can hear you. Don't be shy. It's the middle of your body where you put your hands. There's another name for it. It's called belly button. Let's all touch our belly button, alright? That's your center of gravity. Sounds silly, but that's your center of gravity. Before you guys even got here today, we talked about laws of physics and motion analysis. For you to be able to throw a baseball properly, you have to control your center of gravity in a direction while your arms and feet help you throw the baseball. As we're pulling our hands to our center of gravity, which we're going to do on every catch, what do you think we're going to be doing with our foot? Right. You guys are bright. Let's give yourself a little hand real quick. Ok? Not bad, Steve, for a college kid, you really got this stuff figured out. Ok, we're catching a fly ball again. Alright, catch the fly ball. Pull it to your center of gravity while you're squaring off. Now we automatically. We know now if we put our weight on that foot, what's our front side going to do? It's going to square off. Now as we start forward, we're going to break our hands. And do what with our glove? Point our glove right towards where we're throwing a baseball. Ok, back up on the line. Now some fun stuff. Square off like I am right now with your feet just flat on the ground with your hands right in the middle of your body. Okay? Now when you break your hands, I want you to turn your thumbs under. Let's just do this little drill right here. You don't have to square off. Try not to. If you have to spread out a little bit, go ahead so you don't bump into each other. All we're doing is this little drill right here. Thumbs under. When you break your hands, turn your thumbs under. Thumbs under. What's that doing to my elbows, Chad? Getting your elbows up. Ok. Thumbs under to get elbows up. Thumbs under to get elbows up. Thumbs under to get elbows up. Now hold that pose right here. This is A position of strength. High elbows. Okay, put your arms down. Brian, show me how you're going to break your hands. You just caught the ball. Put it in the middle of your body when you break your hands. Thumbs under. See that pose right there? How his elbows are shoulder height. Put your arms down. Timmy, you try that. Just break your hands. Boom. Elbows up. Perfect. Alright. Feel what it feels like with your palm down and your wrist up, reaching behind you. Now turn your palm to the sky. Feel the strain on your elbow and your shoulder. This is what we're trying to avoid in watching you throw. You have a tendency to do this and we're going to correct that today. Alright? Now let's put the baseball back in your hand and get to this position right here. This is a position of strength. Palm down, wrist to the sky. A grown man can hold about £60 in this position if he turns his palm up. Everybody turn the baseball to the sky. He can only hold about £40. Alright, when you throw a baseball, go ahead and put your arms down. When you throw a baseball, the baseball, your hand and your forearm will put about 50 pounds of stress on your shoulder and upper chest. Timmy, would you rather be 50? Pardon me? Would you rather be 60 pounds strong or 40 pounds weak to throw a 50 pound object? Right. Has anybody here ever had a tender elbow or a tender shoulder? Let's be honest, alright? In effect, you guys were asking 50 pounds of strength and only giving yourself 40 pounds of efficiency. Does that make sense? Mike, show me with your hands what you're going to do. Every time you go to throw a baseball, you're going to break your hands, thumbs under to get elbows up. Position of strength. Everybody find this position right here. We all know that this is a position of strength. Okay, put your arms down. Everybody relax a little bit. Now, assuming we're all catching a fly ball, let's all catch a fly ball. We're going to pull our hands to the middle of our body. While we're doing what with our foot? Alright, as our body is squaring away to throw the baseball, what are we going to do? Good. Now, when your landing leg hits, alright, when your landing leg hits and you begin the forward acceleration of your arm. And every one of you guys should be in what I call the goal post position. Let's all copy me. See this? Goal post position, goal post position. Bend square away like you're throwing towards center field. Now if you look alright, you guys look this way, the baseball is pointing away from the direction you're throwing the ball. That's perfect. The baseball is actually pointing away from the direction you're throwing the ball. Find that goal post position. The baseball is pointing away. The baseball is pointing away. Mikey, that's perfect. Brian, step out here for a second. Now I'm going to show you. You guys relax. While I'm working with Brian. Find that same position, alright? See where he is right now. You say to yourself, why is the baseball pointing away? And here's the key, don't move your feet at all. If I just rotate his upper torso into the throwing position. Now where is the baseball position of strength? You see that? Let's bring it back. The baseball is actually pointing away. Alright? The back of his wrist is pointing towards where he's throwing the ball. Take a little mini step, start your rotation to throw. When he comes through, that's a position of strength. Let me show you what happens if he does it wrong, alright? If he's here with the baseball now, when he rotates to throw, where's his arm going to be? Underneath. This is a tender elbow or a frontside shoulder problem. Now you show me where the goal post position is. What's the goal post position? Yes. And where you point your glove. Alright. Right at the target. Now take a little mini step and throw. Bingo. Alright, let's all do that same drill. Okay? We're going to catch a fly ball. You're squared off. I'm your target. I'm your target. We're all going to catch a fly ball and we're going to do it real slow. Now we catch the fly ball while we're pulling our hands to our center of gravity. Our foot squares away. We pivot around, break our hands, and when our landing leg hits, where are we? In the goal post position. Steve, that's outstanding. You weren't doing that when you were playing catch. Chad, you and I have talked before. That's nails. And you remember when we talked last year? That's how you get your elbow up. Does everybody feel that position? The final thing in throwing mechanics. Let's go all the way back to the beginning. When you accelerate to throw the baseball, assuming you've taken a good direction, when your landing leg hits, you're in your goal post or launch position. When you go to throw the baseball, where do you want your head to be? I'll ask you, Steve, because you haven't heard me before. Where do you want your head to be when you finish the throw? Whether you're an outfielder, an infielder, a catcher or a pitcher, where do you want it to Be on a line straight towards your target. On a line straight towards your target. Behind your knee or out over in front of your knee. Exactly. This is the weight transfer that we talked about in pitching absolutes. The other tape, you've got to get your head out over and in front of your landing leg. Let's put it all together, what we just talked about. Except this time we're going to field a ground ball. Alright, we just fielded a ground ball. What do we do with our hands after we catch it? Pull it to our center of gravity. While we're doing what? Pivoting with this foot. Now as we go to throw, thumbs under to get elbows up. Everybody in the goal post position. Good. Baseball pointing away. Alright, now continue your throw and let me see what your head does after you finish. Head out over in front of. Okay, pair off in the same pairs and I want you to go through the proper throwing mechanics that you just learned. Take it slow, take it right. Same pairs throwing. Let's have a look again and see just how good you are. Catch the ball, pull it to center of gravity, square off your foot and throw. I'll pick up the extra balls while we're walking here. Alright, let's start on this end again. Square the foot off. Good. Point the glove. Much better with your elbow too, Steve. Attaboy. Now you'll notice just because we talked about it, every one of them are squaring their foot off. Point the glove, thumbs under when you break. Atta boy, Timmy. Okay, very nice, very nice. You guys feeling this? Now? When Mark Holtz and I were talking, we talked about don't put results ahead of right. When you guys play catch, every time you throw the baseball, throw correctly. When you get out between the lines and you're competing, the more you've practiced on the side, the better it's going to be between the lines. But every time you throw the baseball, throw it correctly. Steve, that's outstanding. Your elbow is getting higher already in the throw and the thumbs under thing is really going to make a difference with you. The thumbs under to get elbows up. Nice. Ok, two more throws each and then I want everybody to put the balls in the bucket. Two more. Let's have a look. Very nice. Point the glove. Very nice. You guys are nails. One more throw each and put the ball in a bucket. Gather around me here. You feeling that, Timmy? Chad, you feel that? Okay, the ball's in the bucket right here. Now we're going to talk about this thing I picked earlier. Mike and Tim, you're going to Throw this step out here for a second. Those of you that have been around me, I don't know if you throw the football at your university. You guys throw it a little bit sometimes. I bet you can't throw a spiral, can you? Not very good, right? And the key here is everything we just talked about. Tim, I know you've heard this out of me and Mike, I know you've worked with the football. You cannot make a football spiral and do any of the things wrong that we just talked about. If you do all those things right, the football should spiral for you. The best teaching device for good throwing mechanics with a baseball is throwing a football. Little leaguers, high school kids, college kids and professionals. And the study on this, Mark Holtz and I mentioned it earlier, was by Dr. Atwater out of the University of Arizona. And at the end of this video, you can get the data on how to find that information if you need to. As soon as you guys throw two good spirals each, we'll shut it down and go on to the mound. Okay, I'll give you that one. That's one good solid. Elbows up. Attaboy, Mike. Better elbows up. Bingo. That guy underneath. Feel your elbow drop a little bit. Your head goes away, your elbow drops and you can't make it spiral. You're spinning off. Take a little bit firmer direction. Bingo. That was solid. You stayed on line. Your body did exactly what it was supposed to do. Bingo. Good direction. Follow your front side. I'll give it to you. Give me a good one here, Mikey, and we'll shut it down. No, can't have you that one. See how your front side spun off? Elbow underneath. Funny spiral. If you stay with your direction. Stay with your direction. Launch position. Goal post position. Let it happen. You'll throw the better spiral like two throws ago. Stay with me now, alright, B. Alright. As he lifts his leg. Okay, here's the keys. Is he keeping his head over his pivot foot? Now, Brian, you're going to throw this ball, but I'm going to keep you from moving your head. Remember, I want to keep your head right over your pivot foot. Okay? Small step, pivot lift and go. Remember, for every action there's a reaction. Brian, look at me for a second. What looks best to you? This or this? The second one. Try to keep the button of your cap over your pivot foot. Now, as you're looking at kids, some of them will step back, some of them will step to the side. The key here is that anything that happens behind or on the side of the rubber is not going to help the kid as he throws to home plate. Alright, Take a small step, keep your head good. Pivot, lift. Very nice. Now you do those two by yourself. Do two by yourself and keep your head, belly button and pivot. Foot right over each other. Good. Lift. Bingo. Alright, Good, good. Now it's probably apparent that Ben and I have worked before also. Ben does a real fine job. He's what you're going to call a pretty complete product right now. The only criticism I have, Ben, is make sure when you take your step back that you don't take your head with it. Okay? Small step, leave your head pivot. Good. And you notice how he's finishing up as he breaks his hands and he takes his root. He's really getting out here. Good. Go ahead and throw while I'm talking, Ben. Okay, his pivot, look where his hands are, follows that glove and see how far his head gets out in front of his landing leg. It's outstanding. The only thing I would ask Ben is that you stop right at the top of your balance for me. Small step back, stop right here. Now let me ask you with your hands, what do you think would be best? Having him out here, Having them up here or having them right at your center of gravity? Loaded question Right at your center of gravity. On these next three throws, put your foot down. On these next three throws as you come around, bury your hands for me right against this area above your belly button. Okay? Small step pivot, Bury your hands. Bingo. What you just did right there, and I watched your landing leg, what you just did right there was add about 2 inches to your stride toward home plate. Major league pitchers, college pitchers, high school pitchers and little league pitchers, Ben, all should stride at least as far as they are tall. If you throw your hands away from your body while you're going to home plate, you set in motion an action that way that takes your body this way and keeps you from going direction. What you did right there, let's do it again. I'm going to help you with your hands as you go ahead. Good. Now by burying these hands and taking your root from there, alright, you got a better direction toward home plate and you actually see where your foot mark is here. Let me turn around so the cameras can see here. Your foot mark on the last throw where your hands were buried was about 2 inches further toward home plate than when you threw your hands away from your body. You just added 2 inches to your fastball because you're closer to home plate for every action. There's a reaction. And remember that direction from a strong launch position is what we're after. Balance, direction, weight transfer and deception. Okay, let's try that again. Bury your hands this time. Small step, bury the hands. Bingo. Now if the cameras can follow his foot placement. This is where he was, this is where he is now. He actually got a little further on that one. He just added another inch by really keeping his hands tight to his center of gravity. Go ahead and do it again, Ben. Small step. Hands. Bingo. Now he got another half an inch there. Do you feel like how everything when you release the ball, Ben, is right out here. This time I want you to take your hands outside your knee. I want to show you something. Take your hands outside your knee when you throw the baseball. We're going to do it wrong. Get him out here. Now throw. Now see how he spun off to the left and where he landed was about 4 inches short of where you did when your hands were together. Now I'm going to do something. You're going to throw this ball, all right? You're going to go right ahead. Throw the ball. Okay, what did I do, Timmy? You feel like I push you forward. You know what I did? All I did was hold your body straight up and down. Let's do that again. Coaches, don't be afraid to dive in with your hands. Touch teaching, alright? Touch teaching is just as important as talking and listening. Now I'm going to call out the same foot action here. We just added three inches to your stride to home plate, Timmy. See where you were landing and now where you are right now. Why do you suppose we did that? What's the difference between this and this? If I'm going to hit you in the nose, and we've talked about this, if I'm going to hit you in the nose, am I going to do this to hit you in the nose or this? Okay, a couple more pitches. I'm going to have my hands on you and all I'm going to do is hold you straight up and down. Alright? See your stride again. Same distance, same effort. Feels funny, doesn't it? You hate my hands on you while you're throwing, don't you? But they'll get this feel right here. Bingo. Now let's see if you can do that by yourself. We've been doing this battle for two years now. I don't want to see this. I don't want to see this. To throw a baseball, I want you to at least be on line. When you get into our goal post position, you get to a real fine goal post position. But you're back here, okay? And I want it to be straight up and down. See if he does it. Head lift. That's a little better. Now look where his stride went there. Alright. We didn't get a chance to nail it down, but you got yourself another. If this was our line you just added with your own efficiency, with your own feel and your own good mechanics, another 2 inches to your fastball. Do it again. Very good. Atta boy. Now tell me and show me what we're talking about with your body here. What don't I want you to do? Show me what I don't want you to do. You don't want me to lean back like this? Not good. What I want you to do, want me to be straight up, head center of gravity and pivot foot over that balance leg as you take your route. Okay, One more good fastball and then we're going to go to a breaking ball. Nice. Okay, now get your curveball grip. I happen to know that Tim has a real good breaking ball. He has a one knuckle up grip. But we're not concerned, we're not concerned about the grip because the grip is only the icing on the cake. Tell me in your own words now, Timmy, what you remember about the angle of this and this. What's important about your forearm and your wrist. To get your fingers where they're supposed to go, you need to get it set. Like the karate chop. Perfect. That's a great phrase right there. It's like a karate chop. As your arm relax a little bit here. As your arm goes through the throwing motion and gets to our in effect square around here and gets to our goal post position. Alright. The minute his arm starts forward to throw the breaking ball, it has to be set with forearm and wrist to get fingers on top of the ball and have strength to throw the curve ball. Where kids hurt their arms and where curve balls are weak to marginal is when they come through and play catch up with a curveball that's a spinner. You want a snapper. Okay, show me with your arms what we're after. Okay, you want to get to the goal post position. You've got the curveball grip. Now when your arm begins to accelerate forward, bingo, there's where you want to be. Are we going to do something different with our front side? No, just like our fastball from elbow down, everything is the same as your fastball. The only thing that changes is your forearm and your wrist and your fingers throwing the breaking Ball. Some real easy breaking balls here. Stop. You took your head too far back again. Head over the pivot foot. Good lift alright. Not bad for the first one. And check out coaches watch their stride on their curve ball. Because we all were told, especially when I was growing up, shorten your stride to get on top of your curveball. Now there's a great curveball. Can you chase that down? How'd that feel? Little hustle bump, huh? We were told early on that you have to shorten your stride to get on top of a curveball, Tim. And that's not right. You want the same body. The only thing that changes is forearm and wrist. If you deliver that curveball the same distance from home plate as your fastball, it's tougher for the hitter to pick up. You're doing a pretty good job. Stay with it. Head over pivot foot. Hands to center of gravity. Set it early. There's a heck of a curve ball right there. And if you'll notice his feet placement where his foot landed was almost the same cleat mark as his fastball. Do it again, small step. Set it early. Bingo. Kids learn by hearing, they learn by seeing and they learn by touching. And Tim will remember that touch way more than he'll remember the words involved with what this means about coming off. He'll feel this in his mind's eye from here on out when he works on his skills. So this whole workout is going to be from the set position. You go ahead and throw two or three while we look at it. And I'm going to end up this workout having you throw a change up. Okay, where is hand sitting? Good. Now you'll notice that he's a little different with his hands in. Both Brian, Ben and Tim were, let's look at his hands right away he does something a little different with his hands up on top. He sets them a little higher, doesn't he? Alright, now, first thought process is you'd say to yourself, no, this isn't good. But if you look, if you look at the angle his hands are on, that center of gravity, the elevator above that center of gravity. Just stand in your set position for a second with your hands normally. Now notice that Mike sets his hands right here. I don't mind movement this way. This is not going to affect your center of gravity. The movement you're worried about is when they come this way or this way or down this way. And you'll see big league pitchers doing this. You'll see the Jack Morrises and the Dave Stewarts throwing Their hands away from their body. But a youngster at this age should be shown how to do it with a minimum amount of work, wear and tear on his body. So Mike comes sat a little higher than Brian, Ben and Tim have done. He sat actually right below his chin. And you remember why we did that when we started working a couple years ago, I had him do that as a checkpoint. In fact, I had him touching his glove on his chin to get him to that position consistently and to give him a little quicker arm into the what we call our goal post position. So for right now, let's watch his hands and how they relate to his body. And as long as they're not outside his knee and on the elevator from his belly button or center of gravity, it's okay. Go head on, straight on in. See the little movement but they never stray off that center of gravity line. That's okay. Hand set right below chin. Good. Very nice. One more, Mike. It's pretty tough to find something wrong with your delivery because you're fairly sound mechanically. So I think what we'll do is go to a grip. We'll have you throw a change in a second here. Very nice. Now that's some pretty solid mechanics, Mike. And I don't mind telling you that again, the only thing different than you and the other kids that have worked so far is that your hands aren't as low as theirs. But it's okay, isn't it? As long as. Why? Tell me why it's okay to be up here. They stay in the center of gravity. They're on that elevator with that center of gravity not coming away from going this way or going that way from. Okay, tell me what you know about your change up. I'm looking for deception, okay? Deception in what? Change of change of speed. That's why they call it a change up. Alright, there's two ways to get hitters out. Location and change of speeds. Now the rest of the world doesn't know that you don't throw real hard. But if you change speed off of your hardest fastball, the hitter has just as much difficulty hitting you as he would someone that throws a little harder. A hitter doesn't hit what you're throwing. He hits what he sees, okay? And the goal with a changeup is to look with your body like you're throwing what a fastball and you're going to kill it with your grip. Let's look at his grip real quick here. He has what we call here with the Ranger organization a pitchfork. Change up. And in effect he's got three fingers on the ball buried a little deeper in his hand, and he squeezes with his thumb. And I don't know if you remember us talking when we first taught you this a couple years ago, but if you are relaxed, your wrist flops real nice. If you pinch middle finger and thumb together, your wrist doesn't flop. It doesn't have the same snap on it. And that's how he kills his changeup. He's actually squeezing middle finger and thumb harder than he does with his fastball and using these fingers for balance. And look to see if his arm and body look like a fastball while he kills the velocity of the pitch with his grip. Let's go ahead and throw a couple change ups. Easy for the feel right now. Mechanics the same. Good, good. Now if you'll hear if your coaches, as you're standing next to your athlete, listen for the arm speed on the fastball and listen for the arm speed on the change up. You'll hear a little with their arm. Throw a fastball for me here, Mikey. Okay. Listen for the arm speed on the fastball. Okay. It makes that little sound. Now he should the sound of his changeup and you're going to throw a change up. Now, the sound of his changeup should be about the same. It is, but because he's got the ball buried inefficiently in his hand, deeper in his hand and pinching off, he's not getting the same force on the ball. And even though his arm speed is the same, the force on the baseball is less and it's not going to go as hard every other one. Let's go. Fastball. Change up. Tell him what's coming. Straight. Good. Mechanics set. Perfect. Nice. I don't know if the cameras are going to be able to pick up that little. Now let's do a changeup. Same body, same mechanics. Kill it with your grip. Very nice. Now the ideal Changeup should be 17, 18 miles an hour slower than your best fastball. In other words, Mike's best fastball right now is what, 78, 79 miles an hour. It should be about 65 for a changeup, 63 for a changeup. It's pretty solid. Same sequence again, a couple more. Kill it with the grip. Squeeze with that thumb and middle finger. Very nice. Okay, let's watch Chad throw here and in particular, check his upper body with his arms. Okay. Now he's what I call a pie thrower. And again, when he was playing catch, it wasn't quite as noticeable. And this is A surprise to me because again, as strong as he is, he's not. I got one. Here we go. As strong as he is, he should be able to get more out of his body arm speed wise. Now if you look, watch what happens to his arm. He almost throws like his arm is stiff. Alright? And the reason is. And throw a couple more Chad, then I'm going to make some corrections here. Is that when he gets to his goal post position he turns his palm to the sky. Okay, now I'm going to hands on with you here, son. Turn sideways like you've just taken your stride. Like you've just taken your stride. Stride it out a little further, alright? At this point now when Chad should be here, alright? He is already here. Alright? This is not what we see when Chad goes to throw the baseball. This is what we see out of Chad, alright? Now I'm going to have you go back and just don't try to do it right. Just try to do it your way. And watch coaches and athletes watch what he does with his arm as it turns over to throw. Now let me ask you a question in front of the cameras. I bet you when you get stiff and sore that you hurt right in here and right in here. In fact, you're a little tender right now, aren't you? Sure. Okay, now if we are following the things we talked about from Mark Holtz early in the tape to where we are right now, we'll be able to eliminate this. Number one with mechanics and number two with conditioning in the weight room. Alright? And I'm going to step behind you now, Chad, put your foot against the rubber and stride out a little bit like you just landed. This is a great drill for this problem right here. Do you have a baseball in your hand? Okay, now you shorten up for me, please. Come on up here about halfway. Keep coming, keep coming. Okay, go ahead and get down. All right. Now all I'm going to have you do is pick your foot up. You're going to step and I'm going to let you go to throw the baseball, alright? Okay. Go. Bingo. Let's do it again. Now you notice what I'm doing? Hands on. What does it feel like I'm doing with my thumb? I'm turning you inside out. Alright? Remember our thumb under to get elbow up. Where's our front side going? I take a step and throw. Do you feel any strain on your elbow or your shoulder? No, none at all. This is a position of strength right here. This is a position of weakness. Remember I said about 60 and 40 pounds to throw a 50 pound object here. You're 60 pounds strong. Little step and throw. Can you see the efficiency of his arm and what the ball is doing as he's going to home plate with. Can you feel this drill, Chad? Little step. Bingo. No strain on the arm. Right. Now let me show again. Set this position. You're not going to throw. You just hold this position right here. Don't move your feet a bit. Now all I'm going to do is twist your torso. See where the ball is. Alright, now let's do it your way. Twist your torso. Yow. And this is where you get in trouble. I feel you cringing. This is what you're after. And coaches, don't be afraid to do what I'm doing right here. Grab. I'm actually twisting this way with his thumb to get his thumb under and the ball aiming towards second base. Take a little jab, step and throw. You feel that? Move back about five feet. We're going to throw a little farther. A little mini step. How easy is that? This is a real good drill. Now you can't hear what he's saying, but he's all excited. There's no strain on his arm at all. Little mini step. Perfect. Now I'm really going to challenge you. I'm going to challenge you right now. Go back full distance and see if from the set position, not the wind up, come to your set position. See if you can get that feel all by yourself. Your hands from your center of gravity, you lift. When you break your hands, what do you do? Thumb under, baseball pointed that way. Land and launch. Okay. See if we can get it taken care of. Good. Thumb under. Alright. Not bad. Now that's better than when we started, but not as good as it's going to be. And you'll see in the drill when we have the elastic cord that actually your first movement when you start home is to bring your arm with you. What you're doing right now, you set it properly, but you're running from your arm. One more throw and we'll shut you down. Thumb under to get elbow up. Thumb under. Better. Now that should have been less strain on your arm. Be honest with me. Is that less strain on your arm when you first started throwing? Okay, that will be enough for right now. I want you to go in and get the elastic cord and then you and I will do a drill later on with the cord. I'll take the baseball. Fine. Jobs. I'll see you in a minute. Okay. And watching Steve throw, starting from his Feet and working up. He does a pretty good job with his bottom half. Alright, his feet do a good job. His hips are pretty solid, his leg lift is pretty solid. But then it starts getting disastrous as he gets to his upper body. Now, while we were off camera, I told him where his hand should be set. He's doing a little bit better than that, better than he was before. But if you look at his elbow, I don't know if we can get the angle on the camera that we're talking about. But his elbow never gets to shoulder height. It never gets to that goal post position that we're talking about. His elbow is always about 3 inches short of his maximum leverage position. Right there is as high as it ever gets. Now I'm going to hands on with you here a second, Steve. Turn sideways like you're taking your stride. Take your stride out a little bit. Now as his arm comes through, this is the route he takes right here. This is as high as his elbow ever gets. And you know, I already know because I asked. You've had elbow problems in the past. It's a little tender right now. In fact, it's a little tender right now. Now we're going to finish our throwing workout today properly. I don't care where the baseball goes. All I want you to do is try to get your elbow here. Now what I'm going to do, if you remember when I was working with Chad, I held his hand. Your root with your hand is fine. It's just that your elbow is always down there. So you're going to throw the baseball. Alright? From this position here, get your front side up, cheat up a little bit while we work on this drill. What am I doing with your elbow right now? Feels like you're pushing it up. Yeah, it feels like, you know, all I'm doing is holding it at shoulder height. It feels like it's right over the top of your head, doesn't it? It's not. All it is is shoulder height. And the camera would tell us that right now you have a teeter totter at shoulder height. It feels probably like I'm trying to push it over the top of your head. What feels right to you and coaches, you should be aware of this when a kid tells you that doesn't feel right. What feels right isn't necessarily correct for biomechanical efficiency. So you have to practice something that might feel a little wrong until you make it a habit. Now you're going to throw four or five in a row and I'm just not Going to let your elbow dip. Go ahead and take a step and throw. Feels weird, doesn't it? Do it again. And this hands on teaching is extremely important. Okay? Step and throw. Can we get an extra ball here? Attaboy, Mikey. Come ahead. One right after another. Basically the same drill. Now hang on just a second. The same drill as I was doing with Chad. But instead of hands on up here, I had hands on with his elbow. I'm setting him in his goal post position. Relax a little bit. Right in here. Do you want to point your glove there? This goal post position is what we're after. Ok, now take a little step and throw. Alright now bring yourself back. Now you're not going to do anything. I'm going to do all the work here. Alright? Stride out a little further. Ok, now all I'm going to do, I want you to look at your hand. Look at your hand for me. Alright, now all I'm going to do is twist your torso. Look at your hand, look at your hand. Where's my arm? Exactly where it's supposed to be to throw the baseball. Alright, now I'm going to do it your way. The wrong way. Now as you go to throw the baseball, do you see why you have a sore elbow? Yeah. Ok. It does not good. As strong as you are, we should take advantage of all of it. Ok, he's going to throw this little mini step and go. Feel that. Now this time I want you to start. I want you to get the feel of turning your torso and holding your arms in exactly that. Launch that goal post position. Okay, Take a step, turn your torso and throw. Alright, again. Try to keep the ball pointed towards second base as long as you can. A little mini step and throw. Bingo. Now that's the feeling I'm after. Do you feel how at the end your wrist felt? Like it did that? Yeah. The once before you were flopping open a little bit. If you keep your wrist this way, when you get out in front, you really pop the ball. So try to point the ball towards second base. I'll hold your elbows, you point the ball. Take your step. Bingo. That's the feeling I want. Can you lock that in your coconut? Okay, lock it in the computer. Take a step. Perfect. That's not bad at all. Take that front side and put it where you want the ball to go. Front, side and backside work together. Stop, stop, stop, stop, stop, stop. Feel that teeter totter. Okay, they both. Now you can bend this a little bit. You can bend it a little bit. If that feels comfortable. You're fine if that feels comfortable. All I care is that elbows are up and you're in that goal post position. Not here, not there, but right on line. Elbow to elbow, glove to glove. Okay? Little mini step. Alright. You dropped your elbow. That probably felt right to you. Boom. But as you came through, boom. Where did the ball go? Up. Real high elbow, real high elbow. Keep it up there, keep it up, keep it up. Not too bad. Let me give you a little hand on that one. I'll give you an A minus on that. As you came through, it was right there. Point the ball towards second base, elbow high and let it fly. Last one if it's a good one. Alright? Not bad. You tell me in your own words what you learned about your elbow today. I learned if I keep it up, I can keep that tendon from hurting as bad. Exactly. As long as I keep it pointed towards second base. Gives me a lot more pop. Whip at the end, right? And this position here is 40 pounds weak. This position here is 60 pounds strong. Baseball hand, forearm, 50 pounds of work. Make sense even to you and me, right? A good teaching device when you're watching your pitchers throw is to tell the kids that what they do with their bottom half when they throw a baseball is exactly what they do when they swing a bat. If you control your hips in a good direction, your feet and your legs are controlled and you're taking a good route towards where you want to go. The bottom half of a pitcher and the bottom half of a hitter are exactly the same. The only difference is that the pitcher will lift his leg a little higher. As we look at Scotty Fletcher swinging a bat and Brian Howes throwing a baseball, you'll see exactly what all this is. Is the equivalent of surgical tubing with a handle on it. If you can't get it at your local sporting goods store, call any of your orthopedic people and they'll direct you to where they get their surgical tubing and get a little handle on it. And it's a great little training conditioning device. And that's what we're going to do with both Chad and Steve right now. Two low elbow guys that have had a history of elbow problems. We're going to show you a couple drills that will help them learn to keep their elbow up where it belongs. Okay, Goal post position. First part of the drill. You got a little tension on the thing. Move a little further away. First part of the drill is just step and pull, step and pull, step and pull. Now I'm going to show you what you do when you go to throw a baseball and tell me how it feels. Okay? Step. Not good, huh? No. Step. That's what you do. Not good. The idea is we want to use all the big muscles. So we're going to step and pull. Feel that feeling? Yep. Step and pull. Step and pull. Stevie, let's try you with this real quick. Then we'll go to part two of the drill. Get your elbow shoulder height. Step and pull. Step and pull. Step and pull. Step and pull. Feel that? Do it by yourself. Do it by yourself. Boom. Elbow, shoulder height. Boom. Boom. Okay, part two, the character builder. Come on back here, Chad. Hold it down, boys, we're filming. Okay, now this time move a little closer. You're going to step, pull and rotate and only come through to here. Okay? Feel that? Feel that? If you keep your elbow up, you've got some strength. Now let's take your elbow down. Now don't try to do this because you hurt yourself. Bring your elbow down the way you do. Now pull. You feel that strain? No. Good. That's what we're trying to avoid. So again the drill is step, pull, rotate. And you rotate with your torso. Pull, rotate. Perfect drill. That's what I'm after. Do that again. That's what you do when you throw a baseball. Can you feel that? Yep. Steve, come and try it. And if it bothers you, don't go through the range of motion. But I want you to get the feel. You might have to get a little closer because I don't want to hurt yourself. Okay. Turn with your toes. Feel that strain on your elbow. You got to keep the big muscles up. Turn and rotate with your torso. Yes. Now see how you flopped your wrist. All I want you to do is turn your torso. Feel the difference? Turn your torso. That's position of strength. Step. Perfect. One more. Good, that makes sense. Both you guys should invest in one of these courts. Feels good in your shoulder instead of the. Yeah. It's a building device as well as a training device for mechanics. The two fit called cross specificity of exercise. And without, you know, talking too big of words, that is what you need to do. Besides the 25, 30 throws a day from the line drill like we were doing, you need to do this 25 to 50 times every day. You can improve your fastball, alright, by three, four miles an hour. Because you stop launching and you start throwing, you're going to give yourself pain free range of motion. No, no, no, no. I don't want to. Yes, yes, yes, yes. Always above your Shoulder. Steve, read my lips. Always above your shoulder. It's got to be done. Otherwise as much as you want to pitch, it ain't going to happen, partner. Alright, remember, 60 pounds strong, 40 pounds weak, 50 pound object. The wall drills to help reinforce everything we just talked about on the mound. Put their butt against the wall, come to the set position, lift their leg. If they kick their leg, they bang their head as they take their root. If they spin or drop their hand, they're going to bang against the wall. If they do everything properly, boom, boom, boom. They throw the ball efficiently without banging into the wall. All it is is a wall reinforcer for the mechanics we just talked about there. Okay, now the reverse. If he lifts his leg and keeps his foot underneath his knees in a balanced position, can't throw the hands away, can't kick the foot away, comes right down the wall and can throw. That's throw reinforces everything. We were just talking about on the mount we mentioned earlier that three muscle groups on the front side, the anterior side of the body, accelerate the arm and two muscle groups on the posterior or backside decelerate the arm. The whole idea of weight training is to get a balance between those two frontside, backside, anterior, posterior parts of the body and have them work for the pitcher as he throws the ball. As you look at a pitcher conditioning himself, the best thought processes here is that you build in the off season, you maintain during the season. What is the difference between building and maintaining? When you build, you push yourself to muscle failure. In other words, on your last repetition you have nothing left. In a maintenance program you do the same basic approach to lifting that you did in a building program, except you don't push yourself to muscle failure. What does this mean? It means you can lift at 3:30 in the afternoon and by the time game time rolls around at 7:30 you're at 100%. If you don't push yourself to muscle failure, your body will bounce back to 100% of its capacity in about an hour or an hour and a half. There is muscle strength and muscle endurance and a good little test for anyone that wants to get into weight training is if you'll get on the horizontal bench and we'll see one in a few minutes here. If you get on a horizontal bench and you lift one time as much as you possibly can lift, that will tell you how strong you are. Then take 70% of that. Take 70% of whatever your maximum lift is on one repetition. Put that amount of weight on the bar and try to lift it 10 times that is your muscle endurance. Ideally, you should be able to lift 70% of a 1 max lift 10 times and then you've got balance between muscle strength and muscle endurance. If you can't, then you're a little bit out of balance and you have to get on a conditioning program to help you with that balance, to enable you to go between the lines and throw a baseball consistently with a minimum risk of injury to your arm. What I'd like to do now is run through what amounts to be the Texas Ranger application of the doctor Job program. I'm going to use some very light weights. I would suggest if you've never done the job program or the lightweight program, start with 3 to 5 pounds. Very seldom would you ever lift more than 10 pounds with each dumbbell. The idea here is that you will do with repetitions rather than amount of weight per lift. It's easier on the body. Again, it's part of a loosening up process. Now what I'm going to do is start with exercise one and talk while I'm going through and bring you up to speed on all the exercises, the what's and the whys involved with the JOE program. Exercise number one, and these should be done in sequence to tolerance. In other words, if you're stiff and sore and seven pounds is too much to lift, then back off to three pounds. If you feel real good and you want to go 8, 9, 10 pound dumbbells, go ahead and do it. But okay, here we go. Start with the weights at shoulder point. And what you're going to do is go straight up. Straight up. And what I recommend is a linear lift, a straight up lift. You'll notice that I'm just lifting the weights straight up and touching them over the top of my head. I do five of those and then I do five where I'm actually rotating. If you'll notice, I'm doing a rotation while I'm lifting. Okay, a rotation while I'm lifting. Because when you throw a baseball, your arm goes through internal and external rotation. It's not a linear movement. Alright, that's exercise number one. Exercise number two, you hang the weights at your side just like I'm doing right here. And what you're going to do is bring the hand up, roll over and bring it down again. Here is a linear and a rotational lift. Combined linear and rotational. Linear and rotational. This works. Bicep, tricep, through the elbow area. Easy does. And again, we're not lifting heavy, we're lifting light and we're doing repetitions I would suggest if you're first starting out to doing a set of 10 reps with each of the exercises. As you progress and get further and further along, three sets of ten would be optimal. If you feel like you are doing not enough work with 3 sets of 10, then start lifting a little heavier and back off down to one set of 10. In other words, every exercise, every repetition should be to your tolerance level, depending on your time frame. Alright, exercise number three. All you're going to do is take the weights up, get your elbows as close to your head as you can. This is a tricep exercise and what you're going to do is fire the weights straight up. Try to keep your elbows as close to your ears as possible. You're going to work triceps and what amounts to be your lats on this one. I'm not going to do a full set of ten, I'm just going to do about four or five each here. Alright, that's exercise number three. Exercise number four, you start with your weights down like this. You pretend that your back is against the wall and what you're going to do is lift across your body at a 45 while you turn your palm forward again. This is range of motion. This is weight through range of motion with some rotation in the arm across the body at 45, rotating palm outward as you lift. Okay, exercise number five is basically put the weights right in front of you like this. You're going to lift to shoulder height while you rotate your palms outward. Lift to shoulder height, thumbs down, palms out, and the angle of the weight will be slightly forward. I'm going to turn sideways here and show you what I'm doing. The angle of the weight will be slightly forward of the shoulders. You don't want to lift this way. You want to keep it slightly forward. Okay, I'll spin around back. This works. The spinatus group and the rotator cuff area of your arm of your shoulder. Alright, now exercise number six will be a continuation. You start the same way as exercise number five and then you continue up full range of motion. Now notice how the weights are turning in my hand. We have what amounts to be external internal rotation through a full range of motion, which is exactly what the throwing arm does as you go to throw a baseball. I'll do a couple more for technique here. Let me turn sideways again. Weight out in front a little bit and rotate as you come to the top. One more time. External rotation, internal rotation. For exercise number seven, what you do is spread your legs so that you can just touch the weight on the ground. In other words, I don't want you trying to. It's not a toe touch and a stretch on the back of the leg. Spread your legs to where you're nice and comfortable. Right here. Now what you're going to do is pull the weight to your chest while you rotate the weight. See how I'm rotating the weight as I lift? Pull right to your chest. This is working the posterior side, the back side of your shoulder through a range of motion. And you'll notice that I'm rotating the weight while I lift. Rotate the weight while you lift. Let me do a couple more. Pull right to your chest while you rotate the weight. Find somewhere where you can support your head and therefore your low back. And I want everybody to get in this position right here where your feet are spread nice and relaxed. Hang the weights down in this position right here. Pull to your chest and then extend straight out. Pull to your chest and then extend straight out. And then come down with the weights outside. Pull to your chest and extend straight out. This is also a posterior shoulder exercise. Backside. One more pull to your chest and extend straight out. Now the variation on this one. When you've done five of those, you're going to pull to your chest and extend straight out with your thumbs going under. Pull to your chest and extend straight out with your thumbs going under. One more pull to your chest. Extend thumbs under. I caution you on this one. If you're rehabbing or you have a tender elbow, be very careful with this one. In fact, I would check with your trainer or your physician about whether they want you to do this one. Set your arms in what I call the goalpost position. And what you're going to do is rotate the weight back to comfort. Keeping your elbows stabilized. Rotate the weight forward and stop. Back to where it feels comfortable. Rotate forward and stop. Back forward and stop. This is the last one in the sequence. Now we're doing a linear movement here, alright? And the variation on it is weight goes back and as you rotate forward turn thumbs down. You see the difference. Now you'll notice I'm going to turn sideways. Notice you keep your elbows in that goal post position. Keep them shoulder height. Keep your elbows shoulder height as you do the exercise. Last one. Okay. Now that is the Jobe program. That's the light dumbbell program. It's an insurance policy. It's part of the loosening up process before you even go out to the field. And remember, lifting with the JOB program every day is not going to put yourself in muscle failure. It's of part. Part of what we call an insurance policy to keep you from hurting your arm by bringing blood and oxygen to the areas that you use when you throw a baseball and you've actually loosened yourself up before you go out on the ball field. As we get into this part of the lifting program, these are heavy dumbbells, heavy weights, free weight lifting. Let me qualify this part of the information. If you haven't started shaving, you shouldn't be lifting. What does that mean? There are a few of you out there that are 21 years old and haven't started shaving. I use that analogy because we're not supposed to have the peewees, the youngsters, lifting weight. The Light Joe program won't hurt anybody whether you're 10 years old or whether you're 30 years old, but these heavier weights will. You'll actually, if you haven't started the maturing process, if you haven't reached adolescence, hence our shaving rule, you will actually build muscle tissue stronger than the tendons and ligaments that hold them in the joints, and you'll in effect, run the risk of tearing a muscle or tearing a joint apart because your muscles are too strong. But for those of you that have started to mature, have reached adolescence, and right on up to old people like myself, 40 years old, this heavy weight program, free weight program, is designed to again, give you an insurance policy against hurting yourself when you're throwing a baseball. The first exercise we do, and you'll notice that I have a weight belt on. If you're going to start lifting heavier weights, you should have some support on your low back. And the weight belt I'm wearing can be picked up at any sporting goods store. It's very easy to work with. The first exercise we're going to do is a real simple dumbbell exercise. Take off on what we did with the light dumbbells, and you're going to extend straight up, touch the weight. Extend straight up, touch the weight. And then the second part of it is to rotate when you go to the top. Again, we're finding that rotation through range of motion is a real good lead in to throwing the baseball. Rotation through range of motion. Okay, that was exercise number one. Exercise number two is just a standard curl. All you're going to do is hold the weights at your sides, support your low back, keep your elbows as close to your hips as you possibly can, and lift straight up. Okay. Bicep exercise. Control the weight through the range of motion. Control the weight, control the Weight. Okay, the third part, same exercise, basically in reverse. Again, we're working the front side and the back side of the arm is just a reverse curl. Controlling the weight. If you're pushing yourself to muscle failure, you should not try to throw a baseball off of a mound. You should not work on your skills on the mound. If you're in a heavy lifting program and pushing yourself to muscle failure, what happens is throwing off a mound is a tearing down process and you don't want to tear yourself down twice in a given day. You can throw flat ground all you want, but if you're in a building program where you're pushing yourself to muscle failure, you should not throw off the mound. In a maintenance program. Go about it any way you like. You take the weights, put them at your shoulder points and extend straight up. You do a set where you're just reaching straight up and then you do a set where you're actually rotating the weight. And again, remember, rotation through range of motion, very important part of the exercise. All you're going to do is extend straight up and touch. Extend straight up and touch. Alright, if you're going to do one set, do five, straight up and touch and then five where you're rotating. Control the weight. You're going to pull straight up to your chest. Set of five or a set of ten. And then second part of the rotation is like this. Again linear and rotational and then you'll flip to the other side. Do the same thing with the off arm. Work both throwing arm and non throwing arm. Again for the balance that we're after, try not to get your hands further than shoulder width on the lift. I'm going to go ahead and go through it. Okay. You'll notice that my hands are in effect right at shoulder point width right here. And what I'm going to do, get myself a deep breath. Normally you'll have a spotter. I'm not lifting to max right now. A spotter is someone that will keep the weight from falling on you if you run out of gas. Alright, I'm going to go through what I consider a proper lift right here where you give yourself a breath, get the weight off and you'll come through a full range of motion. Weight all the way down to the chest and extend to full extension all the way down to the chest. Full extension, hands shoulder width. Control the weight through the range of motion. Last one. Okay, let's sit up. Now the thing to remember here is that if you don't push yourself to muscle failure, even though these weights look Big and impressive. You're not pushing yourself to muscle failure after a 10th rep or an 8th rep, whatever you feel like you want to do, you can still have more. You haven't pushed yourself to muscle failure. You haven't. You go out in the ball field and in one, one and a half hours be 100% of what you had, as if you hadn't even lifted on that given day. First exercise will be just a traditional lat pull down and again your hands will be about shoulder width. Try not to get your hands wider than shoulder width. And what you're going to do is pull straight down behind your head. Control the weight, go to what we call a lat row where you put your feet up on the machine and lean back and you're actually like on a rowing machine and you'll pull right to your pecs. Let it go, pull right to your pecs, control the weight as you pull down. You're going to put your elbows together, flare them out, bring them back. And this is the same basic muscle groups. You're working your bicep, deltoid tendon area and your connectors on the backside in the teres major, teres minor region. The machine I'm on right now is just a traditional, what they call pec machine, pectoral machine, front side, anterior part of the throwing process. What you're going to do is make sure that you get yourself squared away. Get your elbows shoulder height, not underneath shoulders, but shoulder height. And then you'll go through what they call a range of motion where you just fire straight forward and use your pecs to control the weight. The key here is to have your elbows shoulder height. The first exercise is a palm down exercise where you work against the weight through a full range of motion, pushing straight out. Alright, that's for the spinatus, for the rotator cuff. You turn your palms up and work the same range of motion. Palms up, same range of motion, palms up, same range of motion. It's a new machine. The Texas Rangers pitchers love it. The data coming back from it is outstanding. If you have a need or desire to find out where this machine is at the end of the video, like I had mentioned earlier, any of the research, any of the data, anything we're bringing up will be identified as to where you can get it and who you can contact for information. This is the final part of our conditioning process with the Texas Rangers. Again, it's a shell program. You work your specifics to where your needs arise and the availability of facilities that you have in Your area, you loosen up to warm up to do your activity. The Dr. Joe program and its minor variations are a loosening up process. It's an insurance policy. The light dumbbells are an insurance policy against you hurting your arm. When you get to the heavier dumbbells and the heavier weights. Make sure and understand the difference between maintaining and and building. If you're maintaining, you're not pushing yourself to muscle failure. In the building process which should be an off season activity, you push yourself to muscle failure. You work opposite muscle groups through a full range of motion. Remember that in the throwing motion, three muscle groups accelerate the arm. Two muscle groups decelerate the arm.
Let's review. In this video cassette, Tom House has shown us a way to achieve the the proper throwing motion. Helped us troubleshoot to identify many of the technique problems common with young pitchers. Shown us numerous workout drills aimed at forming and polishing the correct pitching mechanics and presented a comprehensive section on conditioning with weights. As a pitcher, this is where you want to be. A major league clubhouse. Tom House is here and his philosophy has helped others to get here. In this tape we presented some of the problems that can happen to pitchers and some of the solutions. We hope that it will help you. Thanks for joining us. This is Mark Holtz and good pitching. Hank Aaron does it. Number 715. Many fans remember the joy of Atlanta. Relief pitcher Tom House who caught the record setting home run in the Braves bullpen. It's a memory House will cherish for the rest of his life. A Hall of Fame moment all the way.
I want you to look at your hand. Look at your hand for me. Alright, now all I'm going to do is twist your torso. Look at your hand, look at your hand. Can we get an extra ball here? Attaboy, Mikey. Come ahead. One right after another. Basically the same drill. Now hang on just a second. The same drill as I was doing with Chad but instead of hands on up here, I had hands on with his elbow. I'm setting him in his goalpost position. Relax a little bit. Right in here. Do you want to point your glove there? This go. Where's my arm? Exactly where it's supposed to be to throw the baseball. Alright, now I'm going to do it your way, the wrong way. Now as you go to throw the baseball, do you see why you have a sore elbow? Yeah. Okay. It does not good. As strong as you are, we should take advantage of all of it. Ok, he's going to throw this little mini step and go. Feel that. Now this time I Want you to post position is what we're after. Okay, now take a little step and throw start. I want you to get the feel of turning your torso and holding your arms in a. Alright, now bring yourself back. Now you're not going to do anything. I'm going to do all the work here. Alright, stride out a little further. Okay, now all I'm going to do, I want you to look at your hand. Look at your hand for me. Alright, now all I'm going to do is twist your torso. Look at your hand, look at your hand. Exactly that. Launch that goal post position. Okay, Take a step, turn your torso and throw. Alright, again. Try to keep the ball pointed towards second base as long as you can. A little mini step and throw. Bingo. Now that's the feeling I'm after. Do you feel how at the end your wrist felt? Like it did that. Where's my arm? Exactly where it's supposed to be to throw the baseball. Yeah, the ones before you were flopping. Open a little bit. If you keep your wrist this way when you get out in front. Alright, now I'm going to do it your way, the wrong way. Now as you go to throw the baseball, you really pop the ball. So try to point the ball towards second base. I'll hold your elbows, you point the ball. Take your step. Bingo. That's the feeling I want. Can you lock that in your coconut? Do you see why you have a sore elbow? Yeah. Okay. It does not good. As strong as you are, we should take advantage of all of it. Okay, he's going to throw this little mini. Okay, lock it in the computer. Take a step. Perfect. That's not bad at all. Take that front side and put it where you want the ball to go. Front, side and backside work together. Stop, stop, stop, stop, stop, stop. You really pop the ball. So try to point the ball towards second base. I'll hold your elbows, you point the ball. Take your step. Bingo. That's the feeling I want. Can you lock that in your coconut? Step. Bingo. Feel that. Now this time I want you to feel that teeter totter. Okay, they both. Now you can bend this a little bit. You can bend it a little bit. If that feels okay. Lock it in the computer. Take a step. Perfect. Comfortably. Fine. If that feels comfortable. All I care is that elbows are up and you're in that start. I want you to get the feel of turning your torso and holding your arms in exactly that. Launch that goal post position. Okay, Take a step, turn your torso and throw. Alright, again. Try goal post position. Not here, not there, but right on line. Elbow to elbow, glove to glove. Okay. Little mini step. Try to keep the ball pointed towards second base as long as you can. A little mini step and throw. Alright. You dropped your elbow. That probably felt right to you. Boom. But as you came through, boom. Where'd the ball go? Up real high. Bingo. Now that's the feeling I'm after. Do you feel how at the end your wrist felt like it did that. High elbow, real high elbow. Keep it up there, keep it up, keep it up. Not too bad. Yeah, the ones before you were flopping open a little bit. If you keep your wrist this way, when you get out in front, you add. Let me give you a little hand on that one. I'll give you an A minus on that. As you came through, it was right there, you really popped the ball. So try to point the ball towards second base. I'll hold your elbows, you point the ball take. Point the ball towards second base, elbow high and let it fly. Last one. If it's a good one, take your step. Bingo. That's the feeling I want. Can you lock that in your coconut? Mm. Okay. Lock it in the computer. Take a step. Perfect. Alright. Not bad. You tell me in your own words what you learned about your elbow today. I learned if I keep it up, I can keep that tendon from hurting as bad. Exactly. As long as I keep it pointed towards second base. Gives me a lot more pop. Whip at the end. Right. And this position here is 40 pounds weak. This position here, that's not bad at all. Take that front side and put it where you want the ball to go. Front, side and backside work together. Stop, stop, stop, stop, stop, stop. Feel that teeter totter. Okay, they both. Now you can bend this a little bit. You can bend it a little bit. If that feels comfortable, you're fine. If that feels comfortable, all I care is that elbows are up and you're in that 60 pound strong baseball hand forearm. 50 pounds of work. Make sense even to you and me? Right goal post position. Not here, not there, but right on line. A good teaching device when you're watching your pitchers throw is to tell the kids that what they do with their bottom half when they throw a baseball is exactly what they do when they swing a bat. Elbow to elbow, glove to glove. Okay? Okay. Little mini step. If you control your hips in a good direction, your feet and your legs. Alright, you dropped your elbow, that probably felt right to you. Boom. But as you came through, boom. Where'd the ball go? Up real high. Controlled and you're taking a good route towards where you want to go. The bottom half of a pitch. High elbow, real high elbow. Keep it up there, keep it up, keep it up. Not too bad. And the bottom half of a hitter are exactly the same. The only difference is that the pitcher will lift his leg a little higher. As we look at Scotty Fletcher swinging a bat and Brian House throwing a baseball, you'll see exactly what I mean. Let me give you a little hand on that one. I'll give you an A minus on that. As you came through. It was right there. Point the ball towards second base, elbow high and let it fly. Last one if it's a good. Alright, not bad. You tell me in your own words what you learned about your elbow today. All this is, is the equivalent of surgical tubing with a handle on it. If you can't get it at your local sporting goods store, call any of your orthopedic people and they'll direct you to where they get their surgical tubing and get a little handle on. I learned if I keep it up, I can keep that tendon from hurting as bad. Exactly. As long as I keep it pointed towards second base. Gives me a lot more pop whip at the end, right? And it's a great little training conditioning device. And that's what we're going to do with both Chad and Steve. This position here is 40 pounds weak. This position here is right now two low elbow guys that have had a history of elbow problems. We're going to show you a couple drills that'll 60 pound strong baseball hand, forearm, 50 pounds of work. Help them learn to keep their elbow up where it belongs. Okay? Goal post position. First part of the drill. You got a little tension on the thing. Move a little further away. First part of the drill is just step. Make sense even to you and me, right? Pull. Step and pull. Step and pull. Now I'm going to show you what you do when you go to throw a baseball and tell me how it feels, okay? Step. Not good, huh? No. Step. That's what you do. Not good. The idea is we want a good teaching device. When you're watching your pitchers throw is to tell the kids that what they do want to use all the big muscles. So we're going to step and pull. Feel that feeling? Step and pull. Their bottom half when they throw a baseball is exactly what they do when they swing a bat. If you control your hips in a good direction, your feet and your legs, Step and pull. Stevie, let's try you with this real quick. Then we'll go to part two of the drill. Get your elbow shoulder height, step and pull. Step. You're controlled, and you're taking a good route towards where you want to go. The bottom half of a pitch and pull. Step and pull. Step and pull. Feel that? Do it by yourself and the bottom half of a hitter are exactly the same. The only difference is that the pitcher will lift his leg a little higher. As we look at Scotty Fletcher swinging a bat and Brian House. Do it by yourself. Boom. Elbow, shoulder height. Boom. Boom. Okay, part two, the character builder. Come on back here, Chad. Hold it down, boys. We're filming throwing a baseball. You'll see exactly what I mean. Okay, now this time, move a little closer. You're going to step, pull, and rotate and only come through to here. Okay. Feel that? All this is is the equivalent of surgical tubing with a handle on it. If you can't get it at your local sporting goods store, feel that. If you keep your elbow up, you've got some strength. Now let's take your elbow down. Now don't try to do this because you hurt yourself. Bring your elbow down the way you do. Now pull. You feel that strain? No. Good. That's what we're trying to avoid. Call any of your orthopedic people, and they'll direct you to where they get their surgical tubing and get a little handle on. So again, the drill is step, pull, rotate, and you rotate with your torso. Pull, rotate. Perfect drill. That's what I'm after. Do that again. That's what you do when you throw a baseball. Can you feel that? Yep. Steve, come and try it. And if it bothers you, don't go through the range of motion. But I want you to get the feel. You might have to get a little closer because I don't want to hurt yourself. Okay, Turn with your toes. Feel that strain on your elbow. You got to keep the big muscles up. Turn and rotate with your torso. Yes. Now see how you flapped your wrist? All I want you to do is turn your torso. Feel the difference? Turn your torso. That's position of strength. Step on it. And it's a great little training conditioning device. And that's what we're going to do with both Chad and Steve. Perfect. One more. Good. That makes sense. Both you guys should invest in one of these courts. Feels good in your shoulder. And yeah, it's a building device as well as a training device for mechanics. The two fit called cross specificity of exercise. And right now, two low elbow guys that have Had a history of elbow problems. We're going to show you a couple drills that will help them learn to keep their elbow up where it belongs. Okay? Goal post position. First part of the drill, you got a little tension on the thing. Move a little further away. First part of the drill is just step. Without talking too big of words, that is what you need to do. Besides the 25, 30 throws a day from the line drill, like we were doing, you need to do this 25 to 50 times every day. You can improve your fastball, alright, by three or four miles an hour because you pull. Step and pull, step and pull. Now I'm going to show you what you do when you go to throw a baseball and tell me how it feels. Okay? Step, stop launching and you start throwing. You're going to give yourself pain free range of motion. Not good, huh? No. Step, that's what you do. Not good. The idea is we want to use all the big muscles. So we're going to step and pull. Feel that feeling? Yep. Step and pull. No, no, no, no, I don't want to. Yes, yes, yes, yes. Always above your shoulder. Steve, step and pull. Stevie, let's try you with this real quick. Then we'll go to part two of the drill. My lips always above your shoulder. It's got to be done. Otherwise, as much as you want to pitch, it ain't going to happen, partner. Alright, remember, 60 pounds strong, 40 pounds weak. 50 pound object. Get your elbow shoulder height. Step and pull. Step the wall drills to help reinforce everything we just talked about on the mound. But then pull. Step and pull. Step and pull. Feel that? Do it by yourself. Their butt against the wall. Come to the set position, lift their leg. If they kick their leg, do it by yourself. Boom. Elbow shoulder height. Boom, boom. Okay, part two, the character builder. Come on back here, Chad. Hold it down, boys. We're filming. They bang their head as they take their root. If they spin or drop their hand, they're going to bang against the wall. If they do everything properly, boom, boom, boom. They throw the ball efficiently without banging into the wall. All it is is a wall reinforcer for the mechanic. Okay, now this time move a little closer. You're going to step, pull and rope we just talked about there. Okay, now the reverse. If he lifts his leg and keeps his foot underneath his knees in a rotate and only come through to here. Okay, Feel that balanced position. Can't throw the hands away, can't kick the foot away. Comes right down the wall. And feel that if you keep your elbow up and Throw. That's it. Lift. Throw. Reinforces everything we were just talking about on the mount. You've got some strength. Now. Let's take your elbow down. Now don't try to do this because you hurt yourself. Bring your elbow down the way you now pull. You feel that strain? No. Good. That's what we're trying to avoid. So again, the drill is step, pull, rotate and you rotate with your torso. We mentioned earlier that three muscle groups on the front side, the anterior side of the body, accelerate the arm and two muscle groups on the posterior or backside decelerate the arm. The whole idea of weight training is to get a balance between those two frontside, backside, anterior, posterior parts. Pull, Rotate. Perfect drill. That's what I'm after. Do that again. That's what you do when you throw a baseball. Can you feel that? Steve, come and try it. And if it boxes the body and have them work for the pitcher as he throws the ball. As you feathers, you don't go through the range of motion. But I want you to get the feel. You might have to get a little closer because I don't want to hurt yourself. Okay, Turn with your toes. Feel that strain on your elbow. You got to keep the look at a pitcher conditioning himself. The best thought processes here is that you build in the off season, you maintain during the season. What is the difference between building and maintaining? When you build, you push yourself to muscle failure. In other words, on your last repetition, you have nothing left. In a maintenance program, the big muscles up, turn and rotate with your torso. Yes. Now see him. You do the same basic approach to lifting that you did in a building program, except you don't push yourself to muscle failure. What does this mean? It means you can lift at 3:30 in the afternoon and by the time game time rolls around at 7:30 you're at 100%. If you don't push yourself to muscle failure, your body will bounce back to 100% of its capacity. How you flopped your wrist. All I want you to do is turn your torso. Feel the difference. Turn your torso. That's position of strength. Step. Perfect. One more. Good. That makes sense. Both you guys should. In about an hour or an hour and a half. There is muscle strength and muscle endurance. And a good little test for anyone that wants to get into weight training is if you'll get on the horizontal bench and invest in one of these courts. Feels good in there, children. Instead of the. Yeah, it's a building device and. And we'll see one in a few minutes here. If you get on a horizontal bench and you lift one time as much as you possibly can lift. That will tell you how strong you are. Then take 70% of that as well as a training device for mechanics. The two fit called cross specificity of exercise. And without, you know, talking too big of words, that is what you need to do. Besides the 25, 70% of whatever your maximum lift is on one repetition, put that amount, 30 throws a day from the line drill like we were doing. You need to do this 25 to 50 times every day, weight on the bar and try to lift it 10 times. That is your muscle endurance. Ideally, you should be able to lift 70% of a 1 max. You can improve your fastball alright by 3, 4 miles an hour because you lift 10 times and then you've got balance between muscle strength and muscle endurance. If you can't, then you're a little bit out of balance and you have to get on a conditioning program to help you with that balance, to enable you to go between the lines. Stop launching and you start throwing. You're going to give yourself pain free range of motion. No, no, no, no, I don't want to. Yes, yes, yes, yes. Always above your shoulder, Steve. And throw a baseball consistently with a minimum risk of injury to your arm. My lips. Always above your shoulder. It's got to be done. Otherwise as much as you. What I'd like to do now is run through what amounts to be the text I want to pitch. It ain't going to happen, partner. All right. Remember, 60 pounds strong, 40 pounds weak, 50 pound object. The wall drills to help reinforce everything we just talked about on the mound, put this ranger application of the Dr. Joe program. I'm going to use their butt against the wall, come to the set position, lift their leg. If they kick their leg in very light weights. I would suggest if you've never done the Joe program or the lightweight program, start with three to five pounds. Very seldom would you ever lift more than ten pounds with each dumbbell. The idea here is they bang their head as they take their root. If they spin or drop their hand, they're going to bang against the wall. If they do everything properly, boom, boom, boom. That you will do with repetitions rather than amount of weight per lift. It's easier on the body again, it's part of a loosening up process. Now what I'm going to do is start with exercise one and talk while I'm going through and bring you up to speed. They throw the ball efficiently without banging into the wall. All it is Is a wall reinforcer for the mechanics we just talked about there. Okay, now the reverse. If he lifts his leg and keeps his foot underneath his knees in a balance on all the exercises, the what's and the whys involved with the Joe balance position. Can't throw the hands away, can't kick the foot away, comes right down the wall and can throw. That's it. Lift, throw. Reinforces everything we were just talking about on the mount program. Exercise number one. And these should be done in sequence to tolerance. In other words, if you're stiff and sore and seven pounds is too much to lift, then back off to three pounds. If you feel real good and you want to go 8, 9, 10 pound dumbbells, go ahead and do it. But. Okay, here we go. Start with the weights at shoulder for point. And what you're going to do is go straight up. Straight up. And what I recommend is a linear lift, a straight up lift. You'll notice that I'm just lifting the weights straight up and touching them over the top of my head. I do five of those and then I do five where I'm actually rotating. If you'll notice, I'm doing a. We mentioned earlier that three muscle groups on the front side, the anterior side of the body, accelerate the arm and two muscle groups on the posterior or backside. Rotation while I'm lifting. Okay, a rotation. Decelerate the arm. The whole idea of weight training is to get a balance while I'm lifting. Because when you throw a baseball, your arm goes through internal and external rotation. It's not a linear movement. Alright, that's exercise number one. Exercise number two, you hang the weights at your side just like I'm doing right between those two front, side, backside, anterior, posterior parts of the body and have them work for the pitcher as he throws the ball. As you look at a pitcher conditioning himself, the best thought processes here is that you build in the arm here and what you're going to do is bring the hand up, roll over and bring it down again. Here is a linear and a rotational lift. Combined linear and rotational. Linear and rotational. This works bicep, tricep, through the elbow area. Off season, you maintain during the season. What is the difference between building and maintaining? When you build, you push yourself to muscle failure. Easy does. And again, we're not lifting heavy, we're lifting light. In other words, on your last repetition you have nothing left. In a maintenance program you do the same basic approach to lifting that you did and we're doing repetitions. I would suggest if you're first starting out to doing a set of 10 reps with each of the exercises. As you progress and get further and further along. Three sets of ten would be optimal if you feel like you are building program, except you don't push yourself to muscle failure. What does this mean? It means you can lift at 3, are doing not enough work with 3 sets of 10, then start lifting a little heavier and back 30 in the afternoon and by the time game time rolls around at 7:30, you're at 100% back off down to one set of 10. In other words, every exercise, every repetition should be to your tolerance level depending on your time frame. If you don't push yourself to muscle failure, your body will bounce back to 100% of its capacity in about an hour or an hour and a half. Alright, exercise number three. All you're going to do is take the weights up, get your elbows as close to your head as you can. This is a tricep exercise and what you're going to do is fire the weights straight up. Try to keep your elbows as close to your ear. There is muscle strength and muscle endurance and a good little test ears as possible. You're going to work triceps and what amounts to be your lats. For anyone that wants to get into weight training is if you'll get on the horizontal bench and we'll see one in a few minutes here. If you get on a horizontal bench and you lift one time, this one, I'm not going to do a full set of ten. I'm just going to do about four or five each here. Alright, that's exercise number three. Exercise number four. You start with your weights down like this. You pretend that your back is against the wall and what you're going to do is lift across your body at a 45 as much as you possibly can lift. That will tell you how strong you are. Then take 70% of that. Take 70% of whatever your maximum lift is on one repetition. Put that amount of weight on the bar and try to lift it 10 times. That is your muscle endurance while you turn your palm forward again. This is range of motion. This is weight through range of motion with some rotation in the arm. Ideally you should be able to lift 70% of a 1 max across the body at 45, rotating palm outward as you lift. Lift 10 times and then you've got balance between muscle strength and muscle endurance. If you can't, then you're a little bit out of balance and you have to get on a conditioning program to help you with that balance to enable you to go between the lines. Okay. Exercise number five is basically put the weights right in front of you like this. You're going to lift to shoulder and throw a baseball consistently with a minimum risk of injury to your arm. Shoulder height. While you rotate your palms outward. Lift to shoulder height, thumbs down, palms out. And the angle of the weight will be slightly forward. I'm going to turn sideways here and show you what I'm doing. The angle of the weight will be slightly forward of the shoulders. You don't want. What I'd like to do now is run through what amounts to be the Texas Ranger application of the Dr. Jobe program. I'm going to use Sona lift. This way you want to keep it slightly forward. Okay, I'll spin around back. This works the spinatus group and the rotator cuff area of your arm of your shoulder. Alright. Now exercise number six will be a continuation. You start in very light weights. I would suggest if you've never done the Joe program or the lightweight program, start with three to five pounds. Very seldom would you ever lift the same way as exercise number five. And then you continue up full range of motion. Now notice how the weights are turning in my hand. We have what amounts to be x more than 10 pounds with each dumbbell. The idea here is that you will do with repetitions rather than amount of weight per lift. It's easier on the body. Again, it's part of a loosening up process. Now what I'm going to do is start with exercise one and talk while I'm going through and bring you up to speed. External internal rotation through a full range of motion which is exactly what the throwing arm does as you go to throw a baseball. I'll do a couple on all the exercises, the what's and the whys involved with the job. Morpher technique. Here let me turn sideways again, weight out in front a little bit and rotate as you come to the top. One more time program exercise number one. And these should be done in sequence to tolerant external rotation, internal rotation. In other words, if you're stiff and sore and seven pounds is too much to lift, then back off to three pounds. If you feel real good and you want to go 8, 9, 10 pound dumbbells, go ahead and do it. But. Okay, here we go. Start with the weights at shoulder. For exercise number seven. What you do is spread your legs so that you can just point. And what you're going to do is go straight up, straight up, touch the weight on the ground. In other words, I Don't want you trying to. It's not a toe touch. And what I recommend is a linear lift, a straight up lift. You'll notice that I'm just lifting the weights straight up and touching them over the top of my, my head. I do five of those and then I do five where I'm actually rotating. If you'll notice, I'm doing a rotation, a stretch on the back of the leg. Spread your legs to where you're nice and comfortable. Right here. Now what you're going to do is pull the weight to your chest while you rotate the weight. See how I'm rotating the weight as I lift. Pull right to your chest. This is working the posterior rotation while I'm lifting. Okay. A rotation side the back side of your shoulder through a range of motion. And you'll notice that I'm rotating the weight while I lift. Rotate the weight while you lift. Let me do a couple more while I'm lifting. Because when you throw a baseball, your arm goes through internal and external rotation. It's not a linear movement. Alright, that's exercise number one. Pull right to your chest while you rotate the weight. Exercise number two, you hang the weights at your side just like I'm doing right here. Somewhere where you can support your head and therefore your low back. And I want everybody to get in this position right here where your feet are spread nice and relaxed. Hang the weights down in this position right here. Pull to your chest in here. And what you're going to do is bring the hand up, roll over and bring it down again. Here is a linear and a rotational lift. Combined linear and rotational linear and extend straight out. Pull to your chest and then extend straight out and then come down with the weights outside. Pull to your chest and extend straight out. This is also a posterior shoulder exercise. Backside. One more and rotational. This works. Bicep, tricep through the elbow area. Easy does. And again. We're not lifting heavy, we're lifting light. Pull to your chest and extend straight out. Now the variation on this one, when you've done five of those, you're going to pull to your chest and extend straight out with your thumbs going under. Pull to your chest and extend straight out with your thumbs. And we're doing repetitions. I would suggest if you're first starting out to doing a set of 10 reps with each of the exercises. As you progress and get further and further along. Going under. One more pull to your chest. Extend thumbs under. I caution you on this one, if you're rehabbing or you have three sets of ten would be optimal. If you are you feel like you have a tender elbow, be very careful with this one. In fact, I would check with your trainer or your physician about whether they want you to do this one. Set your arms in what I call the goal post position. And what you're going to do is not enough. Work with three sets of 10. Then start lifting a little heavier. And back. Rotate the weight back to comfort. Keeping your elbows stabilized. Rotate the weight forward and stop back to where it feels comfortable. Rotate forward and stop. Back forward and stop. This is the last one in the sequence. Now we're doing a linear movement here. Back off down to one set of 10. In other words, every exercise, every repetition should be to your tolerance level, depending on your time frame. Exercise number three, all you're going to do is take the weights up and the variation on it is weight goes back and as you rotate forward, turn thumbs down, you see the difference. Now you'll notice I'm going to turn sideways, Notice you keep your elbows in that goal post position. Keep them shoulder height. Keep your elbows shoulder height. Get your elbows as close to your head as you can. This is a tricep exercise and what you're going to do is fire the weights straight up. Try to keep your elbows as close to your ears as possible. You're going to work triceps and what amounts to be your lats on this one. I'm not going to do a full set of 10. I'm just going to do about four or five each here as you do the exercise. Last one. Okay. Now that is the JOBE program. That's the light dumbbell program. It's an insurance policy. It's part of the loosening up process before you even go out to the field. And remember, lifting with the job program every day is not going to put yourself in muscle failure. It's part of what we call an insurance policy to keep you. Alright, that's exercise number three. Exercise number four. You start from hurting your arm by bringing blood and oxygen to the areas that you use. When you're with your weights down like this, you pretend that your back is against the wall. And what you're going to do is lift across your body at a 45. Throw a baseball and you've actually loosened yourself up before you go out on the ball field. As we get into this part of the lifting program, while you turn your palm forward again. These are heavy dumbbells, heavy weights, free weight lifting. Let me qualify this part of the information. If you haven't started shaving, you shouldn't be lifting. What does that mean? There are a few of you out there. Range of motion. This is weight through range of motion with some rotation in the arm that are 21 years old and haven't started shaving. I use that analogy because we're not supposed across the body at 45, rotating palm outward as you lift to have the peewees, the youngsters, lifting weight. The light Joe program won't hurt anybody whether you're 10 years old or whether you're 30 years old, but these heavier weights will. You'll actually. Okay. Exercise number five is if you haven't started the maturing process, if you haven't reached adolescence, hence our shaving rule, you will actually build muscle tissue stronger than the tendons and ligaments that hold them in the joints. Basically put the weights right in you of front, front of you, like this. You're going to lift to shoulder and you'll in effect run the risk of tearing a muscle or tearing a joint apart because your muscles are too strong. But for those of you that have started to mature shoulder height while you rotate your palms outward, lift to shoulder height, thumbs down, palms out. And the angle of the weight poor have reached adolescence and right on up to old people like myself, 40 years old. This heavyweight program, free weight program is designed to be slightly forward. I'm going to turn sideways here and show you what I'm doing. The angle of the weight will be slightly forward of the shoulders. You don't want to lift this way. You want to keep it slightly forward again. Give you an insurance policy against hurting yourself when you're throwing a baseball. Okay, I'll spin around back. This works. The spinatus group, the first exercise we do. And you'll notice that I have a weight belt on. If you're going to start lifting heavier weights, you should have some support on your low back. And the weight belt I'm wearing can be picked up at any sporting goods store. It's very easy to work with. And the rotator cuff area of your arm, of your shoulder. Alright, the first exercise we're going to do is a real simple dumbbell exercise. Take off on what we did with the light dumbbells and you're going to extend straight up. Now exercise number six will be a continuation. You start up, touch the weight, extend straight up, touch the weight, and then the second part of it is to rotate when you go to the top again. We're finding that rotation through range the same way as exercise number five. And then you Continue up. Full range of motion. Now notice how the weights are turning in my hand. We have what amounts to be external range of motion is a real good lead in to throw in the baseball. Rotation through range of motion. Okay, that was exercise number one. Exercise number two is just a standard curl. All you're going to do is hold the weights at your sides, support your low back, keep your elbows as close to your internal rotation through a full range of motion, which is exactly what the throwing arm does. As you go to throw a baseball. I'll do a couple of your hips as you possibly can and lift straight up. Okay, bicep exercise. Control the weight through the range of motion. Control the weight. Control the weight. Okay, the third part. Same exercise, more for technique. Here let me turn sideways again. Weight out in front a little bit and rotate as you come to the top. One more time. Basically in reverse again, we're working the front side and the back side of the arm is just a reverse external rotation, internal rotation. For exercise number seven, what you do is spread your legs so that you can just curl. Controlling the weight. If you're pushing yourself to muscle failure, you should not try to throw a baseball off of a mound. You should not work. Touch the weight on the ground. In other words, I don't want you trying to. It's not a toe touch and a stretch on the back of the leg. Spread your legs to where you're nice and comfortable right here. Now what you're going to do on your skills on the mound. If you're in a heavy lifting program and pushing yourself to muscle failure, what happens is throwing off a mound is a tearing down process and you don't want to tear yourself down twice in a given day. You can throw flat ground all you want, but if you're in a building program where you're pushing yourself to muscle failure, you should not throw off the mount. Pull the weight to your chest while you rotate the weight. See how I'm rotating the weight as I lift? Pull right to your chest. This is working the posterior maintenance program. Go about it any way you like. You take the weights, put them at your shoulder points and extend straight up. You do a set where you're just reaching straight up. And then you do a set where you're actually rotating the weight. And again, remember, rotation through the backside of your shoulder through a range of motion and you'll notice that I'm rotating the weight while I lift. Rotate the weight while you lift. Let me do a couple more. Range of motion. Very important part of the Exercise, all you're going to do is extend straight up and touch. Extend straight up and touch. Alright, if you're going to do one set, do five. Straight up and touch and then five. Pull right to your chest while you rotate the weight. Find you're rotating. Control the weight. Find somewhere where you can support your head and therefore your low back. And I want everybody to get in this position right here where your feet are spread nice and relaxed. Hang the weights down in this position right here. Pull to your chest and you're going to pull straight up to your chest. Set of 5 or and extend straight out. Pull to your chest and then extend straight out and then come down with the weights outside. Pull to your chest and extend straight out. This is also a posterior shoulder exercise. Backside. One more pull to your chest and extend straight out. Now the variation on this one. When you've done five of those, you're going to pull to your chest and extend straight out with your thumbs going under. Pull to your chest and extend straight out with your thumbs going under. One more pull to your chest. Extend thumbs under. I caution you on this one. If you're rehabbing or you have a tender elbow, be very careful with this one. In fact, I would check with your trainer or your physician about whether they want you to do this one. Set your arms in what I call the goal post position. And what you're going to do is a set of 10. And then second part of the rotation is like this again linear and rotational and then you'll flip to the other side. Do the same thing with the off arm. Work both throwing arm and non throwing arm. Again for the balance that we're after. Try not to get your hands further than shoulder width on the lift. I'm going to go ahead and go through it. Okay. You'll notice that my hands are in effect right at shoulder point width right here. And what I'm going to do, get myself a deep breath. Normally you'll have a spotter. I'm not lifting to max right now. A spotter is someone that will keep the weight from falling on you if you run out of gas. Alright, I'm going to go through what I consider a proper lift right here. Rotate the weight back to comfort. Keeping your elbows stabilized. Rotate the weight forward and stop while you give yourself a breath. Get the weight off and you'll come through a full range of motion back to where it feels comfortable. Rotate forward and stop back and weight all the way down to the chest and extend to full extension all the way down to the chest, full extension, hands shoulder width. Control the weight through the forward and stop. This is the last one in the sequence. Now we're doing a linear movement here, alright. And the variation on it is weight goes back and as you rotate forward turn, thumbs down, you see the difference. Now you'll notice range of motion. Last one. Okay, let's sit up. Now the thing to remember here is that if you don't push yourself to muscle failure, even though these weights look big and impressive, you're not pushing yourself to muscle failure. After a 10th rep or an 8th rep, whatever you feel like you want to do, you can still have more. You haven't pushed yourself to muscle failure. You can go out in the ball field and in one, one and a half hours be 100% of what you had as if you hadn't even lifted on that given day. First exercise will be just a traditional lat pull down and again your hands will be about shoulder width. Try not to get your hands wider than shoulder width. So I'm going to turn sideways. Notice you keep your elbows in that goal post position. Keep them shoulder height. Keep your elbows shoulder height as you do the exercise. Last one. Okay. Now that is the job program. That's the light dumbbell program. It's an insurance policy. It's part of the loosening up process before you even. And what you're going to do is pull straight down behind your head, control the weight, go to what we call a lat row where you put your feet up on the machine and lean back and you're actually like on a rowing machine and you'll pull right and go out to the field. And remember, lifting with the Joe program every day is not going to put yourself in muscle failure. It's part of what we call an insurance policy to keep you from hurting your arm by bringing blood and oxygen to the areas that you use. When you to your pecs, let it go. Pull right to your pecs, control the weight as you pull down. You're going to put your elbows together, flare them out, bring them back. And this is the same basic muscle groups. Throw a baseball and you've actually loosened yourself up. Before you go out on the ball field. You're working your bicep, deltoid tendon area and your connectors on the backside in the teres major, teres minor region. The machine I'm on right now is just a traditional, what they call pec machine, pectoral machine, front side, anterior part of the throwing process. What you're going to do is make sure that you get yourself squared away. Get your elbows shoulder height, not underneath shoulders, but shoulder height. And then you'll go through what they call a range of motion where you just fire straight forward. As we get into this part of the lifting program, these are heavy dumbbells, heavy weights, free weight lifting. Let me qualify this part of the information. If you have and use your pecs to control the weight, the key here is to have your elbows shoulder height. The first exercise is a palm down exercise where you work against the weight through a full range of motion. Pushing straight out. Alright, that's for the spinatus. For the rotator cuff, you turn your palms up and work the same range of motion, palms up, same range of motion, palms up, same range of motion. It's a new machine. The Texas Rangers pitchers love it. The data coming back from it is outstanding. If you have a need or desire to find out where this machine is at the end of the video, once started shaving, you shouldn't be lifting. What does that mean? There are a few of you out there that are 21 years old and haven't started shaving. I use that analogy because we're not supposed to have the peewees, the youngsters, lifting weight. The Light Joe program won't hurt anybody whether you're 10 years old or whether you're 30 years old. But these heavier weights will. You'll actually, like I had mentioned earlier, any of the research, any of the data, anything we're bringing up will be identified as to where you can get it and who you can contact for information. This is the final part of our conditioning process with the Texas Rangers. Again, it's a shell program. You work your specifics to where your needs arise and the availability of facilities that you have in your area. You loosen up to warm up to do your activity. The Dr. Joe program and its minor variations are a loosening up process. It's an insurance policy. The light dumbbells are an insurance policy. If you haven't started the maturing process, if you haven't reached adolescence. Hence our shaving rule against you hurting your arm. When you get to the heavier dumbbells and the heavier weights, make sure and understand the difference between maintaining and building. If you're maintaining, you will actually build muscle tissue stronger than the tendons and ligaments that hold them in the joints. And you'll in effect run the risk of tearing a muscle or tearing a joint apart because your muscles are too strong. But for those of you that have started to mature, you're not pushing yourself to Muscle failure. In the building process which should be an off season activity, you push yourself to muscle failure. You work opposite muscle groups through a full range of motion. Remember that in the throwing motion three muscle groups accelerate the arm. Two muscle groups decelerate the arm.
Let's review in this video cassette Tom House has shown us a way to achieve the proper throwing motion. Helped us troubleshoot to identify many of the technique problems common with young pitchers.
Shown us numerous have reached adolescents and right on up to old people like myself, 40 years old.
Workout drills aimed at forming and polishing the correct pitching mechanics. And presented a comprehensive section on conditioning with weights.
This heavyweight program free weight program is designed to.
As a pitcher this is where you want to be. A major league clubhouse. Tom House is here and his philosophy.
Has helped others to get again give you an insurance policy against hurting yourself when you're throwing a baseball. The first exercise we do and you'll notice that I have a weight belt.
On if here in this tape we presented some of the problems that can happen to pitchers and some of the solutions. We hope that it will help you. Thanks for joining us. This is Mark Holtz and good pitching.
If you're going to start lifting heavier weights, you should have some support on your low back and the weather does it.
Number 715. Many fans remember the joy of Atlanta relief pitcher Tom House who caught the record setting home run in the Braves bullpen. It's a memory House will cherish for the rest of his life. A Hall of fame.
The weight build I'm wearing can be picked up at any sporting goods store. It's very easy to work with. The first exercise we're going to do is a real simple dumbbell exercise. Take off on what we did with the light dumbbells and you're going to extend straight up.
Moment all the way.
Up. Touch the weight. Extend straight up, touch the weight. And then the second part of it is to rotate when you go to the top. Again we're finding that rotation through range of motion is a real good lead in to throw on the baseball. Rotation through range of motion. Ok, that was exercise number one. Exercise number two is just a standard curl. All you're going to do is hold the weights at your sides, support your low back, keep your elbows as close to your hips as you possibly can and lift straight up. Ok. Bicep exercise. Control the weight through the range of motion. Control the weight. Control the weight. Okay. The third part. Same exercise basically in reverse again we're working the front side and the back side of the arm is just a reverse curl. Controlling the weight. If you're pushing yourself to muscle failure, you should not try to throw a baseball off of a mound. You should not work on your skills on the mound. If you're in a heavy lifting program and pushing yourself to muscle failure, what happens is throwing off a mound is a tearing down process and you don't want to tear yourself down twice in a given day. You can throw flat ground all you want, but if you're in a building program where you're pushing yourself to muscle failure, you should not throw off the mount. In a maintenance program, go about it any way you like. You take the weights, put them at your shoulder points and extend straight up. You do a set where you're just reaching straight up and then you do a set where you're actually rotating the weight. And again, remember, rotation through range of motion, very important part of the exercise. All you're going to do is extend straight up and touch. Extend straight up and touch. Alright, if you're going to do one set, do five, straight up and touch and then five where you're rotating. Control the weight. You're going to pull straight up to your chest. A set of 5 or a set of 10. And then second part of the rotation is like this again, linear and rotational and then you'll flip to the other side. Do the same thing with the off arm. Work both throwing arm and non throwing arm. Again for the balance that we're after, try not to get your hands further than shoulder width on the lift. I'm going to go ahead and go through it. Okay. You'll notice that my hands are in effect right at shoulder point width right here. And what I'm going to do, get myself a deep breath. Normally you'll have a spotter. I'm not lifting to max right now. A spotter is someone that will keep the weight from falling on you if you run out of gas. Alright, I'm going to go through what I consider a proper lift right here where you give yourself a breath, get the weight off and you'll come through a full range of motion. Weight all the way down to the chest and extend to full extension. All the way down to the chest. Full extension, hands shoulder width. Control the weight through the range of motion. Last one. Okay, sit up. Now, the thing to remember here is that if you don't push yourself to muscle failure, even though these weights look big and impressive, you're not pushing yourself to muscle failure. After a 10th rep or an 8th rep, whatever you feel like you want to do, you can still have more. You haven't pushed yourself to muscle failure. You can go out in the ball field and in one, one and a half hours be 100% of what you had, as if you hadn't even lifted on that given day. First exercise will be just a traditional lat pull down and again your hands will be about shoulder width. Try not to get your hands wider than shoulder width. And what you're going to do is pull straight down behind your head, control the weight, go to what we call a lat row, where you put your feet up on the machine and lean back and you're actually like on a rowing machine and you'll pull right to your pecs. Let it go. Pull right to your pecs, control the weight as you pull down. You're going to put your elbows together, flare them out, bring them back. And this is the same basic muscle groups. You're working your bicep, deltoid, tendon area and your connectors on the backside and the teres Major Terry's minor reaching. The machine I'm on right now is.
More from Tom




Throwing Guru Tom House Talks Tom Brady, Josh Allen, Mahomes & More with Rich Eisen | Full Interview

Tom House, Godfather of Pitching/Throwing Biomechanics & Founder National Pitching Association