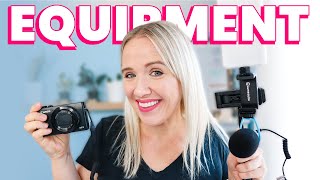
MINIMAL YouTube Equipment To Get A Channel Started
Trena Little’s tutorial explains how to start or level up a YouTube channel with minimal, multipurpose, and affordable equipment rather than expensive pro setups. She emphasizes that a smartphone is sufficient for filming and highlights small, versatile purchases that improve quality: a Lume Cube Creator Kit (light + mic + phone mount), a Logitech C920 webcam, compact cameras (Canon G7X and Canon M50 with a Sigma lens), ring lights/softboxes or window light for illumination, and audio options from earbuds to a Blue Yeti desktop mic and an SM58 on a boom. She also covers practical accessories: LaCie external drives for backups, multiple batteries and memory cards, DIY sound absorption (blankets/pillows), and workflow tips (don’t record via Zoom; use local recorders like ScreenFlow/QuickTime/iMovie). She promotes subscribing for a follow-up video about her "video game plan."
Questions this video answers
Lume Cube Creator Kit
About $199
Logitech C920
Canon G7X
Blue Yeti
The good thing about starting on YouTube now is that you don't need to get a lot of equipment or even expensive equipment to get high quality video. But you do need to be smart about the equipment that you do buy. So I'm going to share with you the minimal equipment that you need to start your YouTube channel or even up level your YouTube channel without spending thousands of dollars doing it. Hit that like button if you are finally ready for someone to simplify this whole video equipment style. Hey guys, welcome back. My name is Trena. If you're brand new here and every single Wednesday I post videos helping you create a video strategy that simplifies your content creation process and helps grow your business. So if that sounds like something you're interested in, make sure you hit subscribe now. And one thing I like to do in every single video before we dive in is personally thank one of you who have commented and subscribed. So Mrs. Edmonds cultural corner, thank you so much for commenting on the video where I Talked about how YouTube could be your answer to the mess that Facebook ads. I'm so glad you found that helpful. If you'd like to be featured as well in my YouTube videos coming up, make sure you leave a comment below letting me know a biggest takeaway from this video. You can also take a selfie of yourself, tag me over on Instagram, and I would love to share that photo as well here on my channel. One thing that I'm gonna be sharing at the end of this video so make sure you stick around is I'm gonna turn the camera around and show you my setup. Look, I like to keep things super simple. I'm not a tech person either and so I'm gonna show you where my camera is, my lighting and all of that. And this is a brand new setup I'm doing today that I so you're gonna see something brand new. So when it comes to equipment, let's first start with camera. Because you need a camera to shoot video, I'm gonna tell you the easiest minimal thing that you need is your cell phone. Really the cameras in these phones are just as good as any kind of camera that you're going to get. You already have one, it's in your pocket and I would literally just get started here. In fact, I've done some vlogging recently and when I've been vlogging I've only been using my phone and a lot of times you'll hear people say to use your rear facing camera. I been using my selfie camera and still getting really great quality video. I'm going to tell you my secret here in a minute. So all you really need to get started on your YouTube channel is your phone. Nobody's going to know if it's shot on your phone or not, because the people that are watching my vlogs don't even know that they're being shot on my phone. So the one thing that's changed my vlogging game is this little contraption called a loom cube. And what I love about this thing, let me get some space in here for it, is it's an all in one. So you'll see. This is a microphone. This is a light. You can put your phone right in here. There's a clip for your phone. You could do it vertical or horizontal. There are no cords, everything. This is chargeable. This is the tripod that comes with it. And so it makes your YouTube setup one thing. You plug this right into your phone so that you have the audio. You charge this and you turn it on right here. Let me see if I get that on. And you have a light also on the back of this. It tells you the brightness of your light and how long your battery is going to last for your light. So this is at a 1%. And we can go the whole way up to 100%. And it's all the lighting that I've needed to create my vlogs. To just say to get this level of video quality with just this little setup has been amazing. Like I said, I'm not having to lug microphones and light boxes around my house as I share a little bit more behind the scenes. It goes for about $199, I believe. This is called the Creators Kit. And I will leave all the links to everything I mentioned here down in the description box below. But honestly, $200 for an entire that you can take anywhere is a great investment. What I love to do with the equipment that I do invest in is making sure I can use it in more than one way. So with that, I can also do Instagram lives, I can do Instagram reels, I can do stories, all on that Lume cube with great audio and great sound. Seriously, that is a game changer for video quality. All right, next up for camera is a webcam. Again, I like to get equipment that has multiple purposes. A Logitech C920 that films in HD or shoots in HD. You can use this for live streaming as well. You can use this for zoom calls. And so you're not just using it for creating YouTube videos anymore. Now real quick about webcams. If you're going to shoot your videos through a webcam and you're shooting them through your computer, do not shoot them through zoom. When you record videos through zoom, it's actually through through the Internet. And so your quality isn't going to be there because the fluctuation of Internet broadband stuff, trust me. Go look at some of our videos that we've done for our podcast, the Video refrain podcast. You can see the quality just isn't as crisp as these videos are. Or even my cell phone videos because we shot through zoom. So instead make sure you're shooting on something like Screen Flow or Quicktime or even in Imovie. You can record videos through imovie. You need to make sure you're not shooting through through the Internet because that's really going to affect the quality of your videos. Now if you're ready to go even up a step, I would recommend getting something like this. It's the Canon G7X. This is the very first camera that I bought for my YouTube channel. I've had this for like six years now. I'm not using this right now. I will tell you what I am using. But the reason why I like this is because it's so small, so compact. I could take it to the park when my kids were smaller. I can throw it in my purse if I need to. You have this flip up stick screen so you can see, you know, if you're in focus, if you're on the screen, what's behind you and it's just point and shoot. You don't have to worry about lenses, you don't have to worry about focusing. It is so easy to use. This is the very first version. I think they're at like a third version. They are a little pricey. They may be a couple hundred dollars. But I will tell you I got my use out of this and I still use this when I'm in a pinch as well. The one thing that I will tell you is for this particular camera, the audio just wasn't that good. Great. So I had to use an external mic, which I'm going to talk about here in a minute. Now what I am using right now to record these videos is a Canon M50. I believe that's what it is. And that was a lot more expensive. And I also bought a lens to go with it. It's a Sigma lens. It was a couple hundred dollars as well. And so that starts to add up. And I highly recommend you not starting there. In fact, when I got started with this camera this year had a lot of technical difficulties. I shot the videos blurry, I didn't have the audio set up right, so I shot video audio. So I had to rerecord those. And so the fancier you get with equipment, the more involved it is and the more things can go wrong. So again, I highly recommend starting with minimal video equipment. Now, besides the camera, the one thing that can really make or break your video quality is lighting. You could have the best camera in the world, but if your lighting is terrible, your video is going to be terrible as well. So the best place to get good lighting is a window. Now I have a window over here, but if I were to face this way, you would see right into my laundry room and my kids room. And that's just not the esthetic I'm going for here. So I have it to the side of me and I have to balance it with a softbox light that's over here and then a ring light right on me. But honestly, if you can put yourself in front of a window and still have a decent background, that's going to be the best lighting you are going to get. Now if you do want to level up, I would recommend a ring light. Again, these can get a little bit expensive, but. But I've had mine for probably three years, no more than that, over four years now. And the reason why I like a ring light is because it just gives this even lighting look on your face. You may also see like rings in my eyes that give that reflection and that's from a ring light. And sometimes a ring light is the only light that you really need to get good lighting on your videos. And so that's why I recommend if you are going to go for lighting, that's a great place to invest in in. Otherwise you can do softbox like I said, but they take up a lot of space so you got to have the space to store it later. As a mom of a four year old boy, if you've ever been around a four year old boy, they want to get into everything. In fact, I have tripods laying around all over my office right now because he thinks they are robots. So I have to make sure I have the space to store this stuff. Otherwise it's going to break, he's going to play with it or I don't even know what's going to happen to it. So again with a ring light, it's just one thing. Maybe you can shove it in a closet and it be out of the way of everything else. The last piece of equipment that's essential before we dive into the extras is audio. With audio, there are a couple of different options that you can go with. Again, I want multipurpose equipment that I can use in more than one place. I have used back there my blue Yeti microphone for years, since the start of my business. I've used it for my YouTube videos, I've used it for my webinars, I've used it for my zoom calls, I've used it for podcasts. And it is such a great multipurpose piece of equipment to invest $120 in. That's usually what it goes for on Amazon. Again, that four year old of mine, he was playing with it and he messed up the knob a little bit. It's kind of shoved in, so I don't trust it right now. So we did buy a new microphone, which I'm going to talk about here in a minute. But it is a good investment because you can use it in more than one place. Now, that wasn't able to plug into my camera that I'm using. So I have two separate files that I have to sync in editing. I have my came which is my video file. Then I would have to sync my audio file as well. So that's one thing to think about. Now, the microphone I'm using right now is called a SM58, I believe. Again, these will all be linked in the description box. But what I did with this microphone is I also bought an arm for it. So you can see I can pull it out here. So when I'm recording podcasts, I really want this microphone to be as close as possible for me to get the best audio. For podcasts with a YouTube video, I like to have it just out of range, you see, just out of the frame. Frame, but still you can hear me. All right, see where I sit? We have the microphone coming right up to me as close as possible. I'm looking into my camera and have the ring light right on me. Then I have this soft box pointed a little bit up towards the ceiling if we pull back here. So I just want to create as much of an even look as possible over there and get rid of as many shadows as possible. And depending on the light from this window, I may close it to keep the lighting as balanced as possible. The one last thing that I did want to show you as well is I throw blankets and pillows on the floor. You'll see it's like a tile floor by throwing down these blankets and pillows, it help absorb sound so it doesn't echo as much. And that's how I set my DIY studio up. A lot of the stuff then goes and gets put away into a closet. I'm thinking about keeping that microphone there, but since I can fold it up in a nice spot, it should stay out of the way of my child. And so I would love to hear if you could tell a difference in my audio in this video from past videos. Because this is a brand new mic I'm using this time around. And again, if we're keeping things super simple, super minimal, if you're using your phone, you could also use your earbuds. So whether it is an iPhone, Android, whatever it is, if you have your earbuds, they usually have a little mic on the cord as well. You can get started there and just have as good audio as possible as well. Okay. There are some other pieces of equipment that you need to think about when you start creating consistent video content. The first thing is an extension external hard drive. So this is a LACIE external hard drive. I have three of these. I'm not using all of them right now. I just have them for backup. But I will save the final YouTube edited versions on my LACIE hard drive in case, like YouTube were to disappear. I have them all there. I also save some other things for my computer on an external hard drive as well because video files take up a lot of space. So that's one thing to think about. Also, since I record multiple videos in one day, I've got to have the juice to do it, meaning the camera juice. So I have three backup batteries so that I can just replace it and keep going. Look, I don't wear lipstick every day to walk down to the bus stop and I'm not doing my hair and makeup. And so when I take the time to actually do this, I'm going to get as many videos done as possible. And so I need to make sure I have the batteries to do it as well and the storage for the camera. So I have multiple camera cards that I can just pop one out, put another one in so I can keep recording when it's quiet and I look my best. Now, besides having your equipment, having your minimum amount of video equipment to create your YouTube videos, another key part of your YouTube videos is to know exactly what you should be saying in them. So you're going to want to make sure you are subscribed to my channel because next week I'm dropping a video all about how I create my video game plan. Now you may call yours a YouTube script, but I'm actually going to tell you why I call it a video game plan and all the critical things you need to have in it to make sure your YouTube videos are successful, gets views, get subscribers, gets people on your email list. Plus I'm going to tell you how you can get that exact game plan in your pocket. So again, subscribe. Be ready for that video next week. In the meantime though, I highly recommend you watch this video that's on your screen right now because it goes into detail all the things that you should have in place before you start your YouTube channel. So even if you started your YouTube channel you can watch this video and see if you have these things in place and if not you can get them in place right now to make sure your channel is set up for the most success possible. Click that video and I'll see you over there.
More from Trena



Why Every "Business Guru" Suddenly Went All-In on YouTube (And What NOT to Copy)