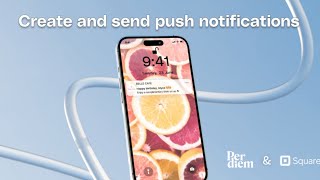
Learn to set up push notifications in Per Diem's Merchant Dashboard. Create birthday messages with personalized names and coupons, edit order-status alerts, and automate abandoned-cart and lapsed-purchaser campaigns. Preview messages and schedule sends.
Questions this video answers
15 minutes
One (only one birthday template at a time)
Chapters
Foreign. From tripodm.com and today I'm going to be showing you how to set up push notifications on the per diem Merchant Dashboard. So the first thing you want to do when you log into your account is go down to marketing and expand the menu. Scroll down a bit and you would see the option for push notifications. All you have to do is click on it and and go to the notifications page. Now, there are a few sections here. Pretty much the first one is dynamic notifications, which is a dynamic way of sending notifications, especially on birthdays. So you have the ability to create a template that would be running. And then the second section here is other status notifications. So these are transactional notifications that are being sent to customers when they interact with the mobile app, either by paying, purchasing something, or any other actions that can be carried out on a mobile app. The last section is the advanced push notifications, which pretty much allows you to do extra things, you know, with the push notifications we're gonna see shortly. So starting with the dynamic notifications, if I expand the accordion, of course you can see that a template has already been created for birthday notifications, but I'm just going to show you how to create one yourself. So all you need to do is click on create template and for now the only notification type available is birthday. And so it's gonna say birthday on the notification type. And then who do you want to send this to? Do you want to send it to all customers or you want to send it to a specific customer group? If it's a specific customer group, then you have to select what group it is. So you have the option to select. But for this example, I'm gonna set it as all customers. And then I could put a subject there, test subject. And then this is where you put in the message body, test message. And another beautiful thing you can do is to insert the first name and you can also insert the last name of the customer within the message. So you structure the message body to be able to account for first name and last name. And as long as the customer is logged into their account on the mobile app, you know, push notifications that are being sent will be sent using the first name and last name that has been inserted into the body here. Another thing you can do also, if in the case where you want to give out coupons, free coupons, or you just want to add coupons to the message that you're sending, a push notification is the same thing. All you do is click on coupons and then you're going to get this model that pretty much has all the list of coupons that have been created. And of course you can just select which of them you want to add and click on done. And once you do that, it's going to add a message with the coupon code. So that is exactly how you set up, you know, the birthday notification for under the dynamic notifications tab. And all you need to do is click on save. So birthday template already exists. So you can always have only one birthday template at a time. So you'd have to delete this one or make changes to this one before you're able to save a new template. And then for the order status notifications, it's pretty much an already filled template for different scenarios. So order received, which is when you receive orders from your customer, then they get an automatic push notification on the mobile app. If the order is in progress, they also get push notification. And these are all the messages that have been pre filled here. You can always make updates to these messages and then just hit the save button down here. Now the last section being the advanced push notification. So you can send more push notifications to your customers to pretty much drive growth. So when there's an abandoned cart, you can send a recover abandoned cart push notification message. If you want to bring back lapsed purchasers so people that you know haven't made a purchase recently, you can also set this up in a way that you know they get sent this message. And the beautiful thing about this is that you can preview how that's going to happen. So for recovery of an abandoned cart. So the automation flow is simple. When a customer has abandoned their cart, the system is going to wait 15 minutes and then take an action which will be to send push notification that leads to the cart and then that ends. So pretty much this is how the message looks when it when it lands on their devices. So this is pretty much how you set up push notifications on the per dimension dashboard. Of course there is a way you can go in to see your notification history using that button. And you can see all the messages that have been sent and their timeline. You can also create an immediate notification on the fly using that button which you can send to all customers or customer groups as we saw before. And of course you can select a date and time. By default it's gonna be set to immediately, but you can actually schedule a future date and time where you want this message to be sent. And you can of course impute the subject and the body and you can also have the opportunity to choose from existing message templates. So if it's a new seasonal menu, free WI FI upgrade, you know, just something to help you get started with, you can do both. And then click on Send notification and it will be scheduled to send to the customers on the selected date and time or immediately as the case may be. So that is how you set up push notifications on the per diem merchant dashboard. Thank you.