How to Design Faster Than 99% of People in 13 Minutes
In this tutorial, the presenter explains why the checkout page is the most valuable page to optimize, citing a 35% conversion lift and $260 billion in recoverable sales. He demonstrates a rapid workflow for turning static checkout screens into fully interactive, testable prototypes using Figma Make. The process starts by building a clean design system from existing frames with Figma Agent—defining tokens for colors, typography, spacing, and border radius, then converting them into variables and publishing the system as a library. Next, the frames are imported into Figma Make, and a detailed prompt describing layout columns, upsell pricing logic, cancel and share modals, and UI states is supplied. Figma Make generates an interactive prototype, which the presenter iteratively refines by fixing color issues, mis‑aligned UI elements, and edge‑case behaviors (e.g., unselectable benefits, chevron size, truncation). He highlights how this AI‑assisted approach dramatically reduces manual effort, enables rapid iteration, improves stakeholder communication, and streamlines engineering handoff. The video ends with a sponsor acknowledgment and a call to try the workflow via a link.
Chapters
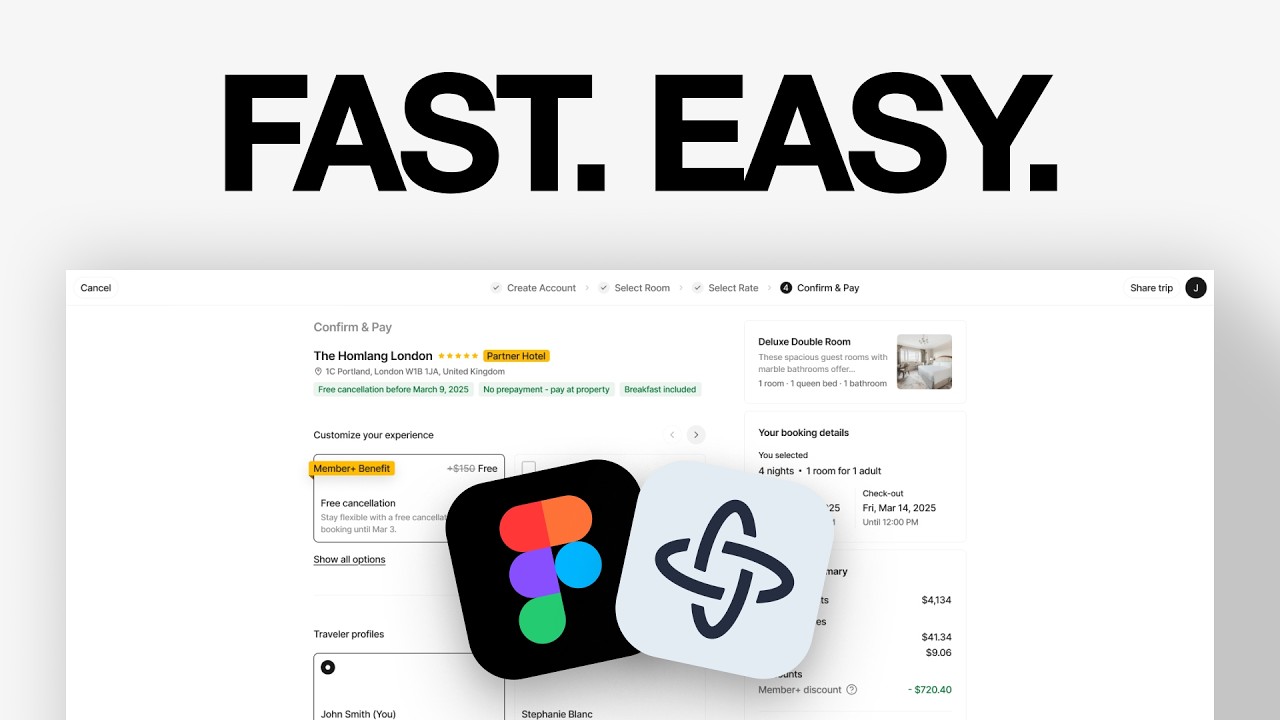
This is the most expensive page in your entire product, the final checkout page. This is where all that work getting someone through your marketing, through the whole decision process of making a purchase ends up, and it can die and go to waste in an instant. Data shows that just fixing the checkout page improves conversions by 35%. That's $260 billion in recoverable sales across the US and Europe. Basically, it's the single greatest page to optimize. So in this video, I'm going to show you exactly how to prototype and create concepts faster for your checkout page in minutes using Figma Make. It will help you test multiple variations to optimize your conversions, impress stakeholders with real usable designs, and make the implementation process 10 times smoother for engineers. So let's get started. All right, so I'm on Figma and I have multiple screens that I've designed to show you how to actually prototype with Figma Make. This is the core checkout page. Then I've created a little upsell variations to basically tell Figma Make that this is the state that it has to look like when you select an upsell. Then I created a little cancel booking modal when you want to leave the checkout flow. And then I created a share booking modal when you want to share the trip with other people. And this way it kind of shows you the possibilities that you have when you want to actually create a real usable prototype. That's just for one flow. The goal here is that once we have the checkout flow, we can create variations of it. What if the button changes colors? What if the upsell goes down? What if there is a different design to it? If you have to do all of that, recreate the design system or update update it, create multiple variations on top of what you've already created. Do you imagine if you want to iterate every week on this, the amount of work? It would just be impossible to manage. So now with Figma Make, we can just remove ourselves a little bit more from the working in the trenches and having more of that strategic outlook on it and having a more iterative design process. All right, so enough chitchat. The first thing I want to show you is that there is no design system whatsoever. Like, all of the text of the typography, the spacings, the paddings. There is nothing that is— you can see in the variables, it's empty. And so what we want to do first is create that design system using Figma Agent to help me turn this relatively small experience into a simple design system with variables so that I can actually tell Figma Make to reuse that to create the design. Because Figma Make needs to have some rules and some structure around what you want. It cannot just read your mind. You have to be clear about it. So creating variables and a design system is really important when it comes to using Figma Make, in my opinion. So the first thing I want to do is make sure that the colors are right. I just want to like check the section colors, like all the colors selected, and just double check that all of the grays are correct. The colors are right. There's no duplicate or like little variations, like in the red, for example, that could happen where this red is this color, but then another one is a slightly different red. We want just to make sure that everything is super clean. And organized. Same again with the text. Like you can see the text, I have like 14 pixels, I have 16, and then I have 20 pixels. That's it. There are only 3 variations in the text. And again, the same thing with the paddings, the spacings. I usually use multiples of 4. So this way it's super easy for me to design. And then it's again, it's super easy to implement into variables because that's it. It's just multiples of 4. So once we've checked all that, what we want to do is select the frames. And then with Figma Agent, we'll see this little Star here, click on it. And then we want to list down all of the tokens that are being used in those frames. We want the agent to understand what we're working with. It's not just coming up with random stuff. It's actually based on the frames that we have. So we want to tell Figma Agent to list down the tokens used in those frames. So colors, typography, spacing, and border radius. That's usually what the tokens are made of. So it's going to review the frames and come up with the tokens that we want. Now that Figma Agent Has created the tokens. I'm going to just make sure to double check that everything is actually correct and it matches the frames that I have, and also just clean up a little bit the typography spacings. As you can see, not everything is perfect on the first go, and that's just how it is. That's why you have to always tell it one step at a time, not just expect the impossible that it just one shots everything. Take the time to always double check what the AI has done so that you get the most accurate possible outcome for your designs. We have the design tokens ready. Now we can ask it to create the variables based on it and include the icons as well so that we can then have a complete and simple design system that we can then publish and use on Figma Make. All right, so it has created the variables for the design system with the border radius, colors, spacing, typography. Everything is ready. And it has also created the design system page to include the icons that I have in my design page. So now we have pretty much everything ready. All I have to do is go to my assets, then to the Figma Make project and to publish it. As you can see, it's getting published. It's done. And now we can move into Figma Make to build it. So the first step that we can do, we have multiple options to build and plan. We have multiple models as well to use. And here you can see that I can also add my design system kit. So I can create a kit, library styles, then I can go into my Figma Make here and add it. So it's getting imported into the Figma Make library. Now while it does this, what I want to do is add those frames. So you have 2 ways to add your designs. The first one is to simply export and add the image into it. The other thing that you can do is to share the frames. You copy the link directly to make sure that it's as accurate as possible, and then you can simply paste it into the prompt bar and it's going to automatically copy those frames. So I'm going to copy all of them into the prompt bar and then ask it to create an interactive prototype of it. Now what's really cool with Figma Make is that you can also really write as much information as you want to give it as much context and details so that it creates the most accurate version of whatever you want it to make. And that's why I wrote a lot of details here. For example, I mentioned that there are 2 columns in a design. As you can see, I have the details column and then the summary and confirm payment column. 2 columns that are fixed width. It means that it's not going to move no matter if the screen is smaller or bigger. It's not going to move anyway. It's going to stay centered on the page. Then I talked about the upsell logic. You have a different state as well. When I want to click on one, it's going to update the pricing. For the night, it's going to update the percentage on the taxes, it's going to update the discount. And also explain that when you click on the cancel button, you have this modal. And when you click on the share trip button, you have this modal. So let's ask it to create it. By the way, look at all of the reasoning that the AI is doing. All of this is what you would have had to do if you were to prototype all of that by yourself. All of the pricing logic, adding the taxes, thinking about the edge cases, how to actually implement it or how to make a prototype that works. Now you can just focus on the strategy and wait for Figma Make to do its magic. All right, so Figma Make has finished implementing the design and you can see that it's very close, but it just, we don't see actually the colors. So there might either be a problem with the variables here or with how it's being implemented. I've, to be fair, I've asked a lot of things and logic. So it goes to show that it's not perfect on the first try. You have to iterate on it. So let's work on that. I'm outlining the 2 problems that I'm noticing right away. There might be more. But I just want to make sure that we cover the, again, one step at a time, the problems that there are. The first thing is that the background doesn't work. It's either gray or transparent since it looks like the Figma Make interface and then the text is white instead of being black pretty much. All right. Already we are one step further on this. It has fixed the background color. There was no background color, so now it's added onto it. Now let's compare what we have versus what Figma Make has. So you can see there are a few things that needs to be improved. Like there is pretty much no color right now. I'm going to also refer again the checkout pages for reference. All right, it has done a ton of work. And look now how good and accurate it actually looks like with the design reference that we've given it. It's really, really good. Now there are still a couple of things that needs to be fixed. For example, you can still see the checkbox here is still selectable when it should be by default. Locked in as a benefit and you should not see the checkbox. When you scroll down, you should still see the top navigation, the top bar, and the checkboxes are not always well placed or the chevrons are not also centered or maybe too small. The radio button is not exactly the same as the one I have. But look how cool it is and look at the logic. As soon as I select an upsell, the prices change as well. I can select multiple ones and it's going to update itself. That is incredible. Now let's see the cancel. Can go back, share the trip. You can copy the link. Like, that's exactly what we asked it to do. I didn't even tell it to, like, when you click on the close button, it should close, obviously, but I didn't say it and it still does an amazing job at it. So while it's doing the extra updates, I wanted to really emphasize that the beautiful thing with working with Figma Make is that it kind of creates that design system like we've talked about and we've been working on so far. It pushes it further so that every case that we can think about is being covered. But at the same time, you kind of add logic and rules to it. For example, the member plus benefit right now, it's something that you can click on. And to be fair, it's something that engineers might think about or stakeholders might bring up is, can you actually remove that or not? So it's a fair point. When you're here, you're like, actually, no, it should not, it should always be on because it's an extra benefit that is free. And so it should always be included as like a nice to have thing. It should not be something you can remove. And so that really brings up some edge case that honestly, when I was designing this, it's not something I think about because I'm again like focusing on a lot of other details. Now here, while using the prototype, the real design, I can actually think about that and realize that, huh, that's an interesting edge case I didn't realize. And it's all fixed. It's even better than what I asked Figma Make to do. For example, like now it's unselectable, unclickable, and they have the same state. I didn't mention that in the previous one. I said you need to fix the kind of the Chevron icon size because it's wrong based on the design I shared. Same with the checkbox. And look, now everything is the right size. And even the logic of, well, if there are only 2 options, then you cannot go further. And that is incredible. And even on this one, like it's still, it's everything works and it's so cool. And again, I could nitpick like maybe this, the top bar could be fixed. The description here could be 2 lines instead of one. Actually, you couldn't even write that. When I want to explain the details, I don't just say this is wrong. It doesn't work like that, or it's not what I want. Cannot guess what you want. You have to be clear about this is wrong, this is not what I want, but when I do this, this should happen, or this is the version that I want compared to what I have right now. And so again, I've just said, well, the top bar should be fixed when you scroll down, and the description of the room should have 2 lines maxed. And then once it reaches past the 2 lines, it should be truncated with the 3 dots following it. And that's exactly how it is. And that's pretty much that. I mean, look at this, look at the reference as well. That's pretty much the design. I'm pretty blown away. I didn't ask it before to create this page, so I didn't really know what to expect. I'm really, really surprised by how good it is. But you can see it's not perfect on the first try. You need to take it step by step and over time create something really accurate. And you imagine the difference when you talk to stakeholders and engineers, like showing that static screen, like Here's the checkout page. And then you show them the actual checkout page. Like, this is what happens when you do this. This is what happens when you do that. This is what happens when you want to leave. You have this little cancel booking modal. This is what happens when you want to share the trip. And that's just one page. Do you imagine how much more stuff you can come up with? Like all the edge cases, the entire flow, how you would map that out. Even sharing a trip, like what it means to share a trip, what happens when you click on this. There is so much more to think about. And so that's pretty much it. That's how you turn static screens into real usable prototypes. The setup, as you can see, my tech and my tech some time, like it still is nothing compared to the amount of work you would need to do it manually. When you take your time, when you do it step by step, it is really easy to do. It's never been easier to try out new ideas, to get stakeholders' approval, to smoothly hand it off to engineers. And so if you want to try it out yourself, you can click on the link in the description below. Thank you so much to Figma for sponsoring this video. And thank you guys for watching. Make sure to leave a like. And subscribe, and I'll see you in the next one. Bye. Bye.