Developer Quick Start to Compass API in Python 🐍
Walk through setting up the Compass API in Python with three working examples: checking wallet balances on Arbitrum, setting token allowances on Uniswap, and executing a USDT-to-USDC trade. Learn how to configure environment variables for private keys, sign transactions with Web3, and verify results on-chain.
Chapters
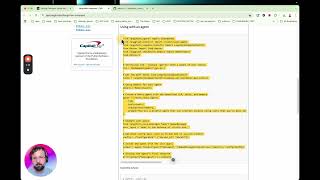
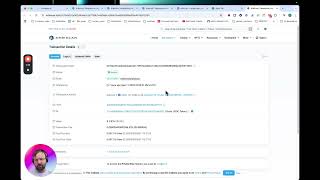
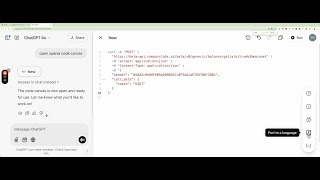
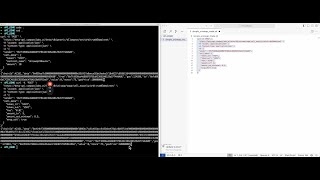
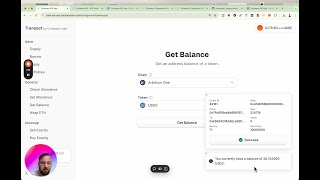
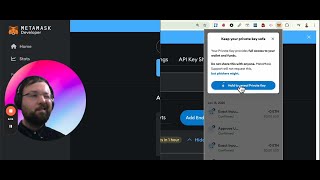
How's it going, folks? So today we're going to do a developer quick start to the Compass API in Python. Now, why are we doing this? Well, so currently, um, users can interact with our API using a user interface, but the great power with being able to interact with it programmatically using Python is that one can execute complex trades at superhuman speeds, and one is not limited by the vagaries of a GUI. So let me clone this repository and show you. So let me clone it using the terminal on Mac. It's taking a second to load. Maybe we'll use the terminal on Cursor for the time being, and that might move my face out of the way so we can see it. So let's open this folder with Cursor. And let's set up a PyEnv environment. What will we call it, folks? PyEnv virtual env. We'll call it the QuickStart, QuickStart environment. And then we'll localize it, and then we'll set the interpreter in Cursor to the quick— this Quickstart environment. So in our GitHub repository, which we just released today, Now this is— I don't know how actively we're going to maintain this given that we're— the API is in a constant state of change, but this should give you a good idea of how to get started with it. So there's 3 Python scripts in this repository. quickstart.py is the simplest, and I'll show you this in Cursor now. So if we open quickstart, what's happening here? Well, All it is doing is calling the get balance endpoint for the Arbitrum mainnet, and it's querying the balance of USDT in this wallet here. So let's see if we can do this in the GUI. So let's get balance of USDT on Arbitrum, and these toast windows pop up here. Let's delete them all. Let's get balance. So I currently have $8 of USDT in this wallet, and if we click the play button here, we can do this programmatically in Python. Okay, so we're missing requests. Perhaps we should read our own README here. So what do we need? We need to pip install requests. Let's run the script again, and we get $8.14 of USDT, which has 6 decimals. Now, where did I get all of this stuff here? Well, this little dictionary here called data, that's actually the JSON request body as defined in our docs. In Swagger. So it's not this endpoint, it's the get balance endpoint, which is this one here. And you see the sender is some wallet, and call data is just defines the token USDT. So this is the simplest Python script, and this does not actually execute anything, or it's a read-only script, but it's still useful. So now our second script here, set allowance, this script actually executes a— it actually writes data to the blockchain. And as a result, because of this, we need some special variables. We need an Arbitrum mainnet RPC URL, which is a URL to an Arbitrum node. We need a private key and we need the wallet address. And why do we need these things? Well, because we're using the set allowance endpoint. So let's go back to the GUI, and I'll show you how to do this in the GUI. So let's set an allowance for USDT for Uniswap, and let's select a small allowance of $3.14. Now if you click set allowance, you can see that we need to sign the transaction. What does this mean? Well, we— when we query the endpoint and we get back a JSON payload. So let's, let's query the endpoint and get back our payload. So let's click play here. Okay, we actually need some dependencies. Maybe we should have installed them all in one go. So in this install dependencies thing, we can copy and paste all the dependencies. Let's install them. Let's click play again. Okay, so we actually haven't set an Arbitrum mainnet RPC URL. So how do we do this? And where is this coming from? So because these are sensitive pieces of information, we actually don't want to store them in our Python script. Instead, we want to store them in a special file called.env. Now in this— in our GitHub repository, we've provided a template to make your.env file. And so this.env file needs the RPC URL, a private key, and a wallet address. So let's make one. So the first one that I'm going to get is this RPC URL, and you can get a free one from Infura. So let's go to Infura. I've logged in here earlier. Let's see if I can still sign in. I can. Apparently I'm a human. Let's, um, delete our alt key and create one afresh to show you how. So let me see, let's go to settings, let's go to the bottom, let's delete API key, let's create new API key, let's, uh, select Arbitrum as the network. Let's copy it to the clipboard. Let's go back to Cursor and we paste it here, and we don't enclose it in as a string with quotes. We just leave it plain text. Now we need to do something sensitive. We need to get my private key for this wallet. So this can be got by going to, um, your MetaMask wallet and clicking on account details and clicking show private key. Now I'm going to pause the video here. Okay, so I've typed in my secret password. Now we need to hold this button in order to see my private key. No, I'm not going to show it to you. So, and I've put my wallet address in here, I put my Infura, and now I'm going to put my private key in here And I actually have to copy and paste this into.env. Why did my— where did my.env file disappear to? There it is. And now we need to put my private key here. So I'm just going to pause this, and now we can proceed. So in our.env file I've put these secrets. So let's go back to set allowance. Let's click play. And what's happening here? And so when we run this, and it sets an allowance of 3.14, and it— and our API. So we send a request to our API, a POST request, and then, um, the API sends us back a transaction, which is this thing here, which I've accidentally printed out twice. And then, um, we need to sign this transaction payload with our private key, and then, um, we need to broadcast this signed transaction to the network. And finally, we get back this transaction hash. So let's run it again and see what happens. Okay, so we've got our hash. We can actually check this in RBSCAN. And you see 17 seconds ago we've set an allowance of $3.14 of USDT. Okay, so now that we know how to set an allowance, let's see if we can do a trade. So this set allowance and trade on Uniswap script sets an allowance and we get back. Let's run it and see what happens. So let's clear the terminal. Let's run the script. So step 1 in the script is exactly the same as the last script. We use the allowance set endpoint to set an allowance of $3.14. Then we, um, signed the transaction payload, we broadcast the transaction, we get back a hash, which is this first hash here. Then we paused for a tenth of a second to allow the transaction to be broadcasted to the Arbitrum network. And then we use a different endpoint, the sell exactly endpoint, and we do a USDT-USDC trade on Uniswap. And let me just show you this on Swagger. Let me show you the Swagger of this. Um, sell exactly. And basically we got this from here. We put it in here. Finally, we get our JSON payload, which is this. And then we sign that payload using the Web3 library, which has a.signTransaction method, and we need our private key in order to sign it. And then we broadcast that signed transaction to the network to finally get back this transaction hash, which we can look up in RBSCAN. There it is, 1 minute ago. Now let's have a look at our balance using the GUI. So get balance Arbitrum 1 USDT. Let's delete some of these toasts. We've got a balance of $6.64 of USDC. Let's check our USDC balance. We've got $11. Let's, um, reverse the transaction. Let's do USDC/USDT, and let's go for it again. Because these are two stablecoins, we can do this very simply. Aha, it's because we need to set an allowance for USDC. So let's run it again, and now we'll check our balance, and our balance has decreased by $1.5 of USDC.