BMW M4 Mods That Change EVERYTHING 🚀 (Exhaust + Springs)
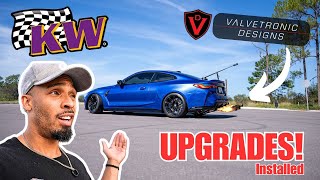
Justin installs KW lowering springs, EBC Redstuff brake pads, and a Valvetronic valve-controlled exhaust on his 2024 BMW M4. He wires the exhaust remote into the car's Homelink system via fuse 273 and shares tips on fitment, tool choices, and troubleshooting along the way.
Chapters
What is up guys, it's your boy Justin. We are back with another video here. Last video worked out with Kyle. We talked about how we were going to be starting the springs, the lowering springs, as well as the spacers on the G82. We're about to go knock that out now. It is literally the same day, like I don't know, 10 minutes after I just filmed that last video, but I'm doing this into multiple videos. Obviously I don't want the video to be too long, and I feel like videos need to have a theme or a point or a plot, you know what I'm saying? Super excited about this, ready to get rid of that stupid gap that is there, and as well as filling out that wheel well because they should have did that from stock. So I already have my Valvetronic system here. This has been sitting here for 3 weeks, honestly. Shout out to the boys there, that's going to be coming up next week. Today's video is going to be about this right here. Oh, KW baby! All right, super excited about this. This has honestly been sitting over there at the side for about 2 weeks as well with the exhaust. Aha! Ah, it is a box in a box. Got your instructions here, got our wrenches or spanners, whatever they're called. Oh yes sir! Oh, it's got a little weight to it. Damn, Nice. Oh man. Oh, this is going to be exciting. Top Hat, your adjustable mounts. It comes with new mounts here. Quality of these springs are— this is— and I love the yellow. A few moments later. Favorite part of the day, got to move this out, bring that in, put this somewhere and let this charge too. Gosh, and it works, bro. Dang, man, I'm not going to lie, this setup is dope. People hating on this, you're crazy. There's no way. All right, so take note here. This is stock ride height. You can fit a whole hand in there, pat it. Just, yeah, that just can't work. That's not acceptable. BMW, that is not acceptable for them. And man, as many times you clean this, clean the rims, man, look at this. The brake pads on this, it's just, it's horrendous. No matter how many times I clean this, we having gloss black rims, it is looking like brown. It's crazy. Look at that. Jeez. Personally, I like it a little flush, but I don't know. I feel like that's one of the first things to do, add some ground effects, do some carbon fiber all around. Same thing with here, eventually I'll change this out, carbon fiber, get rid of the gloss black. Same thing there, might do a wing, we'll see. But 2024 G82, this is pretty— it's nice. I don't know if this is one owner before me, I don't know if the guy before me, if he put that on there. I don't think that it's going to come like that because that looks pretty, uh, yeah, I don't know about that. That, that's gonna have to go. I get what you're doing, buddy, but I mean, overall that looks tacky. And then we have this over here which we found out is broke. Just found out, but we're gonna change this ducts out. We're gonna put carbon fiber ducts, air ducts in there, change the grill here with the kidneys, do, um, I'm not gonna do a CSL style. I'm gonna do the one with the bar there and then this is open at the bottom just to have this whole thing flush open. Eventually I would like to do the Adriel bumper, but I don't have $3,000+ to spend on that. And then if I do that, I'm about to wrap that or get this painted, but we're going to change the color of this blue. Portimão, Portimão blue. I've never been a blue car guy, but it's growing on me. But I also ran into one on the road. We looked at each other, I said, nah, this can't happen again. So we're going to change the color eventually, get that wrapped. Carbon fiber on this here. Carbon roof, bro, that's That's sick. I thought I would like sunroofs. That's a sunroof on there, but I never have it open. It's just way too hot in Florida, and sunroofs, I don't care. Interior-wise, I like it. Only thing I don't like— I like how I say I like it, but then I say something I don't like— is I don't like the black. I don't like the gloss black. It attracts fingerprints. There's already fine scratches on it. I'm not a fan of the gloss black, so we are going to carbon the hell out of that too. Biggest thing about building cars is taking time. And you want to do so much. Literally got this car 2 weeks ago, so much you want to do to it right away, right off. Soon dealership, right to work. I did that with the Tesla. I literally took the Tesla from the dealership, 0 miles on it— well, 5 miles because they moved it— 5 miles on it, drove it home, took it to my garage, and took it apart right away. Why? Because we started wrapping it, because there's too many white Teslas out there. So I love just working on cars, but I work on them too quick, so I gotta slow the build down, enjoy it. And that's what this is going to be about. This is going to be about taking our time and enjoying the build and Yeah, have fun with it. So this is the part of the video where I realized that my microphone wasn't working with my camera. So, uh, yeah, I got the car on jack stands, dogs helped me out, springs are there, but my main issue is that I cannot get this off. I do not have a 12-point socket to fit on here to unscrew this because I'm trying to take this off from the top. So, uh, yeah, let me go to the hardware store. 2 hours later. Finally got this 12-point 18mm deep socket wrench. Had to go to 2 different auto stores, but we finally got this. Which means we were able to finally get this off here. So I'm taking this off from the top. Instead of pulling this all the way up from the top with a spring compressor, I'm just going to use a jack stand or the jack here as my compressor. I'm going to slowly release this out here. All right, so I was able to get the strut out, a little bit of elbow grease. We are now getting this off here. It's been a Interesting. So now we got to get this off and we're going to put on the K&W new one that's on here and we're going to get the spring going. Goddamn, it's only one side. The next day. Top of the afternoon to you guys. It is now the next day. I had some stuff I had to do last night so I wasn't able to finish this unfortunately. I literally only got to one strut. Looking pretty good. Everything is torqued to spec how it needs to be, but again, it's only one side. Bro, it is hot out here, man. I mean, it's— look at the overcast. It's just cloudy. There's not even sun, but the fact that it's just so humid out here. The homie Jeff with the GSF is coming by. He's going to help me do the exhaust as well as help me finish this up. So the goal is to get this done because this car has to be done today. All right, so we got everything back in line. All the nuts are back on place. Everything's torqued to where it needs to be. What we're going to do also, since we're down here, all this brake dust because of these brake pads are pretty tragic. So we're going to go ahead and change these brake pads out since we're here. Shout out to the guys over at Extreme Power— oh my gosh— because they're the only ones who had these in stock. These EBC Red Stuff brakes are out of stock everywhere for the GAE platform. I don't know what it is. Even on EBC's website, they're on back order until November. Got the fronts, I got the Widow rears. Sweet fat pads. Got the old pad off here. It is just such a dust collector. New brake pad is on. Got the American Superman vibes going, the red and blue. Um, you might notice this— I did not do that on the pad. It actually came like that. I could tell that, um, there's a lot of shifting going around the box when they packaged this. At least this is from EBC. And look at all that. That's all beat up because the ends were sitting here rubbing in the box since the box is pretty much just this and there's no padding inside the actual box other than the box that the box was in. That makes sense. But this is what has been about it. So EVC, I'm gonna need you guys to tighten up with your packaging because, uh, that ain't cool. Now that we learned everything on that side, now we're gonna go ahead and hopefully this should take as long because I already kind of know what to do. One hour later. We got this other side here, didn't take too long, probably an hour maybe. Got the homie Jeff with the GSF here. Yeah, he's here to facilitate, make sure I'm doing things in appropriate ways. I'm foreman. We are going to, uh, save the back for later. We're gonna try to put this on 4 jack stands. We'll see how this goes and, uh, try to tackle this exhaust. Alright, so we're back at this again. Now I've been reading on forums on Bimmerpost that quick jacks do not work with this car because they're not long enough. Now we realize that's the case for where the points are at and how far they are, but if you take off the plastic shrouding underneath it, there's actually all metal down there where you can actually put them on there. And luckily my boy here, he already came prepared because he already predicted that we're gonna be doing this. My cat's coming out of nowhere where I just didn't know she was there. But he has the Quick Jacks and, uh, he uses this for his GSF. This is just really exciting because I never used Quick Jacks before. It's super simple as it seems, a few little pieces here, but I think he paid maybe like $1,500 for this. Yeah, we just had to mount it up here, make sure that they're nice and even. He has these little bricks on there which can actually connect to where those jack points are for the bottom of the car, place them right there and there. Slide this underneath, make sure fitment is good because, you know, we don't want to break this. The side skirts are pretty close to it. And with the ease of a button, we have liftoff. And it's just that simple. Keep it underneath the car, you have plenty of room underneath. And now the time has come to make this car become a big boy. We're going to take off this diaper, aka the BBL, aka the muffler, which is also one long single pipe of piece of exhaust which we have to take off here. But we're going to get our new exhaust out here, we're going to unbox it. And the unboxing is pretty straightforward, everything is packaged nice and perfected. Well protected as well. Mine came with a shirt, which homie was kind of upset with that he didn't get one. But my tips, I went with, I went with the burnt tips instead of the carbon because I plan on doing a carbon diffuser, so this will stand out a whole lot more. Also came with a license plate frame bracelet and my order number, which is already labeled. And we have us a single mid-length pipe. That's pretty hard to say quickly. Um, it's really nice. The craftsmanship done is really good. I mean, even down to the bracket that has a detail that's etched in here, engraved with Valtronic Designs. Look at the size of that. Now that right there is like a Speedo. Also, we have the valve controller here, which came with two remotes. These remotes are pretty, pretty hefty, I'm not gonna lie. Not sure which one is up or down, but it's pretty satisfying clicking it though. A little longer than a few minutes later. Taking off this exhaust, I'm not gonna lie, it's really heavy. So make sure you have your arms, or if you're on the ground, make sure you have yourself supporting, because this thing is fat. Fat just like this stupid muffler, which is now going to be downgrade to this nice boxer brief. Right now Jeff is taking off the OEM hangers. I highly recommend either some soap or some type of lube because those things are stuck. And I can't close the garage cuz the car is too big to get the back of the garage and the water is seeping through. It's coming in Stamped Valvetronic, good welds at the end here. Stamp of approval as well here, over there. Installation for this is super simple because it literally goes alphabet to alphabet, so you'll put F to the F-pipe, K to the K-pipe, like everything is super organized and really simple. Get that, Valvetronic looks good. Jeff is organizing the trunk with the wiring for the valve controller. Guys, there is plenty of wiring if you guys are concerned with the length, and we're zip tying it right now because there's just way too much. We want a cold start! We want— Eventually we're gonna do the downpipes, do a tune, do some numbers, race Jeff with the GSF. Mine'll sound better, but it won't be as fast. Hahaha. This car's about to sound so stupid. Homie Jeff over here, Geoff, in the XBizzle. It's crazy, he got this car— he got this car for like 8 grand, wrapped it himself, did all his own little mods. This car is sick. All right, so we're getting there. I think my homie left the Quick Jacks for me. Said, yo, just do your backs, I'll pick them up whenever. So we're going to do as much as we can with this. Um, exhaust is on, super excited about that. I just got to put on the plate there and I got to do these rears. Day 3, guys, we are on day 3 now with this project. Here we are outside messing with this car yet again. Uh, I lowered it down a little bit. I've been playing around with the fitment. I literally had this down at the local park I'm gonna add some spacers. I got some MAD spacers for the G chassis. Let's see what I like. I've seen a lot of people do either 15s across or they do 12 in the back, 15 in the front. So we're gonna take a look and see what the 12 looks like in the back as well when I put the 15 in the front. This is what we have for the fitment right now. This is with it all the way down to We'll see how this goes. It's got to settle, obviously. I mean, it's a lot better than the stock, honestly. That stock ride height was atrocious. So back into the car. Even though this is a super cool remote to open and close the valves, it's kind of heavy, and I know I'm probably going to lose it, and I don't want it to just sit around the car moving around when I'm driving. So what I did was I was able to program the buttons here for the Homelink so I can open and close my valves there instead of having to use the remote. That's pretty dope. My only issue is that they got rid of the 12-volt cigarette lighter in the back trunk on these cars, so there's only one in the car and it happens to be right slap dab here in the middle, which means I'd have to run this entire cord all the way through the car, all the way to the back. So either I can tap into some type of fuse or I can run this cord all the way through the car. All right, after removing a bunch of crap back here in the trunk liner, there's a fuse box back here, which is cool. After doing some research, I found that fuse 273 is what we're going to tap into. All right, nice and neat, wires getting up there inside. Everything looks great, you can't see anything, especially when I put the floor down. I grounded it here. And everything works just like we like it. Cold start. I don't know how to react. Sounds the same. The same? You're crazy. Too aggressive. Really? Too fast. Downpipes to speed. Everything I didn't want.
More from Justin










How Women Are Taking Back Control of Their Sourdough Bread (And Saving Hundreds).