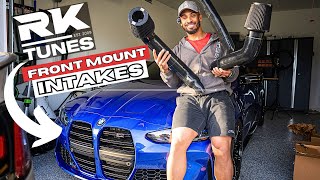
A BMW M4 owner installs RK Tuned cold-air intakes and RGBW LED daytime running lights for under $1,000. He removes the front bumper and fender liners, cuts plastic to fit the 3.5-inch intake tubes, and swaps in cheap AliExpress emblems instead of pricey OEM parts. The result is noticeably louder intake sound and custom LED lighting controlled by smartphone app.
Chapters
Thank you. Take it easy, guys. Happy holidays. M4. M4. I got— I just recently got a 340i. Well, this is exciting. Cold air intake from RK Tuned. RK Tuned, baby! Nice filters. Look at the size of these things. Ah, this is so exciting. Front mount intakes, RK baby. Yes sir. Good. All this is included as well, which it should be. In case you guys are curious about the size, that is the size. All right, after setting this up, it should look around like this in the engine bay. Quality of these, they feel really sturdy. I'm not no expert into intakes I did want to do the carbon fiber ones. Honestly, that was my main, but I just couldn't justify spending $2,000 on some carbon fiber intakes just for mostly aesthetics, in my opinion. Went with the black filters because I really wanted to keep it kind of sleek. I wanted to not have it so pronounced. A lot of people get the yellow, the red, but again, depending on what color we do with the car, it may not match. So you can't go wrong with the black. Ah, kids. So what made me go with RK Tunes? Well, the sound clips I was hearing on YouTube sounded a lot more ferocious than the other ones. Yep, yep. They also have a 3.5 inner diameter compared to other people who have just a 3-inch. So that 0.5 may or may not make a huge difference, but I'm pretty confident it's going to. Also added these new emblems on here. Got the spinners, boy, running on them spinners though. I love these. AliExpress, baby. $46. And they are legit. Not paying $150+ for literally the same thing. Oh, all right, this is gonna be fun to do. By no means am I an expert. This is going to be a very interesting, fun thing to do. I'm probably going to take off the wheels because I think I'm going to take off the fender liner to then take off the bolts that then hold the bumper on, because we gotta take the bumper off to do this. Uh, I'm gonna take off the brace, a lot of the filling here. Um, it's gonna be, uh, it's gonna be interesting. We gotta get every one of these little bolts off inside the fender. I think these are 10s if I remember correctly. Now I'm getting off these little plastic clips, which are a huge pain in the butt, might I add. Definitely suggest to use a plastic pry tool if you do have one if you're going to get this off. Don't use a metal one as the plastic will get dipped into, which we already had the incident there, which, uh, we're not going to pay attention to. But eventually I'm going to change this out and this will be carbon fiber where hopefully we won't have any issues with that. Ah, pop out. Literally looks like this. Now we can pop this off. Now we can get to these here, which look like they are 30s. We'll see. Later that same evening, after a lot of bolts to take apart to take this bumper off, we have finally got it off. We're going to work on this tonight to get this done, and then tomorrow we are going to, uh, Show off the sounds. So these are a different size from this one here, classic BMW. These are 15s. Let's see, how does this get up? Oh, just pull straight up. Huh, that was easy. Just unscrew this. So we gotta pop this off here. I think I gotta get on those little arches about right here and pop this off. This connects to the turbo. Yeah, there we go. It's pretty much just clipped right into here. Almost kind of reminds me like an ornament. And the material of this is— all right, same thing over here with this one. All right, here we go. All right, so for in order of me to get the intake to come through, since these are front mount, as you can tell this is closed here, so I'm going to have to cut into this here enough where it's a big enough diameter to fit the intake to come out here to set just about there. So we're going to figure out where we're going to use to cut this This is hard plastic, so might use my Dremel. Finally, we got this here, bro. This was difficult. Feed this through back there. It's coming around. You can't really tell, but I got to do that side now. 1 hour later, after much trial and error, I finally got the fronts in. That looks so sick. I tried to get it as even as I can, try to get it straight across. I see some people that kind of have it aimed upwards, but that maybe just because of the positioning of trying to get them in there, it is a pain in the butt, and I had to cut quite a bit just to be able to fit them in. You know, I'm trying to imagine getting carbon fiber ones and trying to squeeze this in here. Now again, this is 3.5 as far as the size goes in diameter, so maybe that 3 is really a difference in trying to at least get it fit in here. But for the most part, this looks sick. I'm excited. I can't wait to get the rest going. Now we gotta get the rest inside here and we'll be good.
All right, I got the rest of it around here. Everything is nice and connected, running all the way across. Good old Arcade Tunes plugged in right to the other side. Everything is tightened where it should be. Front looks beautiful. Oh, and there's one thing too when I was looking down here, which I got to clean all this crap up. But inside of here, bruh, what in the—
Hi, hun.
Oh, I look gross. Please don't put me in this frame.
In this frame?
Yes.
You look gorgeous. All right, we did it.
You did?
Yeah.
Oh wow. Oh wow. I'm proud of you. It took a long time.
I know it took a long time.
Hey, great, excellent, proud of you.
Oh, look down there in the bottom right pocket, all the way to the right.
Oh, oh, what, what the— ah, it's dead! You burnt it!
I don't know if I burnt it.
Look at it. I know, it's all— oh, is that why you did this?
No, I was showing you what I finally had done.
It looks really great. You know, you've been running your car on this frog and it's fucking gross.
Can you, uh, get the frog for me?
Nope. Absolutely not. Nope, not in my job description.
All right, I got to get this frog out, bro. He's crunchy. Oh my God. Oh, he's so big. Oh bro, yo, this thing is huge. Oh my God. Oh, wow. All right.
Oh.
It looks like an action figure, actually. It almost looks fake, but yeah. All right, let's get him out and let's, uh, get this all together. Before I put everything back together, I'm gonna get a quick start and see how it sounds. It is dark and it is nighttime right now, and my neighbors are probably gonna kill me, but I just really want to know how this sounds before I put the bumper back on. Plus, there's something else I did to the car that's pretty cool, and I think we're right now is the time to do it. And it was super easy to do. I got the LEDs, DRLs, already attached to a heatsink. This is the OEM one, and all I had to do was go through, take the OEM ones out, which is this one here, and replace it with the RGBWs. And it's literally just like this, plug and play, super simple. Wiring was a little— had to figure it out, obviously, but, um, it wasn't bad at all. Maybe it took 3 hours only because I had to take the wheel liner off to put it in there just to be able to get to the headlights. Super cool. I'll leave the link below. Oh, and if you guys are curious about how you control the lights, it's all done with your phone. There's an app on here and you could just cycle through any lights you want, however you want the style to be. It's cool.