Fix Your Posture in 5 Minutes (Do This Every Morning)
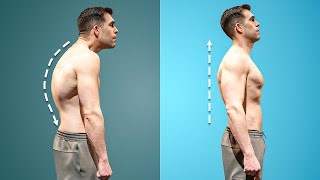
Mark Ottobre demonstrates five mobility exercises to fix desk posture: counterbalance squats for core stability, cat-cow for scapular movement, lock-clams for glute activation, planks for spinal stiffness, and wall squats for hip and knee alignment. A locked-arm push-up finishes the sequence to strengthen the upper back.
Chapters
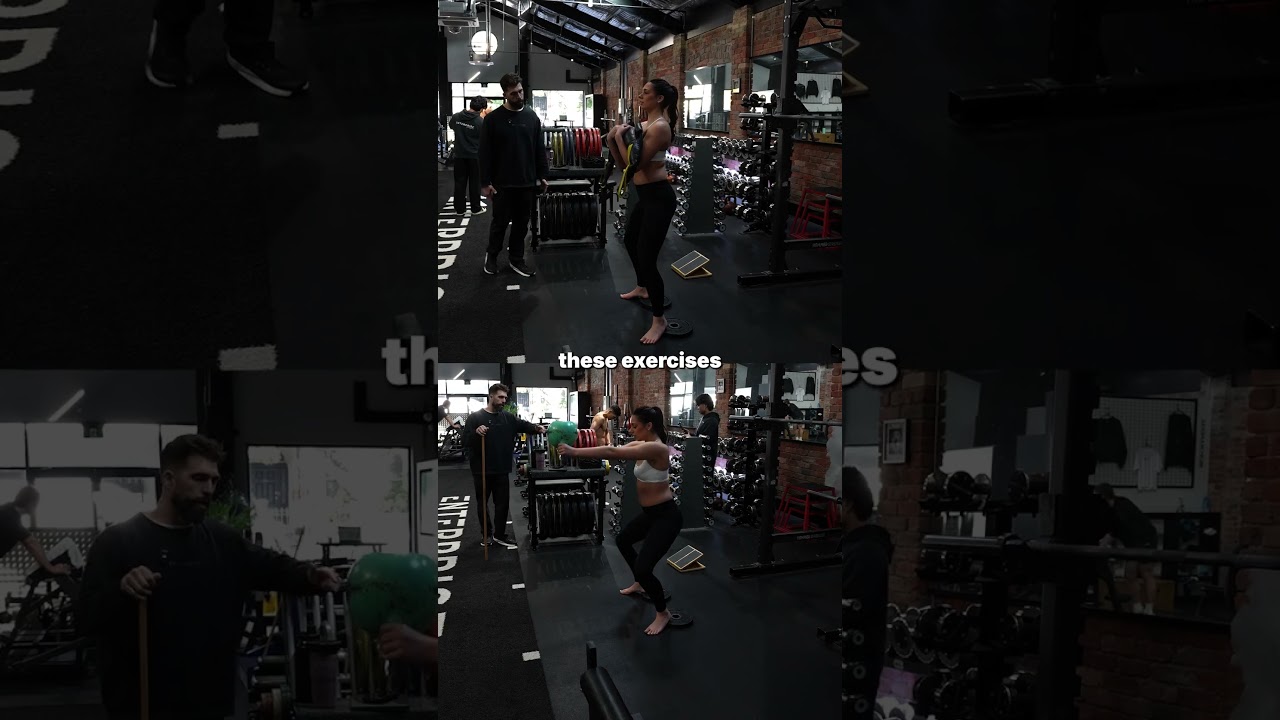
This is what modern posture looks like, and it's silently ruining your body. Here are 5 of the best exercises you can do right now to start fixing your posture, and if you stay to the end of the video, I'll show you a more advanced exercise that will really strengthen your posture. I'm Mark Ottobre, and I'm the founder of Enterprise Fitness. I've trained hundreds of first-place winners at fitness competitions, Olympic athletes, and Commonwealth Games gold medalists. So this is the counterbalance squat. To do the counterbalance squat, you need a load heavy enough it's going to challenge the core but not so heavy that you're not gonna be able to hold it out in front of you for 5 reps. So I've got the 8 kilos here. Some things, you want your arms perfectly straight, no bend whatsoever. So you can see here, and a little bit of reaching as well. We wanna get that reaching involved to really work the core. So reaching, reaching, reaching. As I come down, we wanna go for full range of motion. So you see here, my hamstring is completely covering my calf, and then I'm straight back up. You might say, I don't have this range of motion, what do I do? Well, you could squat to a box, but we really want to challenge the body and get as deep and as low as possible. So the reason why we do the counterbalance squat is because it teaches us how to stiffen up our trunk. So when people squat, quite often what happens at that bottom range of motion, people's hips shift forward, and what happens to refer to as the butt wink. Their hips are not stable as they come down. A metaphor that you might want to keep in mind is if you imagine a chain out in front of you. If we unlink the chain and just made the links of the chain bigger, that's hypertrophy, but it doesn't integrate into a movement. We want to integrate movements as one and link those chains so it becomes a correct movement pattern. So you might be wondering, what muscles does the counterbalance squat use? Now, yes, it is going to work your shoulders, and yes, it is going to work your legs, but they are not the primary muscles involved. The primary muscle involved that you really want to be focusing on when you're doing the counterbalance squat is your core, the transverse abdominis and your abs. This I like 5, but 5 really slow and good reps. So when you're doing it, I'm really thinking about keeping my core nice and stable all throughout the movement. As you can see, I'm doing it nice and steady because it's not just about doing the reps, it's about teaching my body how to maintain a nice tight core so that I can integrate that when I put a barbell on my back. So for people who spend most of their life and day at a desk and they do this exercise, what you may see is their arms get tired. They may not be able to get full range of motion. But again, always when we put a weight in front of someone's body, your core has to engage. So the real question is, how low can they go and do they have mobility in the lower part of their body? Now, if you don't have the mobility in the lower part of your body, then you're going to use a box and you're going to be squatting down to a box. When it Fitness, there's a bunch of dos and don'ts, and that's why at the end of this video I'm going to give you a free copy of my fitness user manual. It contains a lifestyle assessment section, nutritional guidelines, and goal setting section so you can plan your fitness to perfection. This exercise is a must for releasing the upper back. Okay, so how to do a cat-cow. Now, one of the keys with doing the cat-cow, or the key to doing a cat-cow, is always ensuring that your elbows are completely locked throughout the motion. And the other thing I like to do when instruct is I like to splay and spread my hands as much as possible. Then in this position, your knees should just be under your hips. So this is a nice position for me to do the cat cow.
So where we're going to start is I'm going to completely tuck my chin and then I'm going to push the world away.
Now most people do a cat cow, they stop there. No, no, no.
What we want to do is we want to really push everything, and even there I can get even more range. So This is technically, this is protraction, but to keep it simple, I want you to think of it as hiding your boobies. So in this position, you can see I'm trying to hide my boobies, I'm caving my chest in, and I'm pushing everything away. So my chin is tucked, I'm hiding my boobies, I'm pushing my shoulders forward, and my elbows are completely straight. Now, the reverse, I'm gonna do the complete reverse. Keeping my elbows locked, I'm pulling and drawing everything together.
You can see my head starts to come up. I'm going to bring my chin up as much as I can and I'm going to plant everything down. So I'm squeezing my shoulder blades together and I can feel everything squeezing together. So again, that's the end position.
And on both, both of these, whether I'm hiding my boobies or pinning my shoulder blades together, I'm trying to do it as much as possible and then do it even more. So you can see here I'm pushing everything away, I'm being aggressive with it. So when you do mobility work or do this type of work, there is somewhat of an aggressive kind of thought that you want to have in your head, is you want to push for that end range, right? So that's where my end range is.
I really want to work this as much as I possibly can. This is my end range, and again, I don't want to bend my elbows whatsoever. I want to get that end range, squeeze everything together.
It's almost like the muscles should be flexing hard on all of your mobility work.
And you can see here, when I do this, I'm really putting effort into it. It's not just, you know, it's not that. You really want to work those end range of motions and have everything working to get the most out of mobility. So what this exercise is going to help with is the articulation of your shoulder blades. It's the articulation of your upper back. It's the joints of your upper back that's called your scapula, and it's teaching your upper back to articulate, teaching your shoulder blades to articulate forward and back. And most people who sit at a desk, they don't have that articulation. They only have this, only ever forward. We want to train the body to be able to articulate back and also articulate forward because we don't just want to be in this position all the time either. We want to be able to go through forward protracted and also retracted with our shoulders. I do find most people aren't able to articulate their scapula as well as they should be able to. So we talk about the muscles being used in this. This isn't really so much about the muscles, it's about the joints. And as we spoke before about, it's about articulating through the scapula. So muscles that we're gonna be working, well, I mean, we've got our upper back. It's really it in terms of— we've got external rotation, internal rotation, thoracic extension and retraction, but really it is about articulating the joint. It's articulating the scapula. That is what we are aiming at when we do a cat-cow. This next exercise is a must-do to unlock your hips. So the lock clam. A lot of people when they do a lock clam is they set up and they're too straight. When you do a lock clam, you really wanna point your pelvis to the floor. So you can see where I am here. My pelvis is pointed to the floor. Now you can play with your foot position. What I personally like is the back leg is always going to be straight, and I like to put the leg on top, on top of my ankle. Now in this position, all I can move— and with your head, some people move up, some people— what you want to do is just pop your head down on your arm so you're laying flat.
So in this position, the only thing that's going to move is my glute. So I'm going to pull my leg off the floor.
I can prop my hand here if I want to get a bit more stability, but the only thing that's working here is my glute. So first and foremost, the lock clam isn't going to build slabs of muscle on your glutes because you need load. You need load to build muscle. But with that said, what the lock clam is about is about activation. It's about getting the nervous system involved, making sure that the right muscles are working and functioning when you go and do the said task. So whether you're squatting, bench pressing, you've got a game on the weekend, activating the muscles before you do that is going to allow the body and the nervous system to use the right muscles and create a level of stability that otherwise you may go back to bad habits. But what this exercise is going to help with, it's a prehab exercise. It's an activation. It's going to activate the muscle. So when you go do your squats, think of it as prehab or rehab if you're experiencing injuries. This is going to teach the body to use the glute correctly when you're going to go do a movement, whether it's running, jumping, a game that you've got on the weekend, or weight training. You want to make sure your body is prepared to move correctly. That's what this exercise is about. I recommend it if you've got weak glutes or your glutes don't activate the way they should. I recommend you do this daily 3 sets of 20 reps. So if you don't do the lock clams, let's talk about some of the dysfunctions that happen. You have your femur, and on a squat you have what's called a valgus. It's where the knees rotate in towards that center line of the body. What should happen is your glutes should be the stabilizing muscle of your femur. So if what you're finding is when you squat, when you run, or when you walk, that knee is moving in and moving towards our strength, our VM, our vastus medialis, you're finding that the glutes aren't stabilizing the femur, that bone of the body. It's not stabilizing correctly. We want to get our glutes to stabilize that leg muscle so we're not losing strength. We're not moving towards our VM. Our glutes are stabilizing that leg. So we're going to be able to express more force. This next one is great for the core. So in talking about a plank, most people almost always I see do a plank completely wrong. So we want to talk a little bit about the gymnastics position, and what that is, is it's where our rib cage is stacked on top of our pelvis. So you want to imagine your rib cage comes down and your pelvis comes up, and then you're sucking your belly button into your spine. Now, two other things need to happen. We need to squeeze our bum cheeks as hard as we possibly can, and then also squeeze our quads. I'll demonstrate and show you. The other thing for bonus points that we're going to do is we're going also make a fist and push ourselves away from the ground.
So there's actually in a plank, a lot is happening in a plank.
A plank is not passive. If somebody is doing a plank and they're just kind of la-dee-da-dee-da, they're not doing it properly. So let's start from the hands.
I make a fist and I'm gonna push myself away.
You can see here, I'm not here.
I'm pushing myself away, almost like think hide my boobies. Then I'm pulling my rib cage down. Now I've got my bum up purposely. I'm gonna tuck my bum down. So my pelvis is tucked under. I'm trying to hide my tailbone and I'm pulling my rib cage down. Now I'm gonna flex my bum cheeks as hard as I can. And I'm gonna flex my quads as hard as I can. So right now I'm trying to get as stiff as I possibly can in the plank. I'm trying to create stiffness.
That stiffness I'm going to carry over to a deadlift. I'm going to carry it over to a squat. I'm going to carry it over to every exercise I possibly can. I want to create as much stability in my body as possible. That is going to allow me to output as much weight on the bar as possible. So what this exercise helps with, it helps teach stability through the core. A lot of people who have lower back issues, they think it's because their back is weak. Often it's because they're not using their core correctly. So if you do have a lower back issue, I do recommend doing planks. It is an exercise that again is going to teach stiffness and stability. This is why we do the plank. It's not necessarily again going to build slabs of muscle on your core. It's going to teach you the right position to lift in, which is absolutely key. And for those who spend a lot of time at a desk in that hunched position, they're not using their abs correctly. From here to here, I want all of this nice and stiff. But again, I'm going to be squeezing my glutes and I'm going to be squeezing my legs at the same time. So everything is going to be activated. But really, what is this working? It is working predominantly your core. And again, the purpose of this exercise is to teach stability. So what you're going to be using when you're doing a plank is everything from your shoulders down to your ankles. You want everything activated. So you're going to be using— squeezing your hands, you're going to be pushing your chest forward, you're going to pull your rib cage down, you're going to pull your hips up, you're going to bring your belly button into your spine, you're going to flex your glutes, and you're going to flex your quads. Predominantly you're going to be activating your trunk. The reason why we do the plank again is stability. We are teaching the body, we're teaching the nervous system to remain stable and create stability that is going to allow us to lift more load on the bar and ultimately keep us injury-free. For a lot of people, if they don't do this exercise and you're experiencing back pain, Well, immediately you're probably not using your core the way you should. You're probably missing out on an opportunity to create stability in your body. So you want to think about pain. People think that if their back is sore, it's the back's problem. It's almost never the back's problem. Think of pain as a team, and let's say for example there are 3 people on our team, and me and my buddy on my team, we say let's go out for lunch, and we leave this other perp— person, let's call them Mary, to do me and my buddies work. Now Mary gets really tired, and I want you to think of Mary as the lower back in this case. So Mary takes up the slack of the abs and the lower back. That's why Mary gets injured. So in this case, what we want to do is we want to activate the lazy workers. So for most people, when they have back pain, the lazy worker is the abs. So this is why it makes sense to get your abs involved, get the other muscles that aren't working correctly, they're not working right, involved so that it gives the back— it gives Mary in this case a break from having to do all the work. This one is amazing at opening up the hips and teaching you a diabolical squat pattern. Okay, so how to do this, it's very, very simple. All you really need is a wall and to get as close to it as possible. You don't have to use a stick. I like to use a stick. Using a stick is a little more advanced, but I'll take away the stick just for now for the explanation. So what we really want to do with this is we want to teach the body how to squat using both our hips and our knees and splaying the floor. So here you can see I can't move forward. If I move forward, I'm going to nosedive straight into the wall. So as I move, it forces me to get down. I have to open up my hips. Now it creates that kind of nice dynamic between I push my knees forward, but I also have to stick my hips out at the same time. Which creates this nice stability through my pelvis. So you can see I'm pushing my hips out, I'm pushing my knees out. My knees are also coming forward and then I'm straight back up. So it does a lot of things. This achieves a lot of things, but really it achieves that nice end position on that squat where again, I'm not just relying on my knees coming forward. I'm not just sticking my hips out. More importantly on the squat is I want to stay up tall. Most people make mistakes on their squat by leaning forward. I have a wall in front of me, I can't lean forward. So if I translate this pattern— this is a movement pattern— if I translate this pattern over to my squat, now you can see it becomes a really nice squatting pattern where the bar is staying in line with my midfoot. What this exercise helps with is developing a beautiful squatting pattern. As discussed before, what happens a lot of the time when people is they move forward or they move their knees too far forward, or they just move from the hips, or they don't splay their knees out far enough. To do this exercise, you need to do all 4 things at the same time. You just stay up nice and tall. You need to push your hips out, you need to push your knees forward, and you also need to splay your hips. So what this allows— this, this exercise here, it teaches you to create a really beautiful squatting movement that you can marry over when you put a bar on your back. The muscles that are worked in this exercise are all the same muscles that you're going to be working on the squat, except they're not under load. So you're going to be working your glutes, you're going to be working your quads, you're going to be working that upper back, you're going to be working your abs because you need to learn tightness. So what this exercise is about is teaching you the pattern. When we learn the pattern, we use the right muscles, and we're going to use a lot more muscles when we have the right pattern. So this is a great segue to teach someone a correct squat. A squat is a normal movement. Those who can't do a full squat have dysfunction in their body. So by learning to do the squat here, we're learning to use our hips and our knees, and we're also using stability. This type of squat is really going to enable us to use as much load on the bar as possible, but we also want to take time to use a high bar squat. So the high bar squat is where our knees come all the way over our toes. The key thing here is that we want to be as up tall on either squat. However we squat, we want to be as up tall as possible. So what this allows is an objective litmus test for us to ensure that we're moving and have a nice range of motion through the hips and lower body, and we're able to keep up nice and tall. When we bend forward, we compensate with muscles that aren't supposed to be working. So here's the more advanced exercise for your upper back and for the cat-cow. So for the locked arm push-ups. You might be thinking, how do you do a locked arm push-up? Well, very simple. You get into the push-up position and you keep your arms locked, which means that everything's going to be working from the upper back. Now, you can do it on your knees if you need to scale it back. Otherwise, we're going to be doing it on our feet.
So in this position, as you can see, is going to be pushing the world away, and you continue to push. So I could stop there, but that's not my end point. My end point is actually quite a bit further And you can see here as I'm tucking my belly button into my spine as I do it to really get to that end point. And then I'm going to come down keeping my arms locked, right? So you can see here, I'm all the way down. So this is the advanced version of the cat-cow where we're starting to add load in this position. So I'm pushing everything away. It's really, really important you do less reps, but you really go for that full range of motion. We spoke before about articulation of the joints. This is putting the joint, the, the joints and the movement under load as we do it.
So what this exercise helps with is that internal and external rotation from that shoulder whilst our arms stay locked. And again, it's a pattern. You got to think of all of these movements that we've done as patterns. It's patterns that people are weak in, and ultimately it's patterns that people aren't strong in that lead to injury. It's patterns that lead to dysfunction. It's patterns that lead to unexplained back pain or headaches. So when we strengthen the pattern, we alleviate a lot of the dysfunction through our body. So this having the ability to load and go through internal rotation and go through external rotation while keeping our arms completely locked is going to strengthen the pattern, that movement, and the muscles surrounding that. Think of it like this: joints move muscles. So it's in our best interest to keep our joints strong and healthy, and that's what these exercises are doing. The muscles that are involved here are mainly your upper back, but you are going to be using a lot of that serratus anterior as well, especially when you're pushing forward. So just think of it like this: this is more about a healthy movement pattern than it is about a particular muscle group. And the reason why I say that is because what this exercise is really doing is strengthening the internal and external rotation whilst under load. There you go. Use these exercises right now to fix your posture. And as promised, here's the link to my fitness user manual. Grab it now to get your health and fitness dialed in.