How to Do an Initial Client Assessment (Step by Step)
A trainer screens a new client named Jacqueline using five movement tests performed barefoot, finding weak glutes, poor core stability, and limited upper-back strength. The session shows how to pick activation exercises like wide-stance planks and glute clams to address these gaps, then select main lifts (front squat over Zercher squat) based on what needs loading and supervision.
Chapters
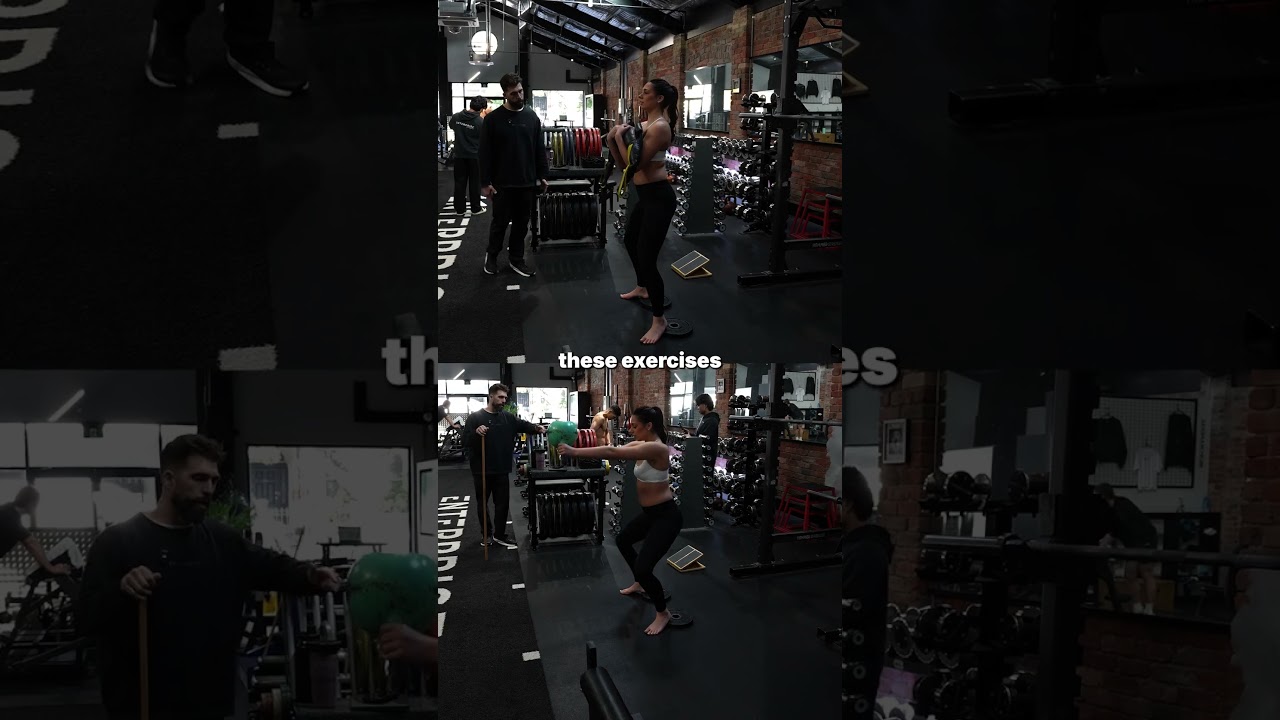
In this video, I'm going to be taking you through the exact process that I'd run when I get a client and how I screen them to how I program for them. So we wanted to really, I suppose, pull the curtain back and show you everything step by step. So what I'm going to be doing is a friend of mine, Jacqueline, who I've never trained before, I've never seen how she's moved, never been into the gym before with me, and we'll make it really authentic so you can get a really good perspective as to my exact process and you get to see my reactions as to how I program things. And I'm going to— so I'm going to screen Jacqueline, I'm going to train her for a little bit so you can see how I make those progressions, and I'm going to take you to my computer where I'm going to write the actual program where you're going to see how the screening and assessment marries up to programming. Because remember, you can't divorce screening and assessment from your programming. So you're going to get to see live how all the discrepancies that happen in the screening and the movement, uh, things and her goals and all that kind of stuff will marry up exactly to the program. So without further ado, let's take a look. So we're going to start with is the Big 5 screening and assessment test. So the first one we're going to do is a bodyweight squat. So Jacqueline, can you please do for me a bodyweight squat. So here what I'm looking at is just generally how she gets into the movement. Do another one, just keep squatting. So movement-wise is actually pretty good. So there's a— yeah, it's actually pretty good, holds pretty well. Because I want to see more of what's happening is I am going to get her to take her socks and shoes off. So Jacqueline, take your socks and shoes off. I want to see what's happening from the feet and from the base, from the base up. There isn't too much discrepancies that we can see from the bodyweight squat. So I mean, she moves pretty well, she does maintain as well. There's not really any butt winking as well on the bodyweight squat. But we'll get her to see, see what happens with her shoes off. So do another one for me. All right, so she does lose a little bit. We can see a little bit more. She does lose a little bit through her core, which we are going to be able to solve pretty easily. But before we move into any solving anything, I'm going to move into the next test, which is the overhead squat test. So you've got to think— remember the thing about the overhead squat test, what we're looking for is a challenge test. So you're going to grab this and go— can you go this? There you go, perfect. The reason The reason why we do that is to make it harder. If people go wide, they can cheat into the range of motion. So what I'm going to do is bring that up overhead, up overhead. Cool. So just so when you're watching at home, um, what I'm looking for often when people bring that up overhead— she doesn't do it— is they sway forward and get into lumbar extension, which she doesn't do at all. So you go into a squat. Okay, so do that one more time for me. So there's a little bit of weakness for the upper back, not a huge amount. Try and really maintain this up here. Okay, and we're gonna just— yeah, it's not too bad. So mobility-wise, she's fine, but there is, there is weakness to the upper back. And there's also— so already what I've identified is this weakness to the upper back. Well, it's not ideal, like she doesn't move bad by any stretch of imagination, but there is weakness to the upper back and her abs are a little disengaged at the bottom. And you're seeing that with the butt wink. We are going to work on her squat position soon, but we'll keep going with the tests. The next one we're going to do is, can you reach down and just touch your toes? All right, perfect. So back up. All right, remember with this test is we're not looking at range of motion, we're looking at how they get there. And you saw immediately when she went into that, her hips went back. So she's not using her lower back, she's using her hips really well. Just do one more time for me. Yeah, perfect. So there is a lot of hips. There is a bit of obviously lumbar flexion, but for the most part she is using her hips. All right, next test, it's the clap test. So without explaining anything to Jacqueline, I'm going to get you to clasp your hands like this, and we're going to do it regressed to begin with. Bring this foot out like this. Oops, no, no. So I want you to balance on one foot. All right, I'm just going to adjust you just slightly. Lock this leg out, lock this leg out, lock the knee out, lock, lock, lock, lock, lock. Point the toe up, up. Okay, hold that. Relax for a sec completely. Bring your feet together. Relax. Feet together. All right, get back into position up here. Bring your foot down a little bit. Yeah, okay. Now I just want you to bend your knee and come back up. And back up. Okay, do that leg. You don't have to go slow. You can do the other leg. A bit of instability. Back up. Yeah, a lot of instability. All right, so, so there is quite a bit of instability, which I'm not going to say what it is yet because I don't want to tell her. Uh, bring your hands here. Yep, stick— keep them there. Get back into position. And you've never rolled your ankles before? Uh, yes, you have. How many times? Relax for a sec. Once? Both feet? No, it was my left. Just your left? Okay, so all we do is just a little hop forward. Yeah, all right, feet together. All right, and a leg, just a little hop forward, just a little. It doesn't have to be anything massive, just— oh, okay, cool. So this was the ankle you rolled? Yeah. All right, you probably need to slow motion that, but you saw immediately this knee, the whole femur rotated in, and then knee came in. So there is definite weakness through the glute, particularly on this side, particularly on— was that your left side? So, um, we definitely will be doing some glute stuff. Definitely glutes, abs, upper back. So far from our assessment, glutes, abs, upper back, uh, what we are going to need to address in this first program. But mobility-wise, um, we're pretty good. So last test, which I'm pretty sure I know the answer to already, but we're going to test it. Put your hands on your hips. I need you to, uh, you don't have to set any records, but we're gonna do a backbend. So, oh, actually do it again. And okay, that actually surprises me. Um, try and go a little bit more if you can. All right, so go, just keep, keep going with it as I talk because this will loosen up as you do. So I was actually expecting, I was actually expecting a lot more range of motion from Jacqueline here than what we've got. So we don't have anywhere near the range of motion that I thought we would, and it is actually a little bit of a red flag for loading a deadlift for Jacqueline because on the back bend, we want to have that extension through the lumbar, right? And you can see here there is very little actual— and through the thoracic too, there's very little extension. So what we're— from this information, what we're going to not do is we're not going to be doing any standing pressing, because obviously with standing pressing, as we press, people can compensate for their pressing by moving into that lumbar extension. And because she doesn't have the range and strength there yet, we're not going to be doing any overhead pressing, and we're not going to be deadlifting to begin with. We might use a trap bar, um, but we'll see. Just do another like Just do— move freely and do 10 for me. Hands on hips. Yep. And try each one. Try and go for a little bit more range of motion. Don't hurt yourself. Don't get into anything that's, you know, bad. Just move freely. Where do you feel that when you do— as you do that? There. So around, yeah, around the spine, not on the spine. Yeah, perfect. Cool. You always want to just check with that, make sure there's no pain. If it's on the spine, obviously you don't want to be going into that territory. Around the spine, you're using the erector spinae, which is perfectly fine. As she's doing this, she is loosening up. I am going to run one more test with her just to see. All right, that's fine. All right, we're going to run one more test. You're going to bring your— you're going to lie down, your head's going to be here, and your feet are going to be there. We're going to just test the glutes, right? What we want to look at is the hip position. So imagine there's a line that's running straight across the hips. What you do is get into a— if I say get into a bridge position, do you know what I mean? A bridge? Yeah. No. Okay, so let me bring your hands out, both hands out. All right, now bring your feet up. Bring your feet up like this. Right now I want you to extend as high as you can. Good. Now, in that position, what I want you to do is controlling and lift one leg off the floor. Yep, and do the other leg. Okay, and I'm just gonna get into position just to assess again. So let's do that again. Bring up— stop, stop, stop, stop. And already her glutes have gone down. So we can Note that there is a lot of weakness here. Bring your feet up, extend up high, extend up, extend up, extend up, extend up, extend up. I want you to maintain that, maintain that. Now switch legs. But try, extend through the hips, extend, extend, extend, extend. Yeah, now do it. Get this leg off. Yep, and go the other one. Keep it up, keep it up, up high. So you're really having to work to do this, eh? Yeah. Which one, which glute do you feel it more in? Is there more? Is there one more than the other? Try and get up high, get up high, get up high. Do the other one. Yeah, get up high, get up high. Yeah, definitely. So you can see, relax for a sec, you can see the hip shift from each, like this doesn't extend as high, which is consistent with what we saw on the CLAT test. Relax for a sec. Bring one leg over, so as in— yeah, that position there. All right, I want to get you to do the same thing. Extend up for me. Higher, higher, higher, higher. Hold that. 5, 4, 3, 2, 1, and down. And do the other side, switch it, come up, higher, higher, higher, higher, 5, 4, 3, 2, 1, and relax. Yeah, definitely we can see that right glute being problematic. Alright, so let's look at some interventions now of what we're going to do. So the first thing that we're going to address is the underactive core. So just to have a refresher in your head where we're at, dual bodyweight squat for me. So this is our control. Okay, great. Come back up. There is a little butt wink. So first control we're gonna do is teach Jacqueline to use her abs. So what I'm gonna get you to do, I'm gonna do this two ways. We're gonna start with a plank. So get into a plank position. Now again, I haven't trained Jacqueline before. I haven't seen the way she does planks. So I'm just gonna, you're just gonna do what you think a plank is and then I'm gonna address. All right. So Jacqueline does a plank the way most people do planks, which is, which is wrong. Right? She's in a very narrow position and she's not using her abs at all. You can see through here there's quite a bit of a dip. So in teaching someone to re-engage their core, we need to teach them to re-engage their core, right? So what we're going to do— I'm going to change position— wider with your arms, wider with your feet. Now get into position. Now what I want with your hips— your hips are up in the air— I want you to pull your pelvis into your— there you go. Now flex your butt as hard as you can. Imagine there's $1,000 in your butt cheeks. I'm trying to pull it out, you're trying to keep it in. Feet wider apart, feet wider apart. Now suck your belly button in towards your spine. There you go, and put— that's a good position. Do you feel that more? Yeah. Right, now I'm gonna put a timer on. We've got a minute. Squeeze your butt, squeeze your butt, squeeze hard, squeeze your legs. Now what I like to do with clients to really teach this core activation is I'm gonna put diagonal forces on each side. So make sure you're tight. There you go. So you feel this more in your abs? Yeah. Pull that pelvis in more. That just rotates. Higher, higher. There, there. Really tuck the tailbone under. Flex the legs, flex the legs. All right, let's try again. Let's just do 20 more seconds, right? 20 more seconds. So diagonal forces, sometimes I like to just give a little bit of a push on each side to really make sure they're activating. Belly button in, belly button in. Pull the pelvis under more. 5, 4, 3, 2, relax. So that's pretty hard. 60 seconds is too long for Jacqueline. Probably need to start with 20 to 30 seconds for this because it's about using the control. Did you feel that more in your abs? Yeah, a lot more. Definitely. Yeah. All right, we are going to come back to this, but you can already see how— you can probably already see how you're actually not using your abs. You're a lot of time just compensating with your lower back, right? And getting the abs stronger, we'll see an improvement. And we'll see if these activations do change the movement pattern when we go back to the bodyweight squat. So you can stay right there. The next one, I'm gonna grab her a 4 kilo. Just judging by what I think I'm gonna see, we can do this one of two ways. Because I like efficiency, We're going to do it this way, but this is where you can stack things together, right? So some of the, the issues with Jacqueline were her glutes and her abs. So again, she doesn't want to be in the gym for like hours and hours and hours. Um, she wants efficiency, she wants to hit big bang for buck activation exercises. So this is what we're going to give Jacqueline. So before a workout, I want her planking. She's probably going to be planking every day, every time she works works out because that is quite weak for her and she needs to learn how to really engage and hold that position, right? The second thing is her glutes are underactive and her abs are underactive, so this is definitely going to be for a lower body day. So what I'm going to get you to do is put this around— let's go around below your knees with this one, and it's just a light band, it's not a huge band, and I'm just going to incrementally show you the steps of why. So a little bit lower with the band. All right, now we need to do a squat with this. So get the bodyweight squat. Now this addresses the glutes, but it doesn't address the abs. So I'll get you to grab this upside down, hold it from the handles. Yeah, perfect. Right now I want you to reach out, reach out, reach out, reach out, reach out. Hold that. Now use only 5 reps. Squat for me. Cool. Now I really want you to try and snap that band apart with your knees. So pull it back. There you go. Now we can see the glutes are working and the abs are working. That might be too light for you though, which I think it is. Just give me this for a sec. So it's almost fully addressed, but not quite. And I think it's a load issue. Let's try that. Perfect. Much better. Now, there's no rush to this. Be slower with it. Okay. Lock your arms out. Slow, control down, control down, control down, control down. That's a hell of a lot better. 1, control. 2, spread the band apart more. Spread the band, spread the band, spread the band, spread the band. 3, hey, arm straight. So 2 more, 2 more. It's only 5 reps. Slow. There you go. One more. This is much better. Control. You've got it. Perfect. Beautiful. That last rep was her best rep. So we've seen some really nice things happen there is without me, and I was kind of in my head pausing whether I cue this or not. So you know what's going inside my head was the bracing aspect of how she was using her core. When she started the first 2-3 reps, she actually wasn't really bracing, but you would have seen— well, maybe not because you're not standing where I'm standing— but those last 2 reps, she breathed into her belly without me having to cue that. So when you get the right exercise for your client, what happens is you don't have to say as much. So I don't have to say sit up tall, do all these kind of things. The exercises that I'm giving her, by putting a band around her knees, by putting something in front of her, she's moving exactly the way I want her to move without me having to constantly cue things. Very, very important when it comes to your programming. And again, what I'm trying to do here is get her abs working harder and get her glutes working harder. All right, so I'm going to get you back to the plank before we reassess. We're going to do this one more round of each. So probably for your program— well, not probably, we'll do 3 rounds. So back, back into here. I'm going to put, put 20 seconds exactly on here. Just before you go, I'm going to show you some keys here. Is— oh, don't move for the cameraman. So most people, when they do the plank, butt up in the air, right? Which is where you, you assume the position kind of like this, which is super easy. We don't want super easy, we want effective. And if you basically want it to be effective, now when you're doing the plank, the butt up in the air, you need to pull. See, I'm pulling my hips under and pulling my chest down. Now my abs are on, my feet are wide, and my hands are also wide. As I'm in this position, I'm not here with my upper back. I'm actually pushing myself away. So I want to create as much stability. So you think, you think of it like this, you got 3 hubs of stability in your body. You've got your pelvis, you've got your spine, and you've got your shoulders, your scapula, right? What we're doing with this is I want you to pull everything in to keep your pelvis tight and your spine tight, right? And also your scaps are going to be tight because you're pushing everything away, right? So let's get into position. It's only 20 seconds of your life. It's not a lot, but it's going to be intense. So tuck, tuck, tuck, tuck, tuck. Good. There you go. That's much nicer. Walk, walk, walk. Flex hard. Imagine you're in a fence and I'm gonna try and push you. There you go. Way better this time. Way better. Way better. I reckon you get more than 20 seconds here. Good. Feel this through your abs. Good. That's 20 seconds. We've got another 10. You've got it. 10, 9, 8, 7, 6, 5, flex your butt, 4, 3, 2, 1, relax. How'd that feel? Much better. Feel more in your abs? Yeah. Good. You can hold that position. Yeah. So we're probably looking at 30 to 45 seconds once you understand what we're trying to do. Much better. Back to this one. So you saw, again, I want to point out that you need, you need to balance it with your weight, right? The counterbalance squat, if I put the 4 kilo in her hand, she didn't get quite as tight. 8 kilo will be too heavy, more for the fact of her elbows and her upper back. This is 6 kilo, which I think is just about right for, for Jacqueline, right? So it makes her work, it's not too heavy, it's that kind of sweet spot. That's what you're looking for your activation exercises, is a sweet spot with your weight. There needs to be a challenge. Alright, so when you're ready, it's 5 slow reps, 5 slow reps. Lock these arms out. Pull, pull the band apart, pull the band apart, pull the band apart. Good. That was still too fast. Alright, think about what you're doing. Pull the band apart, switch your abs on. Think of this as a core exercise. Pull the band apart. Pull, pull, pull, pull, pull. There you go. 2. Pull the band apart, pull the band apart, pull the band apart, pull the band apart. 3. Imagine your waist is a belt around your waist. Breathe into it. Yeah. So expand your waist as you start, right? Breathe through your nose. Expand the waist. Give yourself a belly. That's better. Good. One more, one more. Keep the arms out. Last one, nice and slow. Arms out, arms out, arms out, arms out. There you go, there you go. Cool. Where are you feeling that most? Um, probably a lot of my shoulders. Shoulders, right. So it's the right weight for the glute glutes and the core. I need to tweak it because I think the 4 kilos is too— maybe we use the 5 kilo plate next time. But that's okay, I'm pretty happy with that. I'm going to show you the next glute exercise. Actually, before we do that, take the band away. Um, just chuck it on the floor, it's fine. Do the bodyweight squat for me. Okay, so it's still, it's still the activation and the interventions haven't, you know, instantaneously fixed things. There's technical stuff, but there's stuff that we can definitely work on. All right, stay there for a sec. I'm going to grab a towel. So the other activation we're going to be using for Jacqueline is the 90-degree glute— what would you call this— glute clam, 90-degree glute clam. What you're going to be doing with this, it's going to be here You're gonna lie down, so you can do this on a bench, and you're gonna basically clam, 1, 2, and each one I want you to hold for about 2 seconds. Should feel this just in your glutes. The reason why I like this is because this is an effective way to really activate the glutes before training, which is kind of like a, a no-brainer. It's a no-brainer exercise. So just below the knees. There you go. Yeah, um, let's go to this bench over here. That's better. So get your feet flat on both. There you go. Just get under. That's perfect. So what we're looking for this as well is You want that straight line, so that can even be a bit more forward. Yeah, now, now go. Hold. 1, 2. Good. And release. 2, 1, and release. 2, 1, and release. 2, 1, and release. Good. 2, 1, and release. 5 more. 2, 1, and release. Do you feel this through the glutes? Yeah. Good. 2, 1, and release. Good. 2, 1, release. 2 more. 2, 1, release. Last one. 2, 1. Good, done. I need you to do one more bodyweight squat. Actually, before you do that, let's do to do 10 squats in this position here. So put your feet there. I want you to lean slightly forward, so stick your hips back. Yep, up tall with you. So there. Now do 10 squats in that position. Yep, exactly that position. 1, 2. Kick your hips back more like you're almost— yeah, there you go. Now step now to do the squat. 2. So really hit your glutes. 3. Better. Stick your hips back more. 4. Imagine I'm gonna like pull the chair away from you, right? So you really got there. 4. So you really got to stick your hips back there. 5. What we're doing is really trying to emphasize her using her glutes to that squat, and obviously bands there as well, because you've got to look at her knees. Her knees are moving into that knee flexion really, really nicely. There's no problem with ankle flexion, there's no problem with knee flexion. So what I'm really trying to do here is get her to use her glutes to get that knee stable and also to get that lower back, because there is that butt, uh, butt wink that she's doing, which the butt wink is more an issue of her abs being too weak. But I thought we'd do a bit of extra work here. Just do one more. Spread, spread, spread, spread, spread. Excellent. All right, relax. How'd that feel? Yeah, it's a workout. It's a workout. Well, this is the warm-ups. Yeah, yeah, good. All right, so I have enough information to write her lower body program. I want to see a little bit of what's happening with her upper body now, which kind of already know. Yeah, I have enough information. So just to— we will do a few exercises exercises after I do this. But basically what we've seen is too weak of abs, ankle flexion's fine, knees are mostly fine, glutes are weak. So not big things we're addressing here with Jacqueline are glutes, her abs, and her upper back. Um, I've already— I kind of already know the answer for the upper body, and the reason why I know the answer for the upper body is because of, um, she's not able to— like on that challenge test with the overhead squat, she wasn't in a perfect position, and you can see her rounding out, which just— it's not that anything is quote-unquote dysfunctional. Really, the only thing that I see in terms of dysfunctional is this weakness. So we've got to pinpoint the weakness and make a weakness of strengths. If we can make a weakness of strengths, she'll get better at all of her lifts. So I'm going to have a look at how you do a lat pulldown and how you do a pull, and mainly because this is going to show me how I'm going to program best program her upper back. I've already got some ideas in my head of what I think I'm going to do with her, but this will confirm whether I'm on the right track. So for this, I'm just going to get to use a straight bar. As for the program, the program might give you a different grip, but I'm going to do my assessment with a straight bar. And this is like exercise assessment, yeah? It's not a, it's not a, how do you say, this one's too thick. It's not an assessment in a true sense. It's me actually seeing how she moves to figure out what exercises and how I'm going to modify the exercises that I'm going to write in her program. Whether she's going to do a pause, whether it's going to be leaning back, Where's she even going to do that pull down? We'll see. So jump on. You've done this exercise before? Yep. Yep. All right, you do you, I'll do me. So let's see, have a look at what you do. Again, I've never trained Jacqueline, so I don't know what to expect and how she moves, but I'm gonna, I'm gonna let her do the way she does it, right? Not going to assess, and I'll tell you what I see after this. I really want to point out some stuff, but I don't want to tell her. You do you. If you look at here No, just you do you, you do you. Yeah, and I'll point out the stuff. So at this point, again, I'm not, I'm not going to make any changes whatsoever because I just want to see what she does. Okay, great. And I've seen exactly what she does. So you do another one. So hands, number one, aren't even, so I need to go over that. She does pull forward, she rolls forward, she uses a lot of lat but not any upper back. So go forward again, do another rep, just do it as you're doing. Doing? Yeah, a lot of— use mainly lats, not really using upper back. So relax. Now you might say that pull-down is all for the lats. Not really. When I'm working with a general pop client— stand up for me for a sec, Jacqueline. I just want to put you here again, just want to show the camera crew something. Just relax. All right, so you see, Jacqueline, very common for females, very common for males actually, but this protracted position. So if you look at Jacqueline's hands, her hands are protracted a bit already. So what we're really aiming for is to bring her shoulder blades back into position here. So the way I use lat pulldown for people is to start to facilitate bringing and pinning those shoulders back, right? Which is going to be then more advantageous to any, any of our pressing exercises as well, and better for posture. Just make sure you keep your abs in, you don't start having sway back. Right? So let me run over how to do this, how I want you to do this, whether we're actually even going to do this. No, I'm going to start you off with the way I start everyone off. So let's, let's go over here. And as you can see, like, as I'm going through this, I don't assume that I have the answer, right? I don't necessarily have the answer right now. So I'm gonna start jackaling with this the way I normally start, um, learning that retraction because you've got to remember what my goal for everyone, especially females, um, can you do a chin-up? No. So my goal for Jacqueline, I'm not thinking when I write a program, I'm not thinking about writing the program for 4 weeks. I'm thinking about where she's going to be in the next 12 months. So you've got to remember that, like, okay, so my goal for Jacqueline, would you think it'd be pretty cool if you do a chin-up? Yeah. For the audio, she said yes, of course. Everyone's gonna say yes. Everyone's gonna do 12 chin-ups, right? So the reason why I like chin-up as a marker for success and also as a goal, again, particularly for females, again for males too, but the reason why I like it even more for females is because females, when they get into a quote-unquote weight loss plan or they're trying to get body composition, is they'll just starve themselves. But if you starve yourself, it's going to affect performance. So the chin-up goal, you have to get stronger. There's two ways to do a chin-up. Two easy ways to do chin-ups. You get lighter or you get stronger. Now obviously you want to do both, right? You want to get lighter and you want to get stronger. You want to recompose your body. So the chin-up goal is, you know, she's thinking about reducing body fat, but she also has to train hard, right? So you're not going to forego the carbohydrates before training because that's going to affect your training. So you're going to have to eat properly, which means you're not going to eat too much, you're going to eat enough to really train hard, but you also need to train to get stronger. So that's why I like the chin-up goal, because it's a balance of both of those things. And now as it relates to the chin-up goal, to do a chin-up, we need to get that scapula moving correctly, right? We need to get that scap moving into the armpits, then extend. What most people do on that chin-up is they bend from the arm, right? You're going to produce a lot more force if you can do this. James, can I just grab our general manager, Diamond Coach, James to demonstrate this point. So James, what I'm going to do is grab my hand and resist me, right? So I'm going to do basically what most people do on a chin-up is I'm going to use my arm, right? Actually, I'll use this arm so they can see. So I'm going to use my arm and I can't really— I can generate force, but if he wants to fight me— so fight me, James— like, you know, he's got the upper hand. Now if I'm going to use two joints, right? Use the same amount of force, James. If I'm using my scap, see, automatically I can pull him by using this because your scap is a lot bigger muscle than just your bicep. So when we're teaching clients— thank you, James— when we're teaching clients to do a pull motion, we need to teach them that retraction, depression, retraction, depression, extension, or flexion rather. Depression, retraction, and then pulling it into flexion. So the way we teach that is unilaterally with one arm, and it is easier to teach this on an angle. So that's why we're going to start here over the lat pulldown. So Jacqueline, if you can— what I need you to do, I'll just demonstrate, is we're going to be on one knee in this position here. We're going to retract. So I want this retraction and I want you to pull. This is going to form the basis of our chin-up. It's going to form the basis of our lat pulldown. It's going to form the basis of our seated row. That's always opposite arm to opposite leg. Now this is a very boring movement to coach, but it is very needed, super needed. All right, so when we're coaching this, what you can see— do it again— is I put my arm on her elbow. Now I want you to pull this as close into your body without moving your arm at all. So pull in. See, you want to move your arm. I don't want you to move your arm. Now move your arm and pull yourself up into it. That's it. That's one. So release everything because we want to get this moving, right? Release everything. Now pull it back. Pull it back without moving that arm. That's it. Now pull yourself up into it. There you go. Good. Don't be passive at any point in this movement. Not enough for me, right? I'm always going to be demanding more. So pull this down to press. Yep. Pull more, pull harder. Now pull. Open, open, open, open, open. Good. 3. Good. And again. Release, release. Going to do two more just for the purposes of this video. Pull, pull, pull, pull, pull, pull, pull, pull. Chest up as you do it. Yep. Open, open, open, open, open, open more. Good. So open through when you do it. See how you pull down when I say open. When open through your chest. Right. Don't be scared to call that bad reps. There you go. Keep that locked. Now open through your chest and pull. Open through each— there you go. That's it. Do one more to show me that you can do it. When you release, I want full release. There you go. Now go open, open as you pull. Good, we're getting there. I need some more coaching, but we're rested. Rest, relax. We'll go back over here. So what we're going to do, that upper body, I've got a good sense we're not going to do any standing overhead pressing, but we are going to introduce some arnie presses. I'm also going to do some Y raises. Y raises are going to be key for Jacqueline. It's another movement we're going to do all the time, which I'm going to actually show you how we're going to do that. So actually, again, I do have enough to write Jacqueline's program right now, but I'll show you this one exercise So face here. So you're gonna lie down, you do face down. So the other thing we needed to address is the upper back. Um, well, I mean, the single arm rows is going to be primary for that as well, but this exercise is going to be something I probably might program every second, or at least every upper body day. Um, it's going to be definitely needed. We're going to be working this up into a Y-raise. But we're gonna start here. So what I want you to do is extend your arms out and grab the stick. All right, put your face directly on the floor. I'm gonna get you to swiggle your arms this way. So I want to bring your arms at like 45. So you're not gonna be grabbing the bar like that, you're kind of like resting it there. Yeah, perfect, exactly. So that head stays down. Now with your body here, what I So it's very hard to do this in this part exercise, but a lot of people go into lumbar extension to make up for thoracic extension. So the way we combat that is I want you to bring your belly button in towards your spine and keep that there. Perfect. Now I want you to lift the bar off the floor with your whole body. So this comes— everything— no, no, face stays down, everything stays down. You're just lifting like that. Perfect. Great. Now we're gonna do 10 reps. And hold it for 2 seconds. 1, hold it. 2, 1, good. Up, hold it. 2, 1, good. Up, hold it, belly button in. 2, 1, good. Up even a bit higher. Higher, higher, higher, higher. 2, 1, good. That's 5. Up, higher, higher, higher. 2, 1, good. Those elbows straight. Up high. 2, 1. Good. Keep it locked. Up high. 2, 1. Good. Let's go, 3 more. Up. 2, 1. Good. 2 more. 2, 1. Good. One more. 2, 1. Excellent. Relax. All right, come with me for a sec. We'll do— we will do the army presses because I want to see. How did that feel? Hard. Where'd you feel it? Um, my upper body. Yes. Yep. Like how hard? How hard? Moderately. Okay, good. This is probably right. We can add weight to this. We put like fractional plates in the center, which we may need to do for you sooner than later, um, because you're pretty good. But I'd like to see how you went after 3 sets because this kind of thing, that fatigue sets in. So I'm just gonna have a look at your arnie presses. Grabbing these, sit forward on the bench. So this is going to be unsupported purposely because I want to see what she does. Bring them here. Yep. And you're going to extend up all the way and then come back to here. So feet in front of your body. Oh yeah, don't want there to be any leverage. Yep, that's it. Now go. So as you do it, go again, push your body a bit more into it. There you go. So that's going to be 1. Now control down. 1, 2, Push your body into it. 2, 3. As you come up, push your body into it. 4. On the way down, you don't have to push your body into it. You can— there you go. Push your body into it on the way up. Good. Give me 3 more. 2 more. Fully extend, fully extend, fully extend. Good. Go. Fully extend, fully extend, fully extend. Good. Done. All right, where'd you feel that? How'd you feel that? Arms, shoulders. Yeah, not super hard. I'll get to go grab those and put those back and grab me the 5s. We will do another set here. Yeah, hard movement-wise, there's not enough feedback when you're doing it. The 5s are just there. You can be rounded to start with, right? So like, I'm here a bit more relaxed. As you come up, I want you to move into it. What you were doing is you're trying stay into it the whole time, right? You can— I do want you to move kind of naturally. Is you're here, and then I want you to pop forward, pop forward, right? So this variation of the Arnie presses, by the way, is something that I've just— I, I do and I like to do with clients because I want them to get into that fully locked out position. Because again, where am I, where am I driving them towards? Well, they're Eventually she will be doing overhead press ones, but we need to get the upper— the lower back stronger first and get that mobility in. But that's why we're doing it seated, because it cuts out the lumbar extension. And when we do pop her forward, we're getting that thoracic extension as well. So off you go. So that's why we do it in this variation. Good one. And you can see how her lumbar is being seated and popping forward into that thoracic extension stays super rock solid. So she's very safe in this position doing her overhead pressing. So that's 3. This is much better. So we did need a little bit of extra weight because the weight is feedback for her in terms of how she's going to do it right and how she's going to do it wrong. She can't do this weight wrong, but she could do the 4 kilos wrong, and that's why we want to push up just a tiny bit. 6. Good. Yeah. Now you're much more conscious of it. Do 2 more for me. Get to 8 reps. Good. Fully extend those elbows. One more. Yep. You got 2 more. Go to 10. Go to 10. Go to 10. Good. I want you to touch the roof with it. Go. Last one. Touch the roof. Touch the roof. Touch the roof. Good. Excellent. All right. Pop them there and put them back. Now what I'm going to do for the purposes of this video is just test out a few ideas of what we could do for her programming, for the lower body particularly. And I'm going to start with a front squat because she actually has mobility. Does she have the strength? Maybe not. She maybe not has the strength for the front squat. Maybe we'll change it to a goblet squat. It probably will be a goblet squat, but I just wanted to show you how we can test some ideas and see where we, we fall with, you exactly the programming, just to give you a few more insights. All right, so come with me, let's have a look at what you would do if you were front squatting. This probably won't be the movement, but we'll see. I mean, this is— yeah, we'll see how she goes. You just do you, how you've done in the past. This is how you've done in the past? Yeah, that's better. Good, let's see what she got. Okay, it's actually pretty good, but we need to make some changes. Okay, rack that in for me. We might be able to use this movement, might be able to use it. It's not too bad, just we need to make one adjustment. Put that around your knees. I just want to give you some 101s with your front squats, is when you do it, don't be too close where the hands are sitting on top of your shoulders get wide enough where you're— see, my arms are on top of my shoulders. The other thing is you do want to rotate up higher. See where I'm sitting? And I bring my lats into it, so I'm almost sitting on top of my lats. So I'm not like— I'm not just doing this, I'm doing this and pushing. How do I— I'm protracting at the same. So I'm not just here and getting through external rotation, right? I'm pulling there, so this muscle, my lats, are also involved. So to do— the best way to do that is to sink your chest whilst pulling your sternum up. Now what I want here is 6 reps, and you're going to pause at the bottom for 2 seconds. Make sure your hands have enough clear way from your shoulders. Not too much, don't go excessive with it, just enough so it's not sitting on top of your shoulders. And you want to get it higher, higher on this, on the clavicle. So nice and high with the bar position. That's it. Yeah, and keep those elbows up nice and high. That's it. This is completely new to Jacqueline in terms of movement-wise, which is why you see some discrepancies, but we might be able to use this movement. Bring the elbows up higher. There you go. Keep in that position there. That's actually pretty nice, right? So come down, elbows up high. Hold there. 2, 1. Good. Keep those elbows up high. That bar's slipping too much. Put the bar higher. Higher. There. Yep. Elbows up, elbows up, elbows up, elbows up, elbows up, elbows up. 2, 1. Good. Remember to spread that bar. You got 4 more. Elbows up, elbows up, elbows up. Go. 2. Ah, doesn't count cuz you didn't do the pause. No, you got to pause. 2, 1, up. Good. Control into it. Don't just fall. Control into it. Control, control, control, control, control. 2, 1. That wasn't a good one. Do 2 more. Stop moving. Get into it. Elbows up. Hold. 2, 1. One more. Up, up, up with the elbows. Slowly down. Hold, hold. Up high, a little higher, a little higher. 2, 1, up. Good. Rack it in. So Jacqueline can actually do this. It's pretty good. Normally you wouldn't have a new client who's able to do a front squat. She actually does does this pretty well. The reason why I went to front squat for Jacqueline is because screening her, there's a couple of things that I see. She moves very well. She, she's not a complete beginner in terms of her movements. The front squat is more, definitely more of an advanced exercise. But what I'm trying to do with the front squat for Jacqueline specifically is get her to use her abs. On a back squat, she's going to be able to get away with a butt wink. She's going to be able to just jump hands position because she's got good range of motion, she's got good mobility, but I need to force her to use her abs. My preferred movement here would be the front squat. The front squat is a very difficult and uncomfortable movement. There's no easy way to front squat. You have to bring the bar in. Jacqueline, because she's really into her training, she'll do that. Some of your clients, it might be the right exercise, but they're not going to be able to do that. So I think what the approach we're going to take with Jacqueline when I do sit down to write program is we are going to do a front squat on one of the days, and on the other day we're going to do a, I suppose, what you would call a Zurcher squat. I don't really like the goblet squat as much, but I do like the Zurcher squat. And we'll do the Zurcher squat, make it more friendly so she doesn't bruise her arms. We're going to use a wrestler bag, so I'll show you how we do that in a sec. But you can see from that movement with the pause, by adding the pause, we're forcing and reinforcing. Yes, she made a lot of mistakes at the bottom, particularly she went too low a bunch of times, but you need to accept, I suppose, a level of, um, the client is going to have to figure these things out. And that's why I'm keeping it only to 6 reps. And, you know, we are only using the bar, but there's a lot more coaching here to be done. This is our first session, but again, there is a lot more coaching to be done. There's a lot more cueing before I would then give her the right to go heavier and load this. Still in this phase, the way I'm going to approach Jacqueline's training is to iron out all of her bad habits. And the way I'm going to do that is with the exercise selection, because again, at the bottom she loses that control. We need to, we need to get her, and that's where the pauses are going to become really, really integral and slow movements. All right, let's show you how we're going to do this Zercher squat. So we'll start with a 12-kilo bag. So the thing here is we're not going to be able to get enough load on the front squat to create the effect that we want, but it is the right movement. So to compensate for the load, we're going to use the Zercher, and we can also do a lot more volume with the Zercher as well. So what I get you to do is stand in the center. Um, basically what you're going to do this is you're going to hold it like this. All right, see, your armpits are nice and close to your body. All right, so again, we're going to round everything out, but you're going to round it all out and bring your elbows up. You'll be still keeping it close to— yes, exactly. Right now I want you to squat for me. We've got 12 reps of this. All right, we've got, uh, let's put the band back on you. The minute we take the band off— just chuck it on the floor, it's fine. Um, the minute we take the band off, we saw a different movement pattern. She gets lazy with her glutes. So this band is probably going to become part of her training for some time, some time to come, because we need to iron out those bad habits. Yep. And immediately that changes the pattern. So come back up. Now we're going to do— stand up higher for me. So you're a bit like this. Stand up completely, bring your hips under. There you go. Right, that's the end position. Keep this close to your body. Keep your head straight all the time, even when I'm talking. Keep your head straight. Um, I want you to pause for 2 seconds on every rep. We're going to go for 10 reps, maybe even 12. Right, off you go. Hold it. 2, 1. You're moving fast on the way down. Let's slow it down. 4, 4, 4, 3, 2, 1, hold. 2, 1, back up. Good, that's 2. 4, 3, spread the band. 2, 1, lower, lower, lower, lower, hold. Sit up tall, sit up tall, sit up tall. 1, 2, good, up. Good, that's 3. 4, 3, 2, move back, move back, don't hit my hand. Don't hit my hands. 1, good, sit up. By me putting my hand in front of her face, she's forced to move back to where I want her in that position. Don't touch my hands. Hold, hold, a little higher, a little higher. Spread the band, spread the band. 2, 1, up, good. Now we're working, right? There's 5, we've got 5 more. Don't hit my hand. 4, so she moves back. Spread, spread, spread, spread. 2, spread more, spread more. 2, 1, up. Now she's working. 6, 4, 3, 2, 1. Hold, hold, hold, hold, hold. Back up. Good. This is good. Elbows up, elbows up, elbows up. You got 3 more. 4, 3, 2, 1. Good. 2 more. 4, 3, 2, 1. Up high, up high, up high. Step there. Up. Don't rely on those passive structures. That was a really ugly rep. You're gonna do one more rep, but I want it done right, right? Get everything stable, right? Breathe in, breathe into your belly. Elbows up. Spread, spread, spread. Don't get lazy with it. Don't get lazy with it. A little bit lower. Hold. Stay there. Two. No, higher. Stand up higher, higher. A little higher. This is when you're training with someone with good mobility. I do the same thing. You can get away with it. Bad habit, right? Let's get back up. Let's hold your body. We're not relying on passive structure. So this is a bad habit for her, right? She relies on the mobility rather than the active structures. So this is what we're training out of her. That's the reason for the band as well. Let's get the last one. And this is the reason for the pauses too. You need to build muscle around those structures. Last one. Breathe into your belly. Go. 4, 3, 2, hold, stay there. 2, 1, up, up. Don't hit my hand. Good. Just chuck them on the floor, it's fine. Well done. Awesome. So now I do have enough information about Jacqueline and how to construct her program. Again, what we saw today was not a complete beginner, especially in the mobility aspect of, of the word. I would like to use the front squat, though this this is going to allow a lot more load through her legs and get her stronger. So I'm going to think about it, whether I actually give her the front squat. I would like to, but, um, it needs to be supervised. So if I was seeing Jacqueline, say, like twice a week, 3 times a week, I would be able to give the front squat because I'd be able to make sure and ensure she's doing it the way I want to do. If she's, she's, say, an online client, or say training once a week, and I don't see her do the front squat I'm going to give her completely the wrestler bags squats with supplementary exercises just as a way to get the volume through the legs. And then in the next phase, that's where she's built strength through her upper back and her legs and the movements are better. That's when I'll probably introduce the front squat. Again, the reason people might be watching this going, but front squats is an advanced exercise. Why would I give that to a client? Again, very simply because I want her to load through her abs and to get into this position where she's loading. And how am I going to achieve that? The only way I'm going to achieve that is by having the load in front of her body. Another hack way that I could do it is I could use a cambered bar with her squat where the center of load is shifted forward. The only problem with that is I'm not going to be addressing the fundamental movement pattern. I'm just going to be getting— letting her get away with incorrect or bad movements. So that's why I'm not going to use the cambered bar. Now, but let's say for example I needed to get her— I don't know, for whatever reason I just needed to get her to lift heavy right away, then I could use a cambered bar. So I hope you've enjoyed this video. We're going to switch now to me actually writing the program for Jacqueline, so check out video 2.