How to Hip Hinge Correctly (Progressions for Beginners)
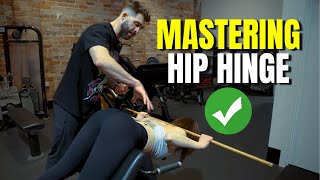
Mark Ottobre breaks down the hip hinge from the ground up, starting with a toe-touch test to see if you're bending from your hips or lower back. He walks through progressions: knee touches, stick drills for spinal stiffness, back extensions at different angles, and finally loaded movements like the Romanian deadlift. The cues stay consistent: push hips back, keep your spine stiff, shift weight to your heels.
Chapters
My name is Mark Ottobre. I've worked with Olympic athletes, champion competitors, world leaders, and helped transform tens of thousands of people's physique. In this video, we are going to show you how to hip hinge and how to think about the hip hinge to master it once and for all. We have Manami here who's going to be helping us today demonstrate some of the ways we're going to master a hip hinge. The first thing we're going to do in terms of looking at a hip hinge and considering it for a client or athlete, one of our controls, if you will, that we want to get is a simple assessment, and that assessment is if you turn and face the wall, Manami, we are going to get you to reach down and touch your toes. So in this, just reach down, touch your toes as you would, and come back up. Right, so doing this with a client or athlete, they're thinking, okay, this is a flexibility test, except it's not a flexibility test, it's a movement assessment test. So what I'm really doing when I ask a client or athlete to do this is I'm looking at how they get there rather than their range of motion. So I'll get you to do that one more time. So how she gets there is she is moving from the hips. She's not moving from the back. She initiates, she pulls her hips back, they go on a diagonal axis up towards the roof. So if she was to move from the back, this is how it would look. She would round. She doesn't round. She sticks her hips up, and you can see the first thing to move are her hips. Now, for people who really struggle with this, it can be— and for personal trainers, it can be a real issue to try and teach their clients how to get into this position correctly. So I'm going to break down some really practical ways to do this, starting with the most regressed version. And the most regressed version of teaching hip hinge is this. So Manami, I'm gonna get you feet as they are, hands on your thighs, and what I want you to do is reach down and touch your knees. Reach down, touch your knees, and come back up. Great. I want you to do 10 of that. So for a client who moves from the back, and you can see Manami in this position, she's really moving from her hips, just move freely, do 10 reps. This is a really easy way to introduce the the most, probably the most remedial way possible that you could get someone to introduce a hinge into their movement pattern in daily life. Now, if someone does move from their back, this is going to require probably 20 reps, 3 sets, multiple times a day. This is a step 1. My next step would be this. So Manami, what I'm going to get you to do is put this stick on your spine. You're going to hold. That's exactly what I want. I want this to be flush to your head. So hold it to your head. This, this has to remain in contact. And this has to have contact the whole time. So you have to keep contact here and just bring that up a tiny bit because I want— yep, you've got to keep contact, right? So the stick is a stiffness for your spine. I want you to push your spine and your hand against the stick. Now I want you to stick your hips out into that hinge position. You can see here her hamstrings elongating. Now I want you to go— I'll just keep going because I want to show the wrong way. I want to show when, when the stick lifts off. So you can see here the stick started to lift off, her back has started to round. That's obviously too deep a range of motion, but she's got great range of motion, she's got great mobility, so she's able to go pretty deep on this. Now there you go, that's too far. We don't want to go there, right? We want to be stiff through our hamstrings. Just do another 3 of that. So on this, this is the next point of how we can teach our clients to get into a better hinge position. Now most clients, again, if they're not used to this, they're not going to be able to go as far. And what is perfectly acceptable, if the stick comes off— come down, come down, come down— if the stick comes off here, that's where they stop. You need to read the play because what you want to do is you want them to shift the weight onto their heels. Keep coming down, shift the weight onto their heels and getting their hips— keep that down— getting their hips working. Cool, so that's the next point. Now from here, relax. We are going to go to the 45-degree hyperextension. So the ultimate goal would be an RDL or a stiff-legged deadlift. That's going to be the ultimate goal, but that is also the movement that requires the most skill. So we need to look at ways to regress this and movement patterns that are going to regress the hip hinge pattern. So I'm going to get you on the 45-degree leg extension, leg extension, 45-degree back extension rather. Now the pad should always sit underneath the hip, so where she is right now is perfect. And I'm going to get her to do the same thing. Now I want you to do it just the wrong way for a second, just kind of flop into it and use your back. Now I really— I know there's a lot of girls online, uh, on Instagram who really, you know, round out and just move from here and do a couple— they do this kind of thing, right? I really don't like that, and they say they're training glutes because this really— we want to be training the hinge. So what I'm going to do is up nice and tall. Now come through that, so stick your hips up to the roof, keep the back locked. Now come up and teaching that lumbar stiffness as we go into that hinge. We want to keep that lumbar stiff. Up. Now one of the ways that I like to enhance this for newbies and create tension is— one moment— I grab, I grab some plates. These are just half a kilo. So what I like to do is put these on your thumbs. Give me two thumbs. I'm going to put them both like that. So back into position. So this is one of the ways I like to begin to teach this. So what she's going to do, she's going to come down, keep the lumbar stiff, keep the lumbar stiff, keep the lumbar stiff, come up, flex through your glutes. Now reach out to the— reach out, reach out, reach out. Here, here, here, here. That's where I want you, right? So, and then come back down all the way. So we call these Superman or Superwoman, and back in and come up, flex the bum. So the reason why I like these so much is because it creates an automatic pause. They have to pause at the top to get in that position, they have to pause at the bottom to bring it in. So it's creating a movement where it's— it automatically slows down the hinge, but it creates a lot of tension. So their backs begin to burn, but they achieve the right position. They also achieve a little bit of thoracic extension as they move move up with that lumbar stiffness. So this is really nice. This is my next point of call. I'll get you to rest for just a sec. Put them on the floor, just shake it out, because we're going to do another one. Now, I always like to stack patterns, and what we're working towards with all of this supplementary work, the hip hinge, is to put a bar on our back. So I like to use a stick If they're strong enough, we'll use the bar. We could use an 8-kilo bar, we could use the female bar, or the full Olympic bar. But we'll get into the position again, Manu, and I like this as the next progression rather than using a dumbbell, because what it does is it starts to begin to teach that lumbar stiffness with a bar, or in this case a stick, on their back as they're moving with a hinge position. So a lot of good things happen here. The other thing I really like to enhance is I like to get the arms as close as possible, and you can see on Manami, you can see her back, her lats start to engage. Now go into the hinge. So we're stacking things on top of each other. There's the lumbar stiffness, there's the hips, there's the elongation of the hamstrings, but we're not necessarily going to use this in someone's first phase if they can't do a correct hip hinge. However, this fantastic to start to build strength because it's mimicking and creating what it would be like if someone had a bar on their back. And that is where we want to end people up. So this is a really good supplementary exercise. Again, you can absolutely put a bar on someone's back and you can, you can— how's that feeling? Yeah, it's burning. Yeah, you can go heavy, you can go light, you can use a light bar, you can use a heavy bar. Let's give you a rest. Cool. You're feeling that burn? Yeah. Where do you feel that burn? Glutes. Good, good. And you can scale, you can scale with the weight, you can always use a lighter bar. Now, so this is our 45-degree hyper. The next, I suppose, advancement that I like to use is the 180-degree or horizontal back extension. This is a little harder than the 45 Apart from the resistance profile being slightly different and there being more tension at the top, this is harder because it requires more strength to get into that full horizontal position. So then we'll move to this. Let's hop up onto this here. Yeah, let's just do a rep. I'll know straight away. We want this pivot point on— I'll show the camera— this pivot point of her hips to be over the pad. So she's good, she's good. So it is over the hips. So you can see in this position, her hips are pointing directly up to the roof. So that's nice there. She gives 3 reps and you can see again, we are now still using a hip, hip hinge, but it is in the reverse. So just do one more rep, one more rep. A lot more emphasis here on the glutes and on the erector spinae as well. Help yourself up. Just give yourself a small rest. What I'm going to do is we're going to do that again, and this time I'm going to put the stick on your back again, right? So you grab that, and you can see here the leverage point of this creates a lot— it's a lot harder because the weight is shifted from her body, and the only thing, the only pivot point, this has to be strong to get into this full position. The glutes and the erector spinae have to work. Work. So you do have to have a base level of strength. This exercise is not for beginners because it's, it's too, it's too difficult. It requires strength at its base point. That's where the 45 is better. Now she's rounding, she's getting tired, so I'll take this from her. I'll take this from her. We don't want to see that when people start to round out and flex. We want them to be tight the whole time. She's done a few reps. All right, how are you feeling now? All of this, by the way, is not the end point. This is all the supplementary and peripheral work. The endpoint is to get someone to be able to do a deadlift. The endpoint is to get someone to be— to get strong through this movement pattern. So I'm going to go over here and I'll show you where we're pushing people towards. We're not going to load you, so don't worry. We're not going to go heavy at all. We're just going to use the bar. But the endpoint is absolutely to improve someone's deadlift. Now, one of the things that can help improve a deadlift is an RDL, stiff-legged deadlift. Now, fun fact, Romanian deadlift— I wrote true Romanian deadlift— is really a snatch grip deadlift or a wide grip. This is your true Romanian deadlift because Romanian deadlifts come from the Romanian weightlifting team, and that's how the Romanian weightlifting team did their deadlifts, hence RDLs. So stiff-legged deadlift, Romanian deadlift, they're sometimes a little bit of semantics, and sometimes people don't know the origins exactly where it comes from. But Romanian deadlifts traditionally were done with a snatch grip. Now, on that point, a snatch grip— fun fact— a snatch grip should be in the position where if I bend my knees, the bar doesn't move. So you can see here in this position, the bar doesn't move from my pelvis. If I move here, as I move down, you can see how the bar slides, slides on my legs. So here it stays in that groove. That's my snatch grip deadlift. So if you're talking about where should your hands be on a snatch grip, it should be in a position where if you're in here and you bend your knees, the bar shouldn't move. So for me, it's, it's fairly wide. We are just going to do what I would call a stiff-legged deadlift. So clean grip, Just clean grip is good. And let's look at your movement pattern. Get nice and close when you lift. Yep. And step out. Now we're going to do everything that we spoke about with the hinge. The only difference here is you have a bar in your hands. So hips to the roof. Keep your head straight. Keep the spine locked. That's beautiful, right? That is a hinge. Now, in this position and with a bar in our hands, we're able to sufficiently load it where we're going to be able to get hamstring growth, erector spinae growth, glute development, posterior development, posterior back development. There's a lot of great things in this position that we can start to load, to really load onto those heels. But you can see that where we started from was no load, no weight, very, very remedial, using the supplementary exercises around it to build the strength and musculature around the structures that are needed for a stiff-legged deadlift. Rack it in. And again, I would also say the stiff-legged deadlift— and in this exercise, this still isn't the end point. The end point is a big deadlift, it's a big squat. This movement pattern helps other movement patterns that we use in everyday life for performance. For example, jumping. The hip hinge— and I think the Romanian deadlift many ways, or the stiff-legged deadlift, it's kind of the mother lift of the, the lower body in many ways because we go through hip extension in so many movements. If we're jumping, if we're deadlifting, if we're squatting, that hip hinge is integral. So developing it with your clients, developing with athletes, really is such an important piece of someone's athletic potential development. So In saying all of that, if you've enjoyed this video, if you have any questions at all, leave them in the comments below and consider subscribing to my channel. Want more videos to learn how to build your superhuman? Click here or here.