Miss Universe Finalist's Glute Workout (The Exercises That Changed Her Body)
In this 30‑minute instructional video, the coach walks viewer‑model Amy through a comprehensive glute‑focused warm‑up and the first half of a three‑part booty‑building program. The session begins with a banded 90‑degree glute adduction warm‑up, emphasizing toe‑down cues and band tension to ensure glute activation. It proceeds to a counter‑balance squat/box squat progression, using a low‑bar stick, a wall cue, and a wide stance to force hip‑back positioning and prevent lumbar loading. The coach then demonstrates a unilateral, uneven‑load kettlebell deadlift (B‑stance) to train hip‑hinge stability and neural symmetry, with detailed cues on knee‑over‑toe avoidance and sternum elevation. A reverse frog‑hold is introduced to reinforce glute engagement while protecting the lower back, with belly‑button‑into‑spine and ankle‑rotation cues. The video also covers equipment choices (female‑bar for sumo deadlifts) and a glute‑centric sumo deadlift, stressing hip‑back drive, sternum lift, and core bracing. The reverse hyper is presented as an underrated glute hypertrophy tool, with form cues (armpits‑into‑underpants, spine safety) and rep range recommendations (12‑25 reps). Finally, a glute‑drive (hip thrust) with a knee‑band is performed, highlighting knee‑spread feedback, upper‑back bracing, and torso‑pelvis integration. Throughout, the coach provides corrective feedback, rehab considerations (band strength, knee positioning), and programming notes (rep ranges, progression, stability‑mobility‑strength sequence). The video ends with a reminder to subscribe for parts 2 and 3.
Chapters
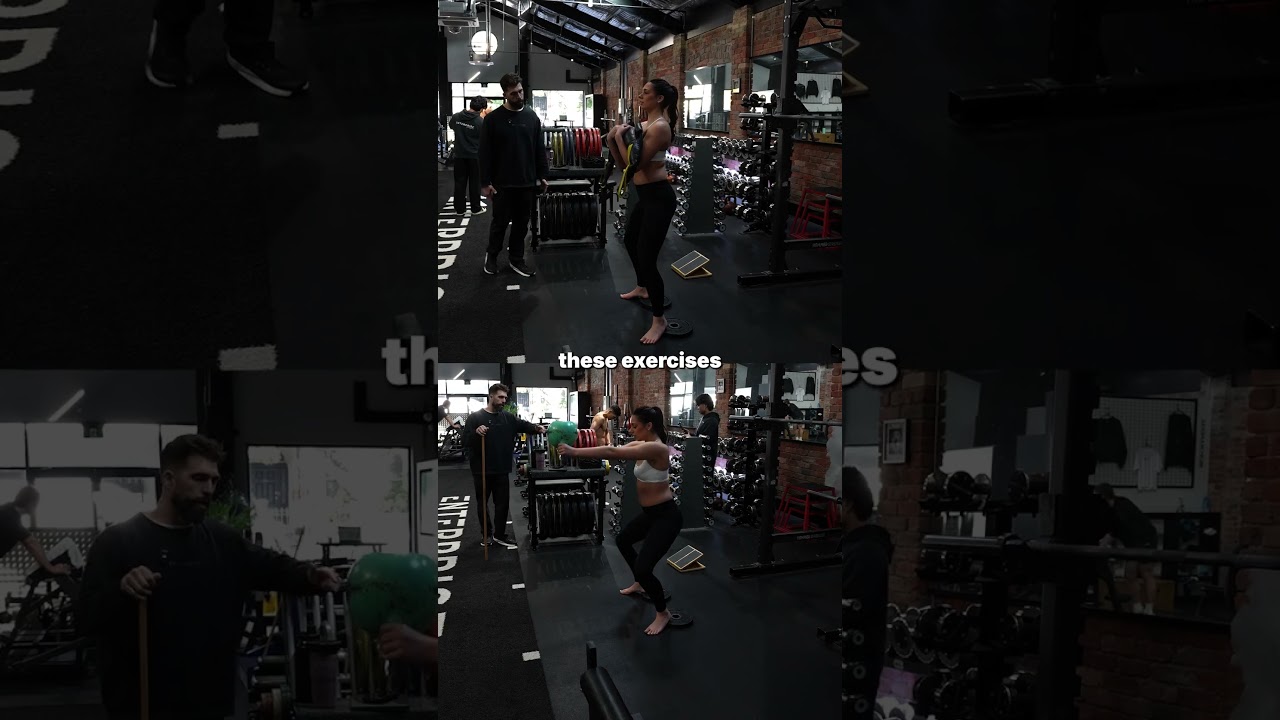
This is my highly requested booty building program. This is part 1. Make sure you subscribe for all 3 parts. I'm here with Amy. She's going to be demonstrating the exact exercises that you need to do to build that booty. We're going to start with a glute warm-up. We're going to be doing 90-degree glute adduction. So the first thing you do is you're going to be lying down flat on the bench, pushing the heels into the floor and bringing the knees apart. You want a band just below your knees. So this is glute banded ab adduction. So some final points of this, I do prefer this exercise with the shoes off, so getting Amy to take the shoes off. And the cues that I like to use with this is pushing that first metatarsal down into the floor along with the heel. So what I like to do sometimes as a cue is getting people to raise that big toe up and getting them to push as hard as they can on the floor. So Amy lying down now, now as she does that, again I'm going to be cueing those toes pushing down into the floor. Lift this up a tiny bit. So in this position, the only thing that can really be working is the glute. This is why I love this exercise, is because it really is a no-brainer to get the glutes firing at all cylinders. So what you're going to be feeling here really is the lateral part of the glute, and it is almost like an idiot-proof way to warm up and train the glutes. When I'm training someone, I'm always checking in to make sure if they're feeling it in their glutes. If they're not feeling it in their glutes, the band may be too weak and the resistance might not be strong enough. So in which case, we level up the band. The next one we're going to do, Amy, is actually a counterbalance squat. So I want the feet relatively far apart. You're going to pick this one up and reach out in front of you. Now I want you to stand up in a squat position. Now the trick with this one is I don't want your knees to travel over your toes. You have to send your hips right back as you do this. Send your hips right back. And a bit more. Yep, that's good. One. Just do 6 of these. A little higher for me. There you go. Spread harder. Push that knuckle down into the floor. Push the knuckles down into the floor. Same cue here. Toes up off the floor. Let's really get that grip happening. Good. This is a box squat with a low bar position, really just warming up the position and the movement, getting her into that position so she's warming up her glutes. We're not using this as overload, we're just using this to activate the glutes. So first thing I'm going to do is I'm going to set Amy up with the stick as a low bar back position so that way she's anchored in. The reason why I'm using the stick here is to anchor her body into something so she stays up nice and vertical and stays up nice and tall, and we're able to shift the load into her glutes. If you look at lever lengths of her legs, actually quite long. So for most people to really feel it in the glutes, we're going to go even wider with our stance. Pushing your hips back, pushing your hips back, pushing your hips back. That's it, come all the way down and back up. Now to really maximize this in the glutes, I want you to stay up as tall as possible. Imagine there's a wall in front of your face, don't hit the wall. So you can see here Amy's still shifting forward. I don't want her to shift forward at all because I want the load to be through her glutes. So shift back, shift back, shift back, shift back, hips back, hips back, hips back, hips back. There you go. More, more hips back. Don't hit my hand, don't hit my hand. Hips back, hips back. Good, and just chuck your chin down as you do this. There, keep your chin down. More back, hips more back, way more back. Good, open up those knees. Spread, spread, spread. Open up the knees. Good, that's better. Now we're getting somewhere. So the truth is with this exercise, not to cover it up, Amy's not doing this exercise the way I want. So what we're going to do is we're going to move to the wall, which is going to enable her pattern. Let me show you how. All right, so what you saw before was Amy was leaning forward and was putting the load and pressure in her lower back. We want this not as a high bar squat position on top of the traps, we want it low on the body. Then we're going to get Amy— there's obviously a wall in front of you, you're gonna have to go a lot wider with your feet, so let's get those toes up against the wall. Now, physical challenge: I want you to squat down, and obviously there's a wall, so you— your body needs to figure this out. How are you going to squat? How are you going to get into position with a wall in front of you? So this— what this does, this is a physical cue. People have to figure this out, and they have to open their knees, and they find the right muscles that they need to work. Now, her knees are traveling a little bit over her toe, which is okay right now, but you can see she's in a very nice wide position and the load is off her back. Can you stack your rib cage on top of. There we go. Stack. See, you can see her back now is now protected. That is a great position. So her glutes in this position are working a hell of a lot more than they were before. And beautiful thing is her lower back is now protected as well. And that core is being engaged. And you got to remember your core isn't just your lower back, it's your abs as well, which she's definitely firing on. Now. Come down. Spread, spread, spread, spread, spread, spread, spread, spread, spread. Beautiful. And back up. Fire. Excellent, Excellent. It's a great exercise. Give that one a go. It is harder than it looks. So now we are going to be doing a counterbalance kettlebell deadlift with an uneven load. So I'm going to use about a 4 kilo difference in between the 8 kilo and the 12 kilo. The trick with this one is we are going to put the heavier load on the outside of the foot. When Amy picks this up, what I want— she's going to pick it up one leg but I wanted to pick it up evenly as if they were exactly the same weight. So her brain and neurally is going to have to fire at the same time. What we're doing with this exercise is teaching stability. So you're going to put your— this foot in. So we're going to have the heaviest weight on the outside. So that way the glute really has to fire up. So let's get that foot in the center of both of those kettlebells in the center. Let's get it dead center. Okay, now let's go into a B-stance. So up, up onto the toe on this one. That's it. So you're really loading. Think about you're really going to be loading this glute. This exercise is to help with the pattern of that hip hinge and that activation of the glute, but the goal here for her is to do 6 reps and to pick them up completely evenly as if they were exactly the same weight. Reach down, reach down, reach down. Let's get into that glute, and she's going to reach and pick it up as if they were the same weight. Good. 1. Good. Things that I'm watching for here is as both of them lift off the floor. Is it even? The other thing that I'm watching for is, cuz I really do want to use her glute, is this shin position here. Is her knee behind her toe? Her knee is coming a little bit forward. I would prefer, but she has had some glute issues in the past. There we go, now she's pushing really into the glute. That's better. So I don't want to be too aggressive with it because we are rehabbing, but at the same time I really do want her to get into that position as best she can without flaring up that hamstring. So good, and I want even further. So stick your bum up to the roof, up to the roof, up to the roof, up to the roof. Good, that's, that's a better position. That's 6. Slowly down, slow down, slow down. Good. Stability gives us mobility, gives us further range of motion, it creates strength. We have mobility, stability, strength, performance. We don't have performance unless we have stability. So what we're doing here is teaching Amy how to stay stable so that she can perform. Let's try and get that toe off. Yeah, really try and get that first metatarsal into the floor, right? That's it, heel and first metatarsal. So if you need to, as a little cue, peel this big toe up off the floor. There you go, so that really, there you go. So now see how you're driving that into the floor and we've got that nice arc which then shoots up straight into that glute. The goal here, again, we want to see the other side a lot better. We want to see her pick these up evenly. So you're going to have to reach down, pick it up, but it's training that neural pattern, right? So long arms, long arms, long arms. Be as tight, be stiff, be stiff. There you go. Yes, see, so you can do it, she just needs to engage. So that's much better. We're going to say that's 1. And again, same thing as the other foot. As she does it, she gets better. We want to get that knee over the— behind the toe, not knee over toe, knee behind toe for glute. That's the trick, knee behind toe for glute. So she warms up into this. Let's try and be a little more aggressive in terms of getting that bum back. So imagine there's a corner up there, you're trying to shoot your bum up to the corner of the roof. Think about the corner of the roof, there you go. That's a bit better, good. That's probably too much now. That's fine, let's just do one more. Hips back, hips back, hips back, hips back, hips back, there you go. And one more, perfect. That last one was perfect. And again, what we're watching for is that vertical shin position. We do not want her knee to travel forward. And again, this is training neurally, this is teaching her stability as a way to activate those glutes. So that when we do our workout today, the glutes are ready, fired, stable, so that we can lift as much weight as possible. So for the last warmup exercise, I like reverse frog holds. We are gonna get into this position where, come up with your knees, come up here. We're gonna turn your toes out. So I'm gonna get you to bring and bridge your belly button into your spine as you do this. What that will do is counteract the load going into your lower back. So belly button into spine. Now, this is very small movement. You're not going to see Amy lift up a lot, and we don't want her to compensate from her lower back. So belly button into spine. I'm going to check this. Here are her hips. I want her hips aligned with her knees and then her knees aligned with her ankles. So you can see here how I'm pushing her into position. You can see how this all lines up, and then she's trying to default back into this position where it becomes a little easier. And now again, just like the 90-degree exercise that you saw before, this is all glutes. So for some ladies, just to make it a little more comfortable, and some gentlemen, what you may need to do is put your hands underneath your hips just to give you a little bit of space from the pelvis so you can stay and maintain that position, which is fine. Belly button in, there you go. Belly button in, stay there. Belly button in, rotate these ankles out towards me, rotate out. That way we're really maximizing the glute. Rotate the ankles out, see, you feel that? So the ankle comes towards me, rotate it, rotate it that way. So we're stacking, you can see here again the Femur bone stacks on top of the ankle, but she keeps rotating in, so I keep pulling her out. And 3, 2, belly button in, belly button in, 3, belly button in, 2, 1, relax. I think that's our warm-up. I think our glutes are warm and stable. So one thing that I like to do for my female lifters is to use a female bar for deadlifting. You might be asking, what's the difference between a normal bar and a female bar? Well, a normal bar is 20 kilos, a female bar is 15 kilos, but it's not the weight differential that I like. I like it because it is a smaller diameter bar and females generally have smaller hands. I'm not training grip strength, I'm training the position of the deadlift. Because this is a glute-focused sumo deadlift, what I'm going to do is I'm going to get Amy to just bring her toes in just a little bit closer, a little bit closer. That's it. Now I'm going to get you almost dead center. I don't want any adduction. I really want you to, to bring them straight. Now I want you to imagine that your hamstrings are super, super tight and you have to reach even more aggressively, and you also have a big belly in front of you too. So there we go. See, now what she just did, she shifted her hips straight back. So my cue was that you have a big belly. That is a nice position for her to maximize the glute. Now I'm going to get you to lift. Beautiful. Now we want to maximize this in terms of the glute. So another little tweak, hold it. I want you to lift your sternum up, point your sternum up to the sky. There you go. Now I want you to deadlift. Beautiful. That's 2. Lift that sternum up nice and high, up to the roof. Not your chest, your sternum. So just under there. Lift, lift. Good. We've just increased the weight. So we're at 45 kilos. It's going to make some slight tweaks to Amy's technique. We're going to get a little bit closer and keep her feet straight. The reason why I do that is in this position, she has to shoot her hips back. As she shoots her hips back, guess what has to be used? Glutes. So what I'm doing here is with the exercises that I'm picking, I'm picking them and putting them in a way and setting her up in a way that she has to use her glutes. She has no choice mechanically but to use the glutes. This is where setup is absolutely crucial in terms of the exercise that you want to be loading. Imagine that you have a really big belly and it's in the way, right? So arms straight, you have a really big belly, and you're going to reach for the bar. Reach for the bar, reach for the bar, reach for the— there you go. Now sticking that sternum up to the roof and lift when you're ready. Beautiful. One. I'm going to do 6 to 8 of these. Two. Hips back, sternum up. I'm happy with your technique. Technique is very good. 7. You're spot on, Amy. One more. Hips back, hips back, hips back. Good. So this is the reverse hyper, and I think it's one of the most underrated exercises for building a booty. The reason I think it's underrated is because your glutes have to work on a reverse hyper. Yes, some people do feel it in the lower back, and they can shift the load into the lower back, but I'm going to show you how to minimize that and max maximize the glutes. So first thing you want to do is look at the upper body. The arms need to be straight, her spine and her upper body is elongated in this position here, which is perfect. Head in the perfect position. Now what I'm going to get Amy to do is bring— simply bring her feet up. You get a little bit of momentum to begin with because we have a little bit of weight, and up she goes. And that's really all there is to it in terms of the reverse hyper from a simple point of view. What also is going on as she does it, she's sticking her sternum up to the roof, and you can see here it's working, her glutes are working as she comes up. We're gonna do about 15 reps here, she's done 5, 6, 14, one more, one more, one more, pull, pull, pull, 15, excellent. For this exercise in terms of rep ranges, what I like is between 12 to 25 reps. 25 reps is fairly high, but I like at least 12, if not 15 is kind of usually where I hover around, but 15 to 20, is the general standard of what I would use for a reverse hyper, because in that way we're able to offset the load. If we go super heavy here, what you'll find is that you get that momentum and you start to swing and the load is pulling you down. We do want to be able to control the load down, so we need to make a consideration from that. So that's where I like— and also it's hypertrophy, we're looking for hypertrophy here. Bring your legs up for me. See, you can see mechanically for her to bring her legs up, you can see what has to flex. Bring your legs down. Right? As she comes up, she has to use her glutes because it's idiot-proof, it's bulletproof. You want to use your glutes, you know, on your belly, lift your legs up, you have to use your glutes to get there. The cue for the upper body that I use on a reverse hyper is to pull the armpits into the underpants because again, the lats, these triangular muscular muscle here, this is a spine stabilizer and we also want to keep that thoracic classic extension where our chest comes up, but we're pulling our armpits down into our underpants. That locks our spine, it keeps our spine safe. So up nice and tall, Amy. Armpits into underpants. Yep, yep, more, more, more, more, really crank on it. See, that's the position. You can see here her spine is nice and safe. Now when she goes to do the movement, she's going to be utilizing and using her glutes. There we go, pull it down, pull it down, pull it down hard, hard, hard, There, now you're good. Beautiful. One. That's how we want to do it. And we can synchronize this. We got armpits into underpants as we come up, armpits into underpants as we come up. That's terrific because now we're really powering through it. And pull. So you've got to think of the whole pull, right? It's not just I'm using my glutes, pulling everything down. It utilizes your whole body. Try and hold Hold it at the top, squeeze the glutes, squeeze the glutes. Excellent. Let's overload them. Perfect. If you don't have this machine in the gym, look, there's a few different ways we could show it. So if Amy, if you're on this bench here, you're going to put your belly— so you're going to be face down, belly down, right? And your hips are going to be off. Yeah, that's it. So grab, and then you're going to lift up your legs. So a little bit further down. Bend your knees there. Now come up. There you go. Again, in this, this position here, you're not going to be able to load it, right? That's the only drawback, unless you have things like ankle weights, ankle load. In this position as well, you could also come up, come up, come up, straighten your legs, and then come back down. And up. So now we also— no, no, come, come up with your knees bent. So come up, knees bent, straighten your legs, and back down. And again, straight in and try and skim the floor. You feel that in your glutes or not? Really? Yeah, a bit. So again, this is more of a remedial version of the reverse hyper. Come up for me, come up, hold. So a more advanced version of the frog holds, of the reverse frog holds. And again, keeping that belly button into spine. It really depends on what level you're at. And again, for Amy, she wants to keep bringing her toes in, we want to keep them out. So you could simply stay on that. If you use something like ankle weights, this just allows a greater range of motion as well. So you could look at doing something like that if you didn't have the machine and you want to include this type of movement in it as well. Amy, straighten your legs. That is going to make it harder as well. Come up, come up, come up. Because the lever— up nice and high— the lever arm is further away from the glute, right? So her feet are out here now. So this does make it more difficult for her to stay in that position. You could also also look at utilizing that as a hold if you didn't have a glute reverse hyper at your gym. So simply, this is a using a bench to do a reverse hyper. So as you can see, Amy's up in this position. If we want to make it easy, we will bend the knees. If we want to make it harder, we'll straighten the legs. And the more perfectly straight we become with our legs, so flex out those knees, the harder it becomes. Bringing that belly button into spine. Generally, for most people, what I would be recommending is to do this as a hold if you're— because you're very much unlikely and unable to use load just using a bench. So this is a position where you can get a similar movement, but it is going to be an isometric movement compared to on reverse hyper where you're able to go through that full contraction. Our third exercise in this workout and in this sequence is the glute drive. Now what I like to do with the glute drive is to add a band around the knee. So Amy, go pop that around your knees. The reason The reason why I pop it around the knees is simply to give mechanical feedback. So you are spreading the knees, which is going to enable and utilize more glutes. So this is going to change the feeling of the exercise. So Amy, set yourself up. The pad's just going to be at middle of the pelvis, pushing the heels in. And again, the same cue when we did our warm-up is I'm going to kind of slide her toes off and get her to really push down into the ground as hard as she can. First metatarsal, fifth metatarsal, heel. You can see this creating the arc. Off we go, Amy. We're going to do 15 reps. So here we go. Now as we do this, we want the neck to be nice and stable, and one of the biggest cues I give is let's bridge up onto the upper back. So as she does it, bridge onto that upper back. So instead of focusing just on the glutes, focus on that upper back and putting all the load so we nice— have something nice to press off and lift off from. That's 5, good. And you can see here the knee position, the knee is right behind the toes. This is really maximizing the glute now. You can see how she sinks into it as one, her upper body, her torso is moving as one with her pelvis, and that's often a mistake people make is they just move from the pelvis. Like that last rep there you saw wasn't as good, but let's lock that torso in. So lock the torso in, lock the torso in, there you go, and up from the pelvis. That's 10, belly button into spine, good, one more, one more, and up nice and high, up nice and high, there we go. This is the alternative if you do not have a glute drive at your gym, simply using a barbell and a bench. So some key things here is— Amy, bring your feet out a little bit more. I really look for knees behind toes or knees behind— so that vertical shin position. The reason why we have the band there is to provide mechanical feedback without constantly saying spread your knees. Putting the band on automatically, Amy's going to spread her knees. Now come up, Amy, and I want you to drive that upper back into the bench as you do it. Perfect. So your body's gonna utilize— use as one. That's 2. Excellent. 4. And you can see here, she's spreading the knees nice and far apart. She's driving those heels into the floor. Most importantly, she's driving this upper back into the bench. A lot of people overcue this exercise. If you simply cue upper back into the bench, it corrects a lot of things, particularly from the spine. So upper back into the bench and then push the hips down, up and back into the bench, push the hips down. We're gonna do 5 more, 5 more, good, and keep spreading those knees, good, 2, 3, good, 4, 1 more, 1 more, 1 more, and drive it up, drive it up, 5, excellent, slow down, perfect. That's part 1 of 3, make sure you subscribe so you don't miss the next one.