The Only 7 Things You Need at the Gym (Stop Wasting Money)
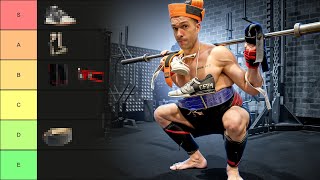
A guide to the seven essentials for serious lifters: belts, knee sleeves, lifting straps, wrist wraps, heel lifters, toe spacers, and chalk. Each one explained for when to use it and how it changes your lift. The key: save them for heavy sets and nail your technique first.
Chapters
These are the most popular gym accessories that you need to know about. So first up, we have the lifting belts. Now there's really two types of lifting belts that people buy. One is your more professional kind of elite belt, which is a powerlifting belt. The other is this flimsy belt, which is kind of a general purpose belt that you'll see at sports department stores and things like this. So first, let's talk about this flimsy belt. It's the most common belt that gym bros will use in the gym. It doesn't offer that much support, let's be real, but you may use it for things like cleans. You may use it for a snatch. When it comes to like serious deadlifting, it's, it's just not going to cut the mustard. It's a general support. The way you put on all belts is you really do want them as tight as possible, but not so tight that it restricts you from moving and breathing. I mean, with this belt you get away with it because it's quite thin. With the bigger belts with a thicker material, you're not going to get away with that. It cuts in, and you'll see what I mean by that in just a second. So You can see here I've gone quite tight with this, and you can see when I brace against it, my stomach is pushing against the belt. The way you want to think about it is the belt helps intra-abdominal pressure. So if you think about a Swiss ball, if I was to put a rope around a Swiss ball and then sit on that Swiss ball, that Swiss ball has become a lot more firm and stable. That's exactly what's happening over my waist here, is my waist— now my trunk is a lot more firm and stable. So as I go into, say, a deadlift, as I go into a squat, this is much more stable, so I'm able to provide much more output. The other place I like to use a belt is on a bench press, actually, especially to just get everything as a cue, an external cue of bracing, because that's all this is, is helping you brace. So that's your flimsy belt. Again, do I recommend this for beginner, intermediate lifters? Yes, but you're not going to be using it all the time. Again, you really want to save your belt for the bigger lifts. If you are a more serious lifter and lifting some serious weight, at least let's say 2 times body weight, you're going to consider one of these powerlifting belts. Now again, if you're more powerlifting, if you're doing things like cleans and snatches, you're not going to use these belts because they just dig in. But these are the two predominant— you've got your single prong belt and your lever belts. Now the lever belt is really just to get it off and on, you get it quite quickly. I've got this one here as well, which is custom. This is a Texas belt. I'll show you with this belt because this is for my size at the moment, but that one was a VR, but the lever belts, you literally just load it like this, like so, and then it's here. Now belt position is going to change depending on the lift that you're doing. So I'll give you an example. If I'm deadlifting, for sure I'm higher. I'm just under the rib cage, right? So I'm able to brace. This is where I'll be on a deadlift position, just under the rib cage. Now on a squat, if I go there, if I go in the position where I am on a deadlift, as soon as I squat down, my rib cage presses and cuts through my ribs here, and it's not very comfortable as I'm squatting down. So when I'm squatting, I'm always putting my belt position much lower. Now, you can see here as I come down, right, that doesn't cut anymore, but you need enough space in the belt where you're able to push your stomach against. So you can come back to that analogy of the Swiss ball with the rope around it. Let me show you the single prong. So on a single prong belt, when I put this on, I'm gonna go quite tight with it. So there we go. All right, so if I pick it up and you can see here, like, I can still get one or two fingers in, but as I push against, my fingers are squished, right? So as I'm here, you want to have enough space in between the belt and your stomach. But again, that belt should act as almost a rope around a Swiss ball, just keeping everything in, keeping everything nice and stable. So you're, you're getting intra-abdominal pressure as you lift and supertight. Stay till the end of the video because we're going to reveal to you the most important accessory of all. I'm also going to give you a free copy of my Fitness User Manual, which contains all the information you need to level up your fitness. I've used these exact methods in my Fitness User Manual to train thousands of head-turning results, Commonwealth Games gold medalists, and Olympic athletes. Now we're going to be talking about knee sleeves. If you notice, I have two sets. One that has no markings on the front and the others that are completely ripped to shreds. Now you might be wondering what's the difference between the two. One I use for squatting, the other I use for deadlifting. So let me show you how I use the deadlifting ones first. The deadlifting ones really just act as shin pads. So one of the things that you find with deadlifting is you always, always, always, always want the bar as close to your center of mass as possible. Now you'll see elite powerlifters and comp blood will be all over their shins. Now, obviously, when you're training and you're doing hundreds of reps throughout the month, you can't have your shins bleeding all the time because it's going to slow down your progress. So what do you do? Put some sleeves on your shins to protect your shins from bleeding all the time. It's also much more hygienic. So the way it works is very, very simple. If I'm deadlifting, right, as I said, I want this bar to be as close— so if I pull this bar in, that causes pain to my shins, right, as I'm deadlifting. So if I have my shins protected, then I'm able to get into this position without worrying about my shins being in pain. So it helps me anchor in the correct position. So you can see, even if I just stay in that range, that does not hurt at all as I rub the bar against my shins. This is what we want. So it really is just to protect our shins. And obviously, if you're using a bar, so like an Eleiko bar, which is very harsh knurling, it's going to shred your shins. Just like— I mean, look what it's done to my sleeves. It's absolutely shredded my sleeves. So shin protection using an old pair of sleeves is what I'd recommend there. Now let's look at our sleeves for squatting. I remember the first time I tried to do this, the first time I ever tried using sleeves, it was me and a guy at the gym, and he was trying to get them on me and we're pulling them up, and it just really was a comical experience. But there's a very, very easy way to put put on sleeves. And usually sleeves do have a left and a right, so just check. This one's the left. So the way you put on your sleeves is you can see they're already pretty tight. Half, you roll half, and then you take it from the bottom and you kick in one move. You want to make sure you're keeping one move because otherwise it just stays there. So now see, they should be pretty tight. They should be pretty tight. That's perfect position that I've got them in. Now you might be wondering about wraps. I don't recommend wrapping your knees unless you really are competitive and high-level powerlifter. But even then, in some powerlifting comps, you know, it's not always, uh, people wrapping their knees. So depending on comp rules, right? But for most folks, sleeves will go a long way, especially— and they, they definitely add a few kilos to the bar. So you can see I rolled it up half, kick, bang, I'm in the perfect position. So now my knees have a nice, I suppose, support base And now I'm ready to squat. Does change the dynamics of my squat. So right now, if I even just get into a bodyweight squat position, naturally I'm not going to go as low because I'm restricted by the material, right? Which is a good thing when you squat. So now I'm in position on my squat and see, already start giving me some feedback to come back up. So it certainly helps keep my knees nice and stable, and just helps me come outside of that hole at the bottom. Knee sleeves for knee protection, just general health, I think are a great option because they do limit range of motion because they are quite thick. I do recommend that they're a good inclusion as a gym accessory, both to protect your shins on a deadlift and to protect your knees on a squat. Now, to get these off It's almost the same way. You want to roll straight down. That is the easiest way. People, you go over, especially like if you're going to be sweating after a big workout, pull down to the bottom. See, it's down to the bottom now and it's easy to slip off. I've seen some pretty comical ways people try and get their knee sleeves off, but what I've just showed you is the absolute easiest. To get these on and off. These next ones are a heavy lifting essential— lifting straps. I'm going to grab a bar because really any conversation around straps is redundant unless you've got a bar in your hands. Now, first thing I'm going to say is a lot of people overuse straps and they use it for everything from lat pulldowns to chin-ups. You do want to develop your grip strength. And yes, say for example, you are training high rep rows, high reps, anything over 8 reps. The grip is going to be a factor. With that said, do want to push your grip until you are on a working weight. So my preferred type of wraps are these ones. These are the Olympic style. Now the reason why I prefer these is because I can wreck those quickly. I'm not attached to the bar. Now almost everyone, 95% of people who I see wrap up— actually, that's a lie, 99% of people who I see wrap up, wrap up incorrectly. Now if you're using a proper bar like this which is on the Lake of Bar, which has harsh knurling. Don't wrap up by going straight to where you want your hand position to be. So a lot of people go straight to where they want their hand position to be and wrap up, and then they wonder why they don't get a good wrap. Well, guaranteed you're not going to get a good wrap that way. You have the knurling and you have the smooth part of the bar. Now the reason why we have the smooth part of the bar is because when we're wrapping, we're going to start with the smooth part of the bar. Right now I've got a good grip. Now I'm going to move out to where I want my hand position to be. So let's say I'm doing a deadlift, right? Now my hands are in position. This is where I want to be. Now I can pick up and hit my deadlift. That's how we wrap up. We don't go to where we want our hands. For deadlifting, I again much prefer these because I can drop quickly and I'm not attached to the bar. The other thing is, is limited material. There's less material. The other option is you use these, which are going to really trap you into the bar. Now, I don't particularly like these. If I am going to use this style, I'm going to use a leather style. So if you are going to use this style of lifting strap, you always want to make sure the tongue is out facing the wrist like so. So on this one, again, I see people do this type of thing and they, they try and get as much material in their hand as possible, and they wrap and they wrap again. That's, it's garbage way to do it. Or they just, again, they start it the way and they wonder why they can't wrap. Start at the knurling, wrap once, don't need to wrap multiple, multiple times. Then move your hands out to where they want to be. So again, if I'm doing an RDL, I did whatever it is, now I'm in position and now this is going to give me plenty of support in this position. Again, I don't like this one wrap, I can let it go pretty quickly. But if I was to wrap this twice, I can't let the bar go. You want to be able to have the ability to let the bar go. So that's how you use your wraps. And I know for a lot of people, simply wrapping up this silver part will be game-changing. Again, my preferred— I hate the figure 8s, that's why I don't have them demonstrated in this video. The figure 8s are a different style of wrap. Again, I never, never use those. These, always this style, or a leather version of a single thread style. So generally, when it comes to straps, when to use them or not to use them, you want to develop a very strong grip strength. So you don't want to develop a reliance on using these. Now I see people on the lat pulldown using them, using them on chin-ups and everything. I think that's completely a mistake. Coming to rows and heavy rows, I definitely use this because the bar does grip out of your hands. On heavy deadlifts and rep work on your deadlifts, I would use them, but I really just save these for my top sets. If it's not a working I don't use them because I want to develop grip strength, and grip strength is a key marker to overall strength. It also, funnily enough, is a key marker to longevity. So I wouldn't rely on these, but I definitely would use these on my top sets of rowing and deadlifting. When to use straps can be a little bit controversial in the sense that I don't want to be using straps all the time. I don't want to develop a reliance when it comes to heavy rows heavy deadlifts, I will use and coach people to use lifting straps. Usually the work needs to be an exertion of an 8 out of 10 or above. So either maybe a really heavy, hard working set for 2, 3, or 4 reps, or they're doing rep work, let's say 6 reps and above. Especially say on a stiff-legged deadlift or a deadlift, when you start doing rep work, your grip is going to give. But again, that rep work has to be the exertion has to be 8 or above. You may have seen a lot of gym bros use this next one, and that is wrist wraps. So now I've got 3 different pairs of wrist wraps in my hand. You may be thinking, what the hell? Well, these thick ones are exclusively for bench press, these red ones are kind of a multi-purpose, and these ones are for your weightlifting style of movements where the wrist needs to flex a little bit. So the one I'm going to show you is for a front squat. This is the type wrap that I use for a front squat. Well, number one, there's a lot less material, and this material is a lot more stretchy. So a lot of people, when they wrap up, what they try and do is they put their string in their thumb and they start wrapping up. And you can see the wrap starts really, really low, which doesn't support the wrist at all. So what I teach people to do when they wrap is they grab the string instead of putting it through their thumb, and once they grab it, then they start wrapping. See how that immediately covering my wrists. These, these wraps are specifically good for front squats. They're good for snatches, cleans, anything where the wrist is going to need to flex a little. Not as good for your pressing. So on a press, whether it be a shoulder press, a bench press, dumbbell press, I don't want the wrist to move at all. On a front squat, the wrists are going to move. They have to move, right? On a clean, the wrists have to move. But I tell you what, this makes a huge difference to my front squatting when I'm able to have a bit of support. So I'll just demonstrate the, the front rack position on the front squat. Not completely warmed up, but see how I'm, I'm obviously bending the wrists, right? So I need that flex in my wrists, but I also want some support. And that's where these type of wraps come in. So if you are going to be front squatting and bench pressing, then I'd highly recommend you have two different wraps, one for for your front squatting, one for your bench pressing. Again, the bench pressing ones should be very, very stiff. Front squatting ones should have that flex. You can see here, these wrist wraps allow my wrist to flex all the way throughout the motion. Now let me show you what a stiffer wrap looks like. Actually, let me show you this, right, just in terms of length of, of these wraps so you can really get an understanding as to the differences. One is a thicker material, the other one is a lighter material. You can also see lengthwise there, these are a little shorter as well, but this again is much thicker. This one's thinner. Now if you look at these ones, which are your elite of the elites, you can see how long these ones are, right? So because I haven't used these ones very much, you can is I save these ones for like super heavy, 1 rep, 2 rep, 3 rep. That's when these ones come out. The rest of the time I'm using the red ones. Front squats, very, very heavy pressing work. It has to be heavy for me to pull out the Harris support systems. Has to be very heavy, has to be close to a max. I'm gonna wrap up this wrist with the Harris. I'm gonna wrap up the other wrist. And these are, these are, wow, these are thick. And there, it's a lot of material. I don't want to keep these on for too long because it is going to cut circulation. Now imagine me going for a front squat. I'll even do it for shits and giggles. So my wrists aren't going to move in this position. I'm going to wrap up this wrist with this, up this wrap, which— this isn't the medium support, so this is what I, I would use for general pressing, which is a medium support, stiff material, but not, not as long as the Harris and the another step. So now both of these, my wrists aren't really moving, right? So you can see now, if I was to press, these wrists aren't moving. If I was to go use these wraps on a front squat, watch how uncomfortable this is going to be. It's not good. This, this one you can see particularly because this is even harder, right? I'm, I'm, I'm, I'm going to exaggerate, I'm forward, but really, like, ah, that doesn't feel nice in my shoulder at all because the wrist isn't able to flex. I'm even going to squat on that. So in Immediately I feel, because that wrist is not moving, I feel all the load on that shoulder. So this is where you want to make sure you have the right support systems. Again, on a press, on an overhead, this is, this is money, these are gold. On a front squat, a clean, a snatch, this is going to be way, way too much where you need that wrist to move with the shoulder. So the question is when to start using wrist wraps. Well, I'll give you a bit of a different answer. One, we want to make sure our lifts are technically correct, right? I don't want people using support systems until the lift is technically correct. If you're not able to perform it with precision, then you haven't earned the right to really start adding loads to the bar. The second thing is when it gets heavy. Now, what does that even mean? Because heavy obviously is an individual term, it's a relevant term. So let's say your technique is on point, heavy 8 out of 10. I wish shoot for an 8 out of 10. If it's 7 and below, I'm not going to use them. Again, if we're doing high rep work, I'll use them if things are giving me niggles. But again, the exertion point needs to be an 8 out of 10. Not for beginners. I would be looking for intermediate and above. The simple reason is beginners, their lifting technique isn't proficient enough to be putting forward the output that's going to affect their joints. Once you start getting strong enough, you've got output that may affect joints. But again, technique should always be 100% on, and then your exertion point is going to be 8 and above. Now we're going to move to what every good squatter will use at some point of their lifting career— lifters. We're really going to use these on our front squats, high bar squat, cleans, jerks, snatches. We're doing a low bar squat. Some folks may use lifters on a low bar squat depending on their body position. But what does a lifter do? Well, a good lifter is going to raise your heel. And when we raise our heel, one of the constraints for most people in a squat is knee flexion. And you might be, well, how's knee flexion, Mark? It's the ability for your knee to come over your toe. So your ankles are often a constraint to bringing your knee over your toe. So if you're not able to bring your knee all the way over your toe, if you're if we raise your heels, which is what lifters do, it allows our shin to travel nicely and safely over our toe, and it also shifts our center of mass forward. And what that does, it puts our body into position where our butt no longer winks, so to speak. So I've got good mobility, so you may not see this on me, but on a flat position you will see change, right? And that's what we want to see. So in the flat position, I'm able to achieve a full body weight squat. And you can probably see this end point, my butt has winked under at the very end point. Now here I've still achieved the full squat position. I'm a little higher as I get to there. Relax. That's what my body looks without lifters. That's how it looks. Now when I raise my heels with lifters, if I put lifters on, you'll notice that that position is even more comfortable for me. So I'm one of these people that doesn't necessarily need to wear lifters. I can get away with squatting without lifters, although I will say it is more comfortable because my body load— my body weight rather— is shifted forward. My center of mass is shifted forward into my quads. So this is where I can develop a much better set of quads and shift the load and use my legs far better than if I did not use it. So if I didn't use lifters, I'd be using more of my glutes. Another thing that I do with lifters is if they do have this strap that wraps over, you can see on my lifters I actually cut this strap off because I don't want my toes to be squished. I want my toes to be able to spread inside of my shoe. So I only have this one, and there's really no need to double wrap your toes. So let me show you this position, my bodyweight squat in lifters, and you're probably able to see is I don't feel it, I don't think there is, but there's no butt wink, right? And that's because slight arc, there's a slight elevation from my lifters that allowing me that full depth position. It almost feels like cheating now, right? So I'm gonna do a couple squats with this bar, high bar squats. I, I don't use lifters on a low bar squat. I'm flat-footed on a low bar squat, so the technique is slightly different. I'm going to step all the way out so you folks at home can really see what the knees are doing. So again, what I said before is about the knee and the ankle. A lot of people, they start there. The lift up, because it's elevated, it allows my knees to go forward, forward, forward, forward beautifully over my toes. You can see that, how far my knees are able to travel over my toes in these lifters. It just allows for a much better position. And you can see in this position here too, you can see how my back is nice and up tall. And I'm able to just come straight up. There's no wink, and that is the benefit of lifters. So for most folks, in terms of improving their squatting mechanics on a high bar squat, lifters are going to be great. Some folks may benefit with lifters even doing some unilateral work. So for example, if you're not quite ready to do a barbell squat, you need to work with a split squat, you may consider putting on lifters on your split squat. So you can see here on my split squat, the lifters enable me to really get my knee straight over my toe and just give me that little bit of extra space and give me that little bit of extra range of motion to really get that knee forward. So lifters allow for a better body position, which ultimately will allow for getting you strong at end range, particularly when your knee is traveling rolling over your toe. And it also removes the constraint of that lower back, as in it removes the butt wink constraint. And you've got to remember, the reason why we get that butt wink is usually because our abs aren't switched on. This is where we can do a lot more ab work, particularly bracing. And then we combine that ab work with a slight elevation where our center of mass is shifted forward by using the lifters. These ones might be completely unexpected, but are totally well worth it, and they are toe spacers. And I think toe spacers are probably the most underrated piece of gym accessory bar none. And I'll tell you why. Most people rock in with these type of shoes that I'm wearing today, these fancy shoes. And these actually ones aren't too bad because they're not super narrow, but most people's shoes are super narrow and it squishes their toes together. So I was going to demonstrate a step up in these shoes. I mean, I train normally without shoes So you're not going to see too much difference, although there is, right? This feels like I'm doing a step up on a cloud, which is not a good thing. I want a stable surface when I'm making contact. And because these have, you know, the, the air in them, as I'm stepping up, I can feel their instability through my feet. Now, if I repeated that action over and over and over again, what's going to happen is really micro movements of my feet that just generally aren't going to be— they're going to be detraining the muscles in my feet. Now I'll show you another demonstration of a step up with no toe spacers, and you see how my foot mechanics work, right? So they're not bad, it's not bad. You can see my toes curling a little bit. Just have a look at the other one. Just do 2 reps. I'm just doing 2 reps. Look, there's a little bit of a turn into the knee then. See there? Now if I want to fix my knees, if I want to fix my hips, it starts from the ground up. So we need to start with the feet, and this is where these toe spacers come in, right? So I'm going to put these toe spacers in between my feet. Now, a little fact that people don't know about feet is that your foot has two arcs. People only ever really think about the first arc of their foot, which is, you know, are they pronated or are they supinated in? Are they rolling? And that's how they roll their ankle. That's the first arc. The second arc of our foot is between the fifth metatarsal and the first metatarsal, so it's between our big toe and our little toe. We have another arc. So we want to think of this as creating two arcs on the floor. So we want our big toe knuckle driven into the floor, our little toe knuckle driven into the floor. So we see we're creating this nice arc through here and through here. Now Let's watch this step up. Maybe folks at home can't see it, but that feels a hell of a lot more stable than any of the step-ups I've done because I'm getting some outside feedback. My feet is stable, which is making my tibia, this muscle here, stable, which is making my knee stable, which is ideally giving me my force through my hip, allowing me to exert force. Now show you the other leg. This foot, I'm getting lots, lots of contact with the floor. Now I'm someone who trains in bare feet. I'm someone who trains. If you did this with the folks who have detrained through their feet, you're going to see some amazing muscle movement. You're going to see people's feet. And an often comment that I get when we train barefoot with clients is, oh, my feet hurt. Great. It means the muscles on your feet are working correctly. They're a muscle like anything else, your feet. We've got to train them. We want our feet to be able to grip the ground almost like velociraptors. So the inclusion of this— get our feet splayed against the floor again— is going to get our feet stronger, it's going to get our ankles stronger, our knees stronger, and our hips in the right position so that we can exert more force. Now we've reached the most important accessory of all. Chalk. So this is how you apply chalk. Grab a block, and most people pussy around with it. They put a little here and a little there, maybe this type of thing. That's not how you want to chalk. You want to really, like, grind it into your hands, particularly where you need contact, which is usually on the outside of the thumb. This area here is, you know, if you're using a bar, and through the knuckle. Now this This is gonna dry up your hands like nothing else. That's why my hands are always super rough and dry. And now I'm, I'm ready to lift. That's, that's a good— that's how your hands should look in the shop, particularly this area here. So let's demonstrate with some chin-ups. So where— when I'm using chalk, I use chalk— look, I use chalk almost on, on everything really, except for bicep curls, except if I'm going super superhero. Reverse kills, yeah, I will use chalk on reverse kills. It just helps with grip. But again, working sets only, which is 8 and above. But say on a chin-up, right, your grip often is the first thing that's going to go. Now you don't need to wrap— I'm not going to wrap my hands to a chin-up bar. I want my grip to get stronger, but I'm going to chalk my hands. Chalk is your friend. So at my gym, we have obviously a chalk bucket. You buy chalk in these blocks and simply, you know, unwrap it out of the paper, and there's your blocks of chalk in your chalk bucket. Very, very simple, very, very easy. Now, when should you use chalk? Really, when you're lifting an 8 and above exertion. So If you're warming up and just kind of like dicking around and that kind of stuff, you don't need it. But when you notice that your grip is the constraint and you really start to get into what I would call a working set, that's where you really have to go, okay, now my body is— I'm pushing for this. That's when you want to start using chalk. You don't want to have it again like straps. We don't want it to just be an over-reliance. So, you know, on the lat pulldown, if we're just warming up and doing a couple of reps here and there and just getting everything nice, we're not We're not coming to the bucket and using chalk and mounds of chalk all the time. I wouldn't really even use chalk on a lat pulldown. But as we get to our heavier, say, chin-ups, our working set, our 8 and above exertion, that's when I'm going to use chalk. Now, 8 and above exertion doesn't just mean load. It could mean that we're pushing for more reps than we ever have. So it should be a really hard set. That's when we want to introduce the chalk. Where I wouldn't use it, I just, I wouldn't use it on everything. Like leg extension, leg curl, things that have no relevance, you don't need it. But certainly deadlifts, certainly chin-ups, certainly pull-ups, certainly bench press. I'm going to use chalk to make sure I've got a nice connection with the bar, especially if I'm, I'm going heavy and 8 and above exertion. That's when I would recommend that you use chalk as well. Now that I've given you my top lifting accessories, I hope you go forward, use them in your lifting happily and safely to train harder than ever have before. As promised, here's a link to my fitness user manual. Download it and level up your fitness today. Till next video, folks, train hard, eat well, and supplement smart.