Watch a Master Trainer Run a Client Through a Program
A master trainer takes client Jacqueline through a full session, starting with mobility work and moving into lower and upper body exercises. He adjusts weights mid-session when movements feel too light, corrects form cues like knee valgus and glute activation, and explains why he picks specific movements like counter-balance squats for functional development.
Chapters
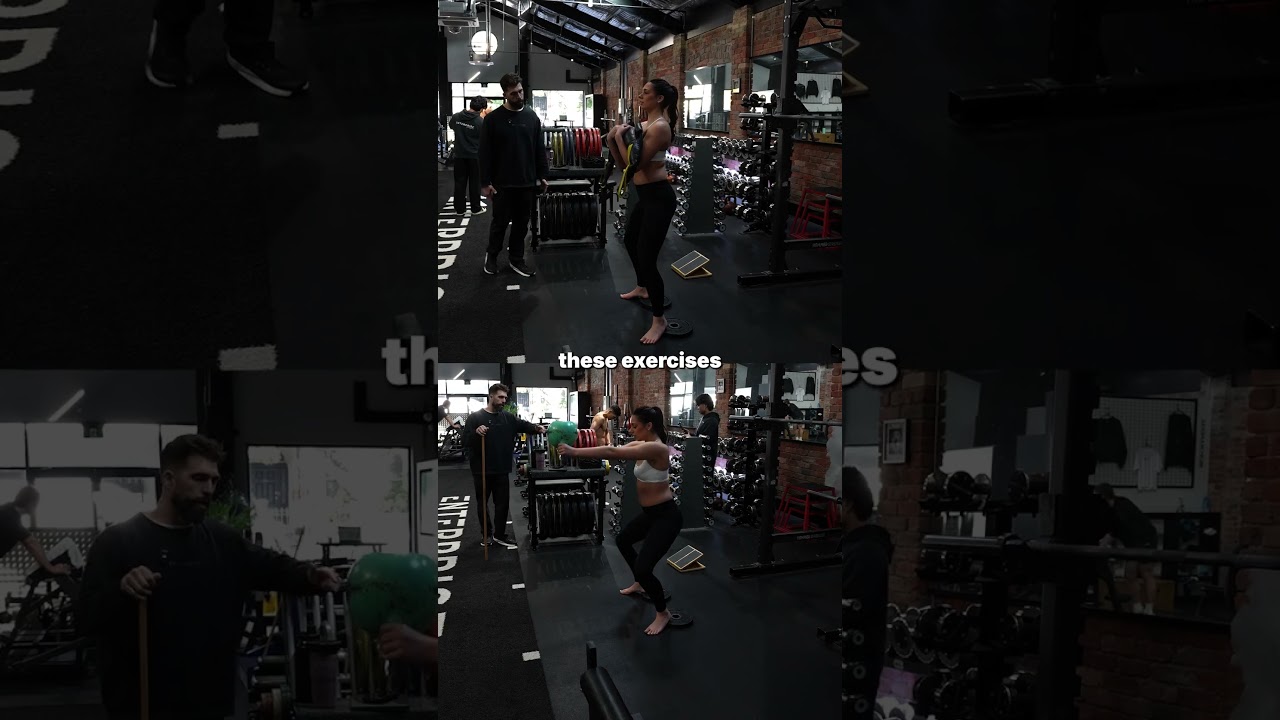
So this is the third and final part of this video series taking Jacqueline through the screening, programming, writing, and now I'm going to take her through the program so you can all see in real time how I actually do that in that session to make sure the exercises— we're on the same page with the exercises that I've written and you've seen me write and how Jacqueline goes and if any modifications need to be made. So welcome Jacqueline, we have her here. We are going to start with the mobility drill. So if you're printing out your programs like we do here and you're giving it to the client, I'd recommend getting some clipboards. They don't have to be branded, but clipboards are nice just to give it to the client so they can carry it with them through their workout. I'm much more of a fan of handwritten programs than app programs because often when people go on the app, they get lost in their phone in between sets. But that's a side point. All right, so the first thing we're going to do is the back bends. And I don't know if you remember from last time, we're going to do 15 of these, just bending back. For this exercise, I've programmed this in every day for her. And if for bonus points, you can do this every day. The next one is planks. So on the floor, you may remember this, how you did it. So I'm going to give you 30 seconds on the clock. This is your part of your warm-up. All right, so this is too high. Bring your hips in under, tuck them, tuck it. There you go, tuck them. That's it. Flex your quads. Flex. Good. Don't let me move you. Don't let me move you. Don't let me move you. Resist. So there you go. Don't let me move you. Don't let me move you. Flex, flex. Flex, flex. That's better. Squeeze your bum. Hold out your abs. Belly button to spine. That's much better. I'm just trying to push you off the fence. Good. Keep going, keep going. Get a few more seconds there. 10, 9, 8. This is much better. 7, 6, 5, 4, 3, 2, 1. Great. All right, next one. What I like to do with the warmups and with every exercise is to get the client to get their own weights. So they understand what weights they're grabbing rather than me passing it that way. They also know where things are at Enterprise too. So I'm going to get you to grab the 4 kilo kettlebell, which is the one next to the light green, one next to the turquoise. It's not quite— holding up in front of your body. This is the counterbalance squat. So I programmed this with a band actually. So we are going to put this around your knees. Yep. Now I want 5 slow reps with that out in front of you. There you go. Slow reps. This is your counterbalance squat. Good. Control everything on the way up, control everything on the way down. 1. I find with these, I don't set— you keep going. I don't set a tempo, I just tell people to control everything. I find people understand it better. As they get more advanced, people understand tempos better. Draw that belly button into spine. This is a good pace that you're going at. It's a great pace that you're going at, actually. Beautiful. Good, good. Spread those knees, heels down. That's nice, slowly up. Good, you just got one more for me. Slowly down. Good, slowly up. Beautiful, much better than last time I saw you, right? So that's the warm-up series. I've programmed 3 rounds that Jacqueline could probably do 2 to 3 rounds of this to get warmed up. We're gonna progress and I'm gonna show her some of these exercises we're gonna go through so she understands each one of each day. So normally if I was taking on a client and doing this, I would just do day 1 with them. Because for the purposes of this video, I want to show you each exercise that I've programmed. We're going to be going through each exercise, we're going to be doing 1 set, 1 good set, so you can see what the exercise is and moving on. But normally, just know, if this was a real session, we would just be doing day 1 and the whole program on day 1, and the next session would do all of day 2. We are going to Face that way. You gotta put this— remember the zurcher? Yep, that's it. So holding nice and tight up over your elbows. So in this position, what I want you to do is pull down like that plank position. That's it. But no, no, there's too much— stay up tall but pull your sternum down. There, exactly. Stack your ribs on top of your pelvis. Okay, so you're going to come down nice slow tempo. Just come down nice and control, and you're going to pause at the bottom. 1, 2, back up. 1, 2. That wasn't quite what we wanted, so do that again. Come down, stop moving completely. 1, 2. Good. 2, stop moving. 2, 1. Good. One more. And don't rely on passive structures. Come down and hold it feel it through the glutes. Spreads. 2, 1, back up. There you go. Jumped up on the floor. Let it go. I will show you the leg curl now. So there's two variations. It's toes pointing to you and toes pointing away. So dorsiflex, plantar flexed. So workout— I think for both of the workouts I've got you dorsiflexed, um, just for comfort for the time being. But in the next phase, we would do some plantar flex work. Jump on here, try this. Come down a little bit. There. So what I'm doing is I'm lining up— there's a red dot on this machine. I'm always lining up the red dot with people's knees. So bring your toes to your face. There you go. Now off you go on this. Okay, so with your upper body, what I want you to do is just lift a little bit. So put your palms— uh, your arms there. Yep, that's it. And you can lift up a little. Yeah, that's it. So where our thighs are staying glued and our hips are staying glued, spread your legs apart a little bit. There, that's Better position. All right, stay there for a sec. Shuffle up a little higher for me. Yeah, that's— it might feel like it's going to come off. It's not. Now curl. There you go. So I really want the pad as far away from the body as possible. Just, I mean, that's going to create more leverage, right? Lift up from the upper body. That's it. Now go. She's a little bit short on this machine. So just alternating her— the upper body position. Don't touch the weight stack. Keep a hairline away from the weight stack. Come up. So it's not quite head neutral, so don't lift up your neck. So there, right? Come up. Don't touch the weight stack. Spread your knees. Spread your knees. Spread your knees this way. No, no, this way. I want you to rotate. No, no, no, other way. There you go. That's too much. Too much. Just there. There you go. Toes up. There you go, good. 1, call that 1. Control down, control, and up. Now we're good. 2, good. Belly button on, sucking your belly button. 2, 3, belly button to spine. 1 more. 8, good. Excellent. Slow, slow, slow. Good, relax. How'd that feel? Jump off. So the way you do those is you notice on here there's A1, A2, right? So A1, you're going to do 10 reps, 8 to 10, of your wrestler bag. You're going to rest 90 seconds, then you're going to do A2, which is your leg curl. You're going to rest 90 seconds, you're going to get back to A1, rest 90 seconds. So it's 4 rounds. All right, counterbalance static lunge. All right, these are fun and these will definitely challenge you. This time you're going to grab the— let's grab the turquoise, the 6 kilo kettlebell. Just grab me one. So these are known as a counterbalance lunge static, uh, dumbbell in opposite hand. We're gonna do 8 reps. 6 to 8 reps, but we'll do 8. All right, now do a lunge. Cool, come back up. Tweak you a little bit. Bring your foot out a little bit. The toe rather. Just that. Too much. Perfect. All right, now go. There's where I want you. All right, come, come up. Yep, and go again. We're not going to get the range of motion with the kettlebell, so I'm going to get you put that back. The kettle— she's got good range of motion. The kettlebell is touching the floor before we get that end range. She's again a bit shorter. Normally someone who's a bit taller, that wouldn't be an issue, but, um, for her, she's got good range of motion and she's short, so she's able to touch the floor straight away with the kettlebell. We need that end range. All right, so go back into position. Let's see how your feet are like this. Let's get them straight. Yeah, that's it. Now go. Come back up. Just bring in your foot to my foot. There you go. There you go. What you want to watch on this one is people trying to balance. I don't want you to balance, I want the glute to work. So this glute should be working. It's probably too light if it's not. A little Looks maybe too light for you. Keep that there. 3. Let me just adjust this. Bring this a bit closer to me. So here, bring your foot here. That's it. Shorten this up. Just make it a bit— there you go. Now go. Pull this this knee out towards me. You're going back into that habit. So I'm just holding it for balance a little bit. No, I don't want this to be a split squat, I want it to be a lunge. So just turning this into a split squat. So what you're doing is this. What I want you to do to make it more lungy is don't worry about straightening this back leg. I want you to actually drop So the thing you've got to remember is the more forward the shin, the more quad it's going to be. The less forward it is, the more glute it's going to be. I want this to be focused on the glute, so it's not a split squat, it's a lunge. You're going straight into a split squat because your quads are good, so just shorten this up and drop straight into it. Okay, let's bring this to me a bit. There you go. Push the knee towards that way. There can be a bit of a bend, doesn't have to be straight drop. It's a little bit forward, a little bit forward there. And now drop, and now drop. There you go. Now come up. 1, 2. Send the knee up, send the knee up. 3, 7, one more. We are going to have to go heavier. 8. All right, swap legs. Glutes working? I can feel it more here in the hip flexor. Yeah. Okay, glutes aren't working then. All right, that's all right. That's why I film this, to show you how I problem solve these things. So this movement, we might change. So generally where she's pointing, the hip flexor, if people are feeling pulling in the hip flexor, it's exactly because they're not using their glutes, which means that this exercise might not be the right exercise for her. 5. Let me get you to pull this here. There you go. Hey, how'd that feel? Um, still too light? Yeah. Or was it here? Yeah, let's go grab the 9s. Grab a 9, put that away. So I'm not going to give up on this exercise just yet. So get into position, and I'm going to change the way you you load this. So instead of loading it to the side, I want you to load it here. Yeah. 5. Push the knee out more. 6. If cameraman comes over here, she's better do 4 more. The knee keeps coming in as she does this, continues to come in. I want to make sure you get that out, out, out, out, out, out, out. And that's trying to balance on this hand. Keep this by your side, point down. Let this. Let your glute work on this side. Glute should be working. Two more. Now she's trying to turn into a split squat and use her quads. Don't do that. Drop, drop, drop, drop, drop, drop, drop, drop. There you go. Straight back up. Do one more, one more, one more, one more, one more, one more. Stop twisting, stop twisting. Stop twisting. Draw up, back up. There you go. All right, where'd you feel it? Hamstring? No, my ass. Good. All right, so a few things went on there. I had to learn the movement, and this is very normal. So often what happens is a trainer, they have a client, you do an exercise, the client doesn't quite get it straight away, and they bail on the exercise and think, oh, the client is not doing it right. Sometimes it takes a few goes, and sometimes it's actually weight. So in this case, the 6 kilo was too light for Jacqueline to get what we're actually doing, which is that unstable load. Put the 9 kilo in her hand, it does change things. So this is where you need a coach. You need to be patient with your clients in terms of, you know, is this, is this the wrong exercise? It might not be. It might just be a few things you need to coach and figure out, and then just learning it. Sometimes it is the wrong exercise. So you're just going to be open to either way. We'll do the other side. One thing you can do before we do that is take off your socks, because I do think there is— the reason why I take off the socks is because the socks is going to affect the proprioception from the feet. If she can feel the floor underneath her, also I'll be able to see her feet a lot better and she'll be able to see, she'll be able to get conscious of her feet as well. When you're doing this, the key things for you is don't overstep because, and then you do this, which you rely on your flexibility and that knee to come forward. I want a small step, keep your feet like train tracks, then you're going to come down. When you come down, I want you to hinge into it. So see how my, I shift my hips back and then I drop down rather than going forward. Right, too small of a step. Now that, that's it there. All right, grab this. There you go. There, good, good, good. The key here is more of a vertical tibia. It doesn't have to be perfectly vertical, but more of a vertical tibia. When I'm coaching this, I'm at the front usually to see what the knee is doing, because I want that knee to be pushed out. If the knee's coming in, it's showing that she's relying on the VM. Point down, point down, point down. Yeah, the pointing down just anchors you. Don't, don't hold your body, just point down. 1, straight arm. There you go. 2, 9, 10. How'd that feel? Much better. Where'd you feel it? All right, cool. So a couple of things there I want to explain. You might be thinking, why not just give her a glute bridge or a hip thrust? Good question, because it's not an open chain movement in the sense that doing a glute thrust may help the glutes get stronger from an hypertrophy or from a growth aspect, as in bigger glutes, but in terms of functional aspect, it doesn't necessarily always correlate to, to the same thing. So here is, I want to teach her standing how to stabilize that knee. If I just give her a glute thrust, it may or may not have that outcome, whereas what I'm doing here is unilaterally teaching her, here's something unbalanced. The minute you put something in this hand, the body's going to sway, so the opposite is going to switch on, which in this case her glutes are going to switch on because she's only loaded one side. So I'm putting her in a position where she has to use her It basically simplifies it and dumbs down things for— again, I'm always— the exercise I'm going to give is always the exercise that's going to improve the client. So I don't have to over-cue it. I don't have to say, "Use your glutes." Opposite one dumbbell, it's in her hand. She has to switch on her glutes as she comes down, and she has to stabilize through a range of motion of that knee flexion. So it's almost like a challenge exercise, but there is going to be direct application to when we want to start getting her squatting and deadlifting and doing things that are standing, not just as a glute thrust. So I think in terms of learning and teaching clients how to use their glutes, this is a great tool and exercise. So this is also a pairing. Obviously that took a little bit of time to learn, but obviously when you're doing it on your own, you'll be able to move through this a bit faster. So you would do your feet like you do the exercise, you do 8 reps, 8 reps, and then you're going to pair it with back extension. I've got here Superwoman variation, so I'll get you on. Have you done this before? No. All right, well, I'm going to demo very briefly, and I'm going to get you to do it. Most of it I can teach you when you're doing it, right? So you're going to be here, Superman, Superwoman variation. So Superman variation, Superwoman, same thing, is you're going to come up at the top, you're going to point your thumbs up, giving everyone a thumbs up, and you're going to come down, you're going to bring it in and come back up. So that's 2. The key's here I like the 45-degree hyper as a starting point to teach people how to hinge through their hips. A hinge is not a drop. So when we did this, we'll do it for the video again. Can I get you to reach down and touch your toes? All right, so yep, good. Let's come back up. Better than when we previously filmed. Hop on for me. So the hinge is is you're not, you're not dropping, you're pulling the hips back, right? So I want you, when you do this, I want you to pull the hips back. Let's see what you got. Just do one rep and I'll see if this is right. Go ahead, just— oh Jesus. Yeah, let's just hop off for one sec. You're better off going further down and further up with this. There you go. That's better. You're not bending at all through there. So go again. Straighten your knees, lock your quads out. There you go. Now here, extend out. Yeah, stick your hips back towards me. No, no, no, no, don't bend your knees. Lower down, stick your hips back as you lower. Stick it— stick your hips back as you lower. Yeah, no, no, don't overthink it. Come down. And back up. Okay, and bring it— bring this in. Let's just bring this in for a second. Let's look at the movement, right? Bring your hands across chest. Now come down. Stay there for a sec. Just for the purpose of this video, I'm actually explaining— this was— you guys weren't watching this, I wouldn't be explaining as much as I'm explaining in this video. So again, um, I'm just going to not explain things and I'm just going to get the user exercising intervention to get her to do what I want. So don't even think this. Here's a stick. I want you to put this hand behind, the other hand on top. Yep, exactly like that. Now I want you to hold both of those, one on your back, one on your head, and do the exercise. Just come as low as you possibly can and then come back up. And come back up. So the rule is this has to be staying here. This has to stay there, right? So as soon as you can't go any lower than that, you come back up. Muscle. All right, go again. Just do you, you do you. Do a couple, couple reps. That's 1, 2. So I'm going to shuffle this up just a tiny bit for you so it's not— there you go. So that— bring your head to there. That's it. I want everything in a line, everything in a line. Come back up. Good. Flex your quads. Now get to it. Keep everything touching. As soon as you hit it, you come back up, right? 3, yep. Flex your quads. So now I'm achieving that hinge. I don't have to spend hours and hours explaining what I want. She feels what I want. So keep that, you found it now. Stick your butt back, stick your butt back. Now I'm gonna take the stick, bring your hands to the front of your body. Do the same thing, same movement. Now let's see if we can get a little lower. Rotate your hips out, rotate your hips out. There you go. Now come back up, squeeze your butt as you come up. Good. Rotate your hips out, spread— try and spread your butt cheeks as you do this. Spread, spread, spread, spread, spread. Further, further, further. Chin, just tuck your chin ever so slightly. There you go. Now come back up, squeeze your glutes. Good. And again. Spread, spread. So imagine this is a gear on your hip, right? Yeah. So this is a gear on your hip. We stick out and then we come back in. Stick out, then we come back in. The knees aren't moving, it's the hips that are moving. That's— this is the cog, right? So when I say spread your butt cheeks, you're pushing back. When you come up, you're pushing in, right? Makes sense? The pushing back doesn't make sense. Look at my hips, they're tucked forward, pushing back. Okay, right. I'm not dropping. Yeah, see, this is me moving, moving down, but my hips aren't moving, my back's moving. This is me moving my hips back. Okay, right. Cog. So the easiest cue is to spread your butt cheeks. Spread your butt cheeks as you this. Spread them as much as possible, as much. That's a good position there. Now come back up, squeeze your butt, keep your legs locked. I'm gonna call that 1. Spread your butt cheeks, flex your butt. 2. And turn your abs on more. You should start to feel this really in your hamstrings. We're on the way down, you should really feel a stretch there. Feel your hamstrings. Yeah, you should go deep into that stretch. Keep this locked, keep this locked. You don't want this to flex. There you go. You don't want to let this go. Keep this nice and stiff. Go back up, go back up. Squeeze your butt. That's 5. Stick your butt back, stick your butt back, back. There you go. Now we're shaking, now we're rocking. This is good. Now you found it. Come back. 6. Good. Stick your butt back, stick your butt back. You're gonna do 4 more. Now she's got it. You can see her Whole body's shaking now. That's what we're aiming at the whole time. Good. Come back up. Beautiful. It's a big difference there in the movement. So it took me a couple of goes to explain it, but as always say, be patient with your clients. That's in, you know, she hasn't done this with me before, but you saw exactly how I coached it. Just stair step. 10. Relax, relax. We stair stepped it, right? I got her on and I knew she's going to be terrible at this. Because she's never done it before, or she's done it but she hasn't done it with me. So I accept, one, I accept that she's going to be terrible at this, and two, I'm gonna coach her and layer the skills in incrementally as we go. So that's where I got that stick, got her to get the concept, big picture concept using the stick. Okay, she understands the movement now, let me take the stick away because it's inhibiting the range of motion. I could keep the stick there, I chose not to. Again, that's going to be a coach's decision decision on the day. I chose to take the stick away because I didn't think she needed it, and then taught her the concept of spreading the butt cheeks, pulling back, and she picked it up in what, the first set, right? So you're just going to stair-step the skill because again, this movement is going to eventually be part of her deadlift, right? So this is where you're looking at all competencies of skill acquisition in this phase, is I need to get her glutes strong in function when she goes on one leg, that foot needs to be strong to stabilize, but I'm also thinking 12 weeks down the track, like, I want to teach that hinge because eventually I'm going to get her to go into a deadlift and I wanted to pull some big numbers, but I wanted to pull numbers without me having to worry, is she going to set her hips back? It's going to be automatic, right? And it might take me 12 weeks to get it to that automatic response, but when we're there at that 12-week mark, or maybe that 8-week mark when she then starts deadlifting, she's gold. Yeah, she doesn't make a mistake because these motor patterns have been hardwired into her. So you start slow to go fast. Yeah, um, last one is single leg dumbbell calf raise. So for this, you are going to need to put on your shoes. So I'll get you to put on your shoes. The only reason you need shoes for this one is because it will hurt your feet otherwise. So for the purpose of this, I will, I will show you how you load it. That way you can see Go very, very light. 3 kilos. You know, he's getting the clients to grab the weights so they know where things are. They own the experience, you know. Yep. They're paying you for coaching. They're not paying you to get your weights for them, right? So you're going to hold this. So this is an— I mean, you can use an incline bench. You can use this. I'll go between each. So stretch all the way down and Back up. Oops, switch all the way down and back up. Load it. That was a faux pas on my behalf. You're going to load it, same leg that's working is the hand that you're loading. So let's grab this. You could use a block and a wall, um, you can use a bench if you've got a bench like this, or you can use incline bench, whatever, as long as you've got something to stabilize your upper body. So I like to wrap it around. So bend the knee a little bit, bend the knee. Yeah, so it's out of the way. There you go, perfect. Good. So what I'm gonna do just for this one to enhance the stretch, keep going. I need you to pull this back as you come down. Yep, and then come up. And as you come up, you're gonna twist. This is called actually the Shane, famous bodybuilder. Dan Duchesne was coined, coined this exercise. So these are the Duchesne calf raises, but this is how I like to do single leg calf raises because it does change the strength curve, but it also makes people think about pausing at that bottom position and stretching because that stretch component is very, very important, especially for that ankle flexion. As you can see when she's doing this, come up, up more, up more, up more. more up more up more up more. Don't let your clients get lazy coming parallel. It does matter. They need to get up on those hippie toes. So that's. We're going to call that one. All the way down. Move freely. Come on, get up, get up. Two. And again. Sorry. That's the workout Y. That's why you're here. Come back up. 3, 2. Now what I'm coaching is what I'm looking at is I'm looking at that heel, I'm looking at the quad. Is the quad locked? Is that heel all the way down? Does the heel come all the way up? Good. As they get really good at this— this is a little bit far away for her, but we'll keep going with it because she's feeling Doing it. Try and come straight up. Don't hit my hands. Come straight up. 6. Good. There you go. And again, see the cue? I didn't say stand up tall. I said don't hit my hand, come straight up. Very easy to understand, right? Someone puts their hand in front of your face, you're like, shit, okay, I gotta come straight up. Let's do one more, one more, one more. She was coming a little bit too diagonally with it. I wanted to come straight up. Good, excellent, good. How'd that feel? It burns, it burns. So generally speaking, with calf raises— you can pop that one away— with calf raises, I always go easy with clients when they begin with calf raises because if they've never trained calves before, usually like when I say easy, I'll give a client one set and that's it the first time we train calves because that will make them very sore. And the goal isn't to like kill them on the first session because then they don't want to come back, right? So the They're going to be sore regardless, so generally speaking, I'll use less sets, particularly with calves. I just introduce them to calves, and as we go along, they'll obviously be able to work up to the full amount of sets. So that's day 1 of her program. I'm going to show you the exercises, the upper body exercises of day 2. Her warm-up for upper body, you're still doing back bent bends, you're still doing planks, and instead of doing the counterbalance squat, you're going to need 2. And the third one she's going to do is the lock big 3, which is the T-raise, by the sides, pronated, supinated. So lie down on the floor face down, put your head on the towel, make a T with your hands, so hands out like this. And I'll talk you through this one. You just relax your head down onto the towel and you're gonna lift up your arms. You're gonna do 10 reps. So lift up your arms. Yep, bring your head down though. Okay, 1, and then bring it down like there's eggshells, so you don't want to snap— smash the eggshells. So that's 1, and again, 2, 3. You can see there is a little bit of disparity between left and right when she does this exercise, and that's the whole idea of this exercise, is to start to iron some of those disparities out. 6, 10. All right, now bring your hands to your sides with the dumbbells. Hands to your sides, straighten your arms. Now lift up. Keep your head straight though, don't want to hurt your neck. 1, 2, good, 3, 9, 10. Now turn your hands the other way. Nah, in that position, so you're just moving that way. Yep, and you can do another 10. Good. 1. Wow, it's good range. 2, 5. So the real value in this exercise for her is the T-raisers. So I might actually change this to just writing T-raisers because she's pretty good, uh, in the shoulder flexion— extension, rather. She's pretty good in her shoulder flexion— uh, shoulder flexion— extension. Shoulder extension. You don't normally do shoulder extension, that's why. So you're pretty good here. Done. Put them back on the rack. So I'm going to change it on the program. So we're doing the A1 component of this. Okay. Is your— this is for upper body day, right? Is your high cable row, single arm, into two parts. You may remember this video We did it last time. Do 6 reps, but they're going to be good reps, right? So, no, she bends her elbow before she retracts. I'm not happy, right? So she can't bend her elbow. All these subtle things matter. Now row. I want you to open up more. No, no, without twisting. So think about opening up your chest. Open up from the chest. Pull this down there. One. Let's get some more feedback on here. Let's go a little heavier. That way. Go again. I've just changed it for you. We need a bit of feedback. If it's too light, the client won't do it correctly. So you need— the weight needs to be that happy medium. Obviously it can't be too heavy where they're not going to be able to lift it, but it can't be too light where they're not getting the sensory feedback that they need to be able to do the exercise. So pull up. Now, now row. And again, at that row, without twisting here. So feel this, stick this up, right? Release everything, get into that position. So pull this down. Yeah, pull this down. Go again. So pull, squish this more, more, more, more. Don't bend, squish it more. Now as you row, I want you to lift up your chest to the roof. Good, that's 2. Squish, squish. Now open up your chest through here as you row. Open, open, open, open, open. Open, open, open, open, open, open, open. Keep your head straight. Stop, stop bending through here, but open up your chest. There. Good. Again, remember, this isn't about just purely using lats for lack— lats' sake. Most people are protracted naturally in their posture. We need to use the retractors. Yep. And row. There you go. Now we're getting Getting it. More, more, more. Pull, pull, pull, pull, pull. Good, that's better. It's 4. We're gonna do 2 more. Release, stretch, pin everything down without moving the elbow. Pull harder, screw that in. Now row. More, more, more, more, more, more, more. Pin, pin, pin, pin, pin. Give me one more. What's pin? Uh, pin. Get release, and I'll explain. And when I say pin— more— pin this, pin this, pull this in, pull this in, pull this in more, screw it in, screw it in, screw it as hard as you can. There you go. Pin that, don't move that. Now as you pull, open up your chest. There you go, good. The only other touch is your wrist. Instead of doing this, do this. Yep. Do one more for me. Just Just to get all those things working together. Stretch, pin, pin. More, more, more, more, more, more. Don't move this. More, more, more, more, more, more, more, more. Narrow wrist. Good, good, good. All right. Release and switch arms. So initially, to teach clients the movement, you're going to need to take a back slope. Because these are foreign movements. I want to really teach that extension stre Pulling everything back, pulling it towards. You do the— this— the initial program right, you do the initial movements right, client's going to be so much easier to train long term because they're going to get all these fundamental things at a deep level. Let's switch arms. The ultimate goal here is to be able to do a chin-up. Now if you look at how to do a chin-up, a good chin-up, you're all going to start with a full hang, head forward. What happens going to chin up, it's not arms, you're not pulling forward, that's how most people do their chin-ups, that's why they suck at chin-ups. What a good chin-up looks like is they're pulling everything down and in, that's the first part of the chin-up, right? Is the scap works, not the arms. So this is a good chin-up. This is a bad chin-up that relies just on arms. And you may remember from the previous video when we did that demonstration with James, where I pulled versus just use my arms. The initiation should be from the scap. So this is why we're spending time with Jacqueline to teach this unilaterally. Eventually this will become her lat pulldown, her seated row, her one-arm row, but it's going to be that pulling into this because the goal, we're going to stack these skills so eventually she's going to be able to chin up. Now if I'm her trainer and she starts with me being able to do zero chin-ups and that kind of being a dream. And then in, let's say, 24 weeks, 36 weeks, whatever, 6 months, she does her first chin-up and then is able to do reps of chin-up. She tells her friends because that was a goal that she didn't think she was going to be able to achieve, wasn't even on her radar, and now she's been able to achieve it with my training. So this is how when you get results with clients, they— you get more clients, right? And you get more results. So off we go, do the other arm. And then we'll move on from this exercise. Retract. Remember to keep that locked. Pin, pin, pin, pin. More, more, more. You've got more in you, right? Without twisting, pull this in. Now go. Now row. That's a good— that's very good. One. Just again, don't do this with your wrists. Do this. Stretch. Now go. Pin, pin, pin, pin, pin. Hold. More. Harder, harder, harder. Now Good. 2. Keep your wrist like that. Feel that? I'm doing this. Yeah, nagger. Or should I say, stick your sternum up. Walk this. Nagger. Stick your sternum up. Good. Just do 2 more. Stick your sternum up. Walk. More, more. Pin, pin, pin, pin, pin, pin. Harder, harder, harder, harder, harder, harder, harder. Good. Now go. Good. One more, but I really want this pinned more. Be aggressive with it. Pin. Squeeze it in. Tuck, tuck, tuck, tuck, tuck, tuck, tuck. More, more, more, more, more. There you go. Now lift your sternum up and row. There you go. Good. Excellent. So you saw how I coached those and a few cues. All right, the next one, we're going to pair this. So it's each arm, and then we pair this with arnie presses. So arnie presses are going to be unsupported, and that's to really work on that thoracic extension and to stabilize your stability muscles here. This we will use— let's go 4 kilos, right? Grab the 4 kilos, and I'll get you straight into it. I'm not going to demonstrate Oh, but you can do it. Good. 1, 2. We just do 6 reps. You've got the movement of this. You did this last time. 3, 4. Try and keep the sternum down as you do this too. Yep, now go. 4, 5. 6. Good, you got it, you got it, you know how to do these. That's it. All right, put them back. All right, incline dumbbell rotating grip, 30 degrees. A little tidbit here is not all benches, but I know Life Fitness benches are— this is a Life Fitness bench— but every time you lift up, it's 15 degrees. We want 30 degrees, so 2 clicks will give you 30 degrees. I'm going to get you to grab the 6 kilo dumbbells. We'll do a set of 6. So you're going to lie down, uh, facing up, so on your bum. Yep, that's it. And rotating grip— I'll guide you through what rotating grip is. So come back with your dumbbells. You're gonna do a press. So rotating grip starts here. Head down and come up with me. Come up, push up. And ends here. So go again, we'll do one more together and come back up. All right, all you now. All right, now that pinning of the shoulders that we spoke about, that's what I want you to do this whole time. I want you to pin the shoulders down as you go through this. So give me 6 reps pinning the shoulders back and rotating through. Good. 1. And really, when you do this, I'm going to come open up up through here. Don't look at me. Open up through here. I'm guiding through there. That's what I want, right? That's what I want. Good, good. More though. Really open up. Again, what we're doing in this position with her is I'm— I'm using the bench press basically as a way to stretch through her pecs, right? Because she's a little bit tight, and that's why we're doing the rotating grip, right? But also to depress the lats down while she's working and pressing as well to help that shoulder stability. A lot of females will say, I don't want to get bigger pecs, or you might, you know, whatever, but I'm not using it as a pec exercise to get bigger pecs or anything like this. I'm actually using this as a way to teach shoulder stability and also as a stretch for the pec, which often is inhibitory to people in terms of pulling that shoulder back. So she's not quite in the right position. Again, that up right now, come up. I want you to feel the stretch on this. Bring your feet forward a little bit more because you're— all right, release, rest. So the pairing of this is with seated row, and I've got you mid-neutral, neutral with the mag grip. We can use— actually use this one, which is a prime one. Just need to change it. So the reason for the Prime grip— most females will have a problem with grip strength. If you look at Jacqueline's hands, fingers, wrists compared to mine, or, you know, the average male, they're a lot smaller. So grip can become an issue. Um, so the Prime handles do help bypass that. Also, using a Prime handle, what you'll find is greater range of motion through the scapula, specifically as well. I don't really want grip to be an issue here, so off we go. You're doing seated row, and this is literally how I explain most exercises to clients, is I don't explain it. I just get them to do, and as they do, I then explain it. So you're seeing this in real time. I'm not going to demonstrate. You're just going to do what you think your version is of this. Most exercise, obviously deadlifts, we do that. So stick your keeps back and you're going to roll it. Oh, wait, wait, wait, wait, wait, let me go now. All right, so what I want you to do, go again, just do a couple reps for me, rowing. All right, this is going to be too heavy, so let's back off the weight a little bit. So first thing I want you to do is, yep, get into position, um, get the weight back. All right. So stick your hips back towards me. Really push them back that way. That's it. Up tall through here. Now stretch your arms out, stretch your arms out, place your thumbs on top of these. Now, there you go. Pull this back. Good. Same concept and stretch, keeping your chest— keep your sternum up high the whole time. Sternum up, not chest. And crush my hands in the middle of your back as you— as you— with your back. Yep. Uh, no, no. So as you pull, pull and crush my hands. Try and get all of this to crush my fingers. That's it. Yeah, beautiful. Go again. 2, stretch and crush my fingers. Crush my fingers. Good. And again, stretch, crush my fingers. Now I want you to keep this stiff as you do it, so keep your sternum up, keep keep the sternum up and let it stretch you, but keep this locked. Keep this locked here. Good. 4. Keep this locked, let it stretch you, and pull. So good. All right, relax. We're gonna get a little heavier now that you've got the concept. We'll go back to the bench just to give your arms a little rest. So come with me. What I want is— I really want you to focus on— so I don't want you feet here so much. I want them just out, just out in front, but really push all of this up to the roof and get that stretch. Keep that position. Yes. 3, 4. Come down and pause for a sec. 1, 2, up. 5, but keep the pause active. Don't go into passive structures. Chest up, sternum up. 1, 2, sternum up for me, sternum up. There you go. Do 3 more, pause, 2, 1. 2 more, sternum up, pause, 2, 1. That is perfect. That's exactly what we want. 2, 1, boom. Yes, you got it. That's exactly what we want. Good, you can rack it. Feel the difference? So again, we're constantly, constantly coaching. If there's a bad rep, we say, do it again, it's a bad rep, it doesn't count. Don't count bad reps because then clients understand what you want versus, oh, I'm just getting away with shit, right? You're You don't want your clients to get away with shit. You lose respect. You'll constantly be on clients. And then eventually, like, you see clients that I've trained for like, you know, years. I do very little and very little talking because they know exactly what to do. But initially there's a lot of work in the upfront, but then they understand things and, you know, the, the eventually the coaching just becomes about one more, no, finish the set, fast, fast, fast. The cues become a lot more singular and niche, whereas at the moment where it's about teaching that right language to the client. So the first thing is those hips. You're going to pull the hips back into this position, right? That's it. And then this lower back stays nice and firm. Good. Now row. Good. It's like a rowboat, right? So there's a little movement from the hips but not from the lower back. Yes, correct. Good. There. So as you do this, pull everything in. Good, good. And stretch. So I'm guiding with my hands for exactly what I want. There. Good. Remember to open up like you're doing that press. That's why we're pairing with the press, right? We're pairing with the press because I want you in that same position. So open up. Yeah, they're not just two random exercises that I put together. One complements the together, guiding her in terms of what I want, pinching those things together so she understands kinesthetically. Because that's what you're teaching here, you're teaching kinesthetics. Beautiful, excellent. Good. How'd that feel? Yeah, where'd you feel it? Um, yeah, good. So here specifically? Yeah, beautiful. Anything for the upper back? Um, a little bit here maybe. Okay, but anything through where I'm pointing? Not as much. Okay, so in this case, because she's not feeling it there and I actually want her to be feeling it there, we might narrow her grip a little bit, get her to do another set. And this is why you want to have the biofeedback of, hmm, is this hitting the way we want it to hit? So the answer right now is actually no, it's not. We'll come back, we'll give her a small rest, we'll do an— introduce another exercise. So we're going to do iso. So C1 and C2 is iso stick on the floor, 10, 10, 10. We're going to do seated hammer curl. So lying on the floor, let's grab you a towel, put your face on the towel. So this is 3 sets of 10 seconds. So arms outreached in in front of you. Right, face down. Yep. And we're going to go into a Y raise. So here, I'm gonna put this in your hand. You're not going to grip it full grip, right? So that's where you're going to be, like that. Okay, now you're going to lift. So I need to be in this position here because I need things I need to coach her on. One is that. Now you're going to lift this up and hold it for 10 seconds on my count, right? So lift up, hold, 10. Keep your arms locked, 10, 10, 9, 8, 7, 6, 5, 4, 3, 2, 1. Now the next thing is you're gonna do the same thing. Now the ideal is all you get away with that, I should be able to slide my hand ever so slightly under. Yeah, there you go. Now do it, right? So belly button into your, there you go, hold that. Lock, lock, lock, lock, lock. 10, 9, 8, 7, 7, 6, 5, 4, 3, 2, 1. Makes it so much harder, right? So I want the pelvis like that plank position. Yeah, there, hold that and lift this, right? Okay, lock these arms. Try again. 5, this can stay down though. 5, yep, there you go. Now lift. Uh, 10, 9, 8, 7, lock, lock, lock, lock, 6, 6, 5, 4, 3, 2— don't touch my hand— 1. Good, done. Nice. So that's the isos. Pretty hard, hey? Yeah. I love this one because it's, it's idiot-proof, right? Um, in the sense that even if you don't get the ab tuck right, you're still going to be working your upper back. The ab tuck is the ideal, but even if you don't do this and you just lift this we're good, right? This— we definitely want to learn this because this will make you better, um, and give you the right rib stack position when we're overhead as well. How do you lift this but also lift your— it's just lack of strength, that's all it is, right? So when you say how— all right, so I'm in this position, okay, just new to you, right? So you can't expect— okay, well Like, I can bullshit you and say this is the end point. Yeah. But it's not the end point. The end point is to pull your ribs in, pull everything in. But we learn skills in isolation and then we integrate them, right? Like, this isn't— even this exercise being perfect at this exercise, it's not the end point. The end point is being able to do a fairly decent overhead the head press and not have our, you know, go into extension where we put all the load in our back. We're able to keep our pelvis on and keep all of this and stabilize through. So we're just stacking skills. The first time doing this, you're just lifting your arms, lifting and using your upper back. Awesome. But I'm going to introduce the ideal to you. All right, and the ideal is being able to keep this in and extend. Let's go back to the seated row, and the goal here is I want her using more upper back, so that's why I've got her a bit more narrow in her hand position. Good, perfect. That's much better. One. Yeah, it's a little easier for you to get— generally speaking, narrower grips are easier for people to to get, so we will start there. Not mid grip, but narrow grip. Perfect. And I want you to pull, pull, pull, pull, pull. Good, pinch. Good. Remember, open up like you are on the bench press. Open up. Beautiful. Good. Let's do one more. Open up. That's a lot better. Actually, do one more. I want your hips back more. Hips back, hips back, hips back. Now go. Good, excellent, awesome, way better. All right, and the last one, the C2 exercise that you pair with the Y-raisers, is hammer curls. Super easy, we're gonna do them seated. So hands to the side, feet in front like this. That's it. Now shuffle your butt forward a bit more. There you go, perfect. Now you're going to curl up like this with both hands. Yep, and back down. So I'm gonna get you to— you know, I've been telling you the whole time to retract, retract, retract. This is the only exercise I'm going to tell you to pull a little bit forward, right? Bring the elbows a little bit forward. Now go. Good. And slowly lower. One. So what I'm looking for when I do this, so you guys can see on camera, is her elbow come all the way down. If she pulls back her elbows, right, leverage point— just do a rep like that for me. This is not what we want. The leverage point, you're not going to feel it as much, right? If I get her to pull her elbows forward— now do it for me. See, leverage point, the dumbbell is much further away. Come down slowly and just come down slowly. Pause. Ah, pause. A little higher. There. Now we're feeling in the forearm flexors. And all the way down. That's how I'm going to get you to do it. So come up all the way, then pause. The reason why I want it done like that is the 3 biggest weaknesses For females, athletes, clients, you should find the VM, which is usually a combination of glute and VM, forearm flexors, and scapular retractors. So I really— this program Jacqueline, what she's presented with, isn't uncommon by any stretch. That's why we're really working on that scap with all the stuff that we're doing. But I always like to include some bicep or direct forearm flexor work to help with that, especially if you've got small wrists. Those forearm one flexors need to be strong. So off we go, let's do 8 reps. We've already done one, we'll say you've done one. Hold. 2, good, that's nicely done. And back up. 3, good, this is a good tempo, I'm happy with this. 7, let's do one more. Pause. Good. And you can pop them back on the rack all the way down. Excellent. Well done. So that's perfect. All right, so we are almost, almost there. There's only some variations that we need to show her on the day 3. So she's 3-day program, there's a couple of variations. The only variation I need to show— 2 more exercises I need to show you. One is the front squat and the other one is the deficit kettlebell pickup. So the deficit Let's get started with the deficit kettlebell pickup. So I thought about this for her. Again, this is exercise— this is something that I normally give, but for Jacqueline, I wanted to give this— hit her glutes, hit her quads. I want to introduce the swing. I didn't think she was quite ready for a swing, so instead of giving her the swing, this is the exercise we're giving her to get ready to be able to do the swing, right? So I've regressed the swing. I'm actually going to use I want you to grab the orange one, whatever that one is, and then I want you to put the orange one in the middle here. Just drop it. Cool. Now step up onto the block. Yep, one foot on each side. Yep, get nice and firm with it. So a little bit further apart with your feet. That's a nice position. All right, now I want you to, before you move anything, Now, I haven't coached this to her. This is literally real time how I'm coaching her. She doesn't know what she's doing. Elongate your arms for me. All right, now as you do that, I want you to try and reach for that kettlebell. Right now, I want you to get a nice firm grip. Look up, do all those things. Yep, look up. Now lift it up off the floor. Now try again. Now come down and back up. Yep. When you do this, spread the knees more and be be tight with it. There you go. And back up, back up, back up. You don't have to touch the floor. You don't have to touch the floor. It's good. So when you do this now, what I want you to do is instead of letting that kettlebell go forward, I want you to try and pull it in towards your heels a little bit. There you go. And you don't have to touch the floor. Good. It's 4. Got 15 of these. So good. 5, 6. Good, solid. Pull it in towards your heels. 9, 10. Good. What I'm looking at is what her lower back is doing, what her hips are doing. Keep going. I'm just going to talk about what I'm doing. So you can see that her knees and hips are moving in sync, which is really good. Do 5 more. So knees are moving forward and her hips are moving back, and her lumbar spine is staying pretty on point. There is a little bit of movement in the upper as at the bottom, but that's okay. The thoracic spine can bend. Any questions on the kettlebell deficit, uh, exercise, deficit pickup? So that one, no, no questions. So that's going to lead us into doing a swing. Just going to build up some foundational strength first. And again, you don't have to come all the way down and round and try and get range. You just simply pick it up. The only reason we've got the— because as you— if you need the range, it's there. All right. So the last exercise we're going to cover on your program that you need on your day 3 is the front squat. And with the front squat, we were going to put a band around knees. Generally speaking, if there's ever in doubt of shoes on or off, shoes off. Time that shoes really need to be on is for anything that's going to really hurt your feet. Say for example, like the calf raises, that can be quite uncomfortable, especially with load. Barefoot, it's fine if you're not using lots of load, but if you're using lots of load and trying to go barefoot, it can be quite painful. All right, so you remember last time what we did with the front squat? Yeah, that's exactly right. And notice, like, I didn't help her then. I didn't go to correct it. I let her think about what she was doing, because I want her to own the experience, because that way when she's by herself, she knows what she's doing, right? So we want that up as high as possible. That's nice. All right, now break it. And that's good, good. All right, come back up. I want you to really spread the band as hard as you can, and you're going to hold in position. Spread the band, spread the band, spread the band. Good, hold. 1, 2, back up. Good. I'll give you pause. All right, we're gonna do 6 of these. So come back down. A little lower, a little lower. 2, 1, back up. Good. Spread more, spread more, spread more, spread more. 2, 1. Good. That's 3. Spread harder, spread harder. Heels down, heels down. Spread hard. 2, 1. Good. Good. Let's do one more and we just spread really hard. Good. 2, 1. Excellent. Now rack it back in. Pretty good. It's pretty good. I'm pretty happy with that. And I did have doubts last week about, is this the right exercise for you? It is the right exercise. I'm going to add a little bit of load because, I mean, not adding much, adding 5 kilos, but it will change things for sure. What a little bit of load will do is any of the things that you've been doing— how do I say— taking for granted. That's the thing with load, right? Load— when you put load, enough load on the bar— if there's not enough load on the bar when you're teaching someone something, they can take things for granted. I want to eliminate that. That's where the happy medium with the load needs to be. So I don't want necessarily a huge increase, but the but there does need to be enough feedback in the load that they're giving where if they drop those elbows, the bar rolls out of their hands, right? They feel it, but it's not so much load that they can't do it either, right? So let's give this another go. Again, I'm letting her figure it out. I'm not racing, racing, oh, your hand's gonna go here. I want to see what she does, and if she does it wrong, I will correct her. So I need to get your hands a little bit further out. There you go. I said a little bit. A lot. Yeah, that's it. All right, stop. Put it back. You need to get it higher. Yeah, yep, yep, yep. Should feel uncomfortable. Elbows up high, elbows up high. There you go. Yep, it's how it's supposed to feel. If it feels comfortable, you're doing it wrong. Should not feel comfortable at all. Hold. 2, 1. Good. 1, 2, 1. Good. 2, 1. Good. Spread the knees, spread the knees. 2, 1. Stand up, stand up. All right, rack. 6. With the front squat, I'm always keeping it to 6 reps because the upper back is what usually fatigues first. Now you saw how she did that with a front squat loaded. Let's see how she does this. Do a bodyweight squat for me. Grab that one. It's just where you are, just do a bodyweight squat. Okay, so we see, just to tie it back to what we're trying to do, we see the discrepancies when she does squat. Go again. You can see how that tip happens and she loses— I mean, we have been working out, so it's probably better if she did at the start would probably be more exacerbated. But we can see her abs switching off into that bottom position where her hips tuck forward. You can see when she does it with the front squat, everything now is forced to stabilize, and it actually— her hips and that butt wink is completely removed. So this is the right exercise for her, and it is the right weight. We'll stay on this weight, we won't go heavier. But now it's just a matter of repetition, getting the reps, getting the sets. So week 1, I'd probably I usually say she should get all her sets done at 20. So this is— this bar, it's a female bar, it's a smaller diameter, that's why it's a female bar, 15 kilos, whereas a normal standard bar is your 20 kilo bar, thicker diameter. The reason why I like to use this bar for front squats, particularly females, is because it just feels nicer. It's easier to get, it's not as hard on the clavicle, whereas— and it's also got no center knurl, and particularly if you've got a harsh internail on a front squat bar. The only front squat— if I'm going to front squat with a— if I'm going to do a front squat, the only bars I really like front squatting with are Olympic bars. You might say, well, all bars are Olympic bars. No, you have powerlifting bars and Olympic bars. So powerlifting bars are the ones in the Eleiko range, they're the orange tags. The Olympic bars are the ones with the blue tags. The difference is, is one has a bearing, and essentially the way they're made is the powerlifting bars are made in one piece, so when they drop, there's no bend, there's no whip in a powerlifting bar. So when you do a front squat on it, it's got that harsh center knurl, it can be quite uncomfortable, especially trying to get your arms around. It doesn't roll like this rolls, right? If I did— I should do it on this one, right? This rolls because there's a bearing in it. So when I get into my front squat, it moves. On a powerlifting bar, there's no roll. This is a Pennlate weightlifting bar. This is an Eleiko powerlifting bar. Doesn't roll at all, right? That's, that's the difference between the bars. So I'm doing a front squat, I want to wrap my wrists around, and that's why I use the female bar. Or for male, I'll use a weightlifting bar. I won't use a powerlifting bar for front squats because it's uncomfortable, and particularly it's very uncomfortable on the clavicle, but More specifically, it's uncomfortable in the wrists and the elbows. So, you know, you got to know your tools. You have the right tool for the right job. Okay, so we're gonna do one more set and then we're done. This is really just a drum at home because it's technical. Good. Make sure your hands are in the right position. Good. 2, 2, 1. Good. 1. Elbows up high as you come down. Good. 5. One more. Very good, in fact. 2, 1. Excellent. You can rack that back. Great. Perfect. I'll leave that there. Um, well done, Jacqueline. Thank you. Any questions? So that's a wrap of, of this 3-part series. So now you've seen the screening and assessment component, you've seen me actually write the program, and you've seen me deliver those exercises and tweak them on the fly and how she does them and how we put them together. So 3-day program. Hope you've really enjoyed this 3-part series. Enjoy the course and stay tuned for more great videos just like this. You're in the internship now. If you want the next level, the next level above this is the Elite Results Bootcamp. Bootcamp, which again is that 8 to 12 week course and a 3-day face-to-face absolutely amazing event. We push you to next level. Uh, Internship's all about training the general population client, and the Elite Results Bootcamp is all about getting those elite results. So there's body transformations, uh, training competitors, training athletes, and next level. And if you want more advice on business specifically, do check out the Wolfpack Online Program and the Wolfpack Alpha Program, which is the mastermind where you get 12 months with me and access to all of our best stuff. So hope you've enjoyed, and see you on the next module.