Level 1 Teacher Training
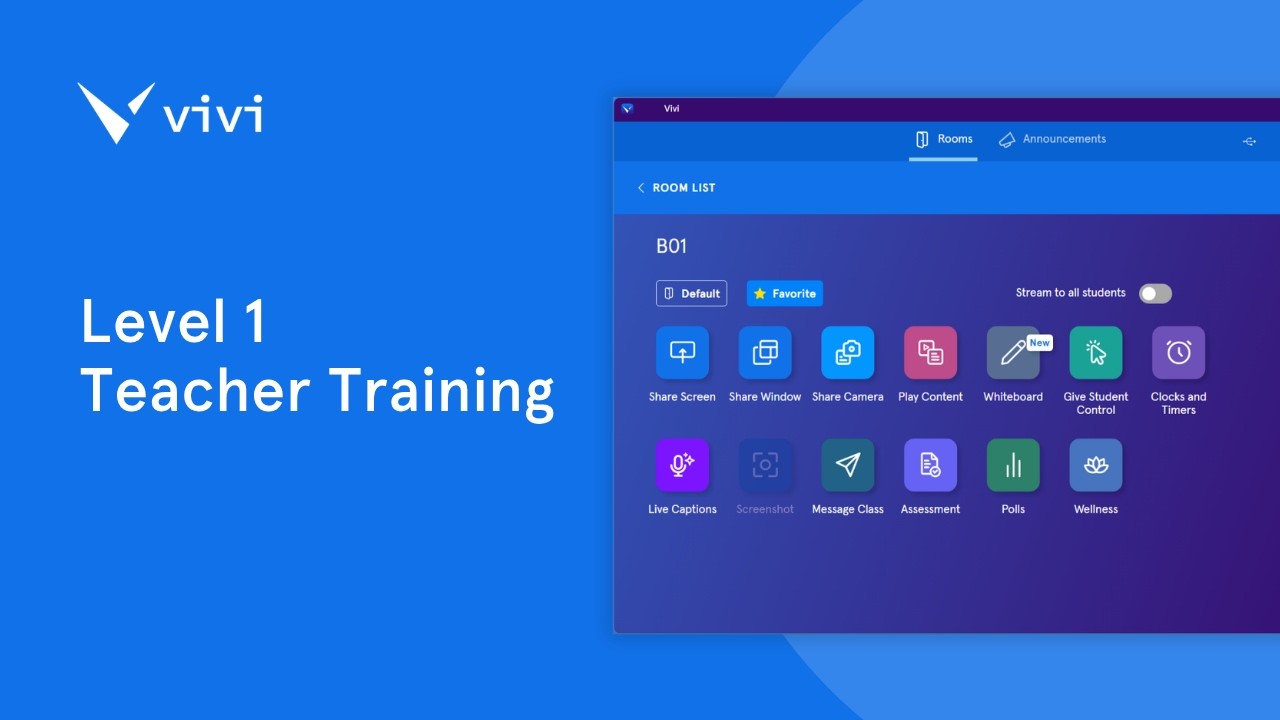
Learn the basics of Vivi for teachers: installing the app, joining classrooms, sharing your screen, and using the whiteboard with drawing tools, shapes, and backgrounds. The tutorial covers the sharing toolbar's controls like Timer, Annotate, and Movie Mode, plus how to capture and annotate screenshots. Practice these Level 1 features before moving to student polls and screen sharing.
Chapters
Welcome to the Vivi Level 1 training. In this session, we'll cover the essentials you need to start teaching with Vivi with confidence. That includes logging in and joining a room, sharing your screen, using the whiteboard, and capturing and annotating what's on the display. Let's get started. Before you can share anything, you'll need Vivi on your device, and there are 2 versions to choose from. The installed app is the full experience, running on Windows, Mac, select Chromebooks, iPad, iPhone, Android, and Linux. You can download it yourself from get.vivi.io, or your IT administrator may have already set it up for you. If you're on a device that can't install apps, like some Chromebooks, you can use the Vivi web app instead at app.vivi.io. It does almost everything the installed app does, with only a few features unavailable. For this video, we'll be using the installed app. First, open the Vivi app on your device. You'll be asked to select your organization, usually your school or district. If you're on your school's network, it often appears automatically. If it doesn't, select Find My Organization, enter your email address or the organization code from your IT administrator, and choose Search. Next, you'll be prompted to log in or sign up. If your school uses single sign-on, click Log In and use your usual school email and password. If it's your first time, click Sign Up, then enter your name, email, and a password. Choose I'm a Teacher and enter your presenter code, again, from your IT administrator. Click Sign Up to finish, and if prompted, select I Agree to accept the license agreement. Once you're in, you'll see the rooms list. Find your room by searching or browsing your school's locations. Then double-click it or select it and click Join Room. Teach in the same space regularly? Click the star beside the room to make it a favorite, or once connected to the room, click Default and then Set Default so Vivi connects to it automatically each time. And if your room uses a room code for privacy, you'll find that code on the classroom display. Now for the feature you'll use most: sharing your screen. From the room's homepage, select Share Screen. On a Windows device, sharing starts straight away. On a Mac, you may need to enable AirPlay. On an iPad or iPhone, use Screen Mirroring. And on a Chromebook or Android device, just allow the permission prompt. Follow the on-screen instructions for your device, and your screen appears on the classroom display. Sometimes you only want to show one thing. Select Share Window instead. Pick the window you'd like to display and choose Share Window. Only that window appears on the display so you can keep your email, notes, or lesson plan open privately on your own device while you present. However you share, Vivi shrinks down to the floating toolbar so it stays out of your way. Grab the 6-dot handle to move it anywhere on screen. You've got Stop to end sharing and Pause to freeze the display— handy when you want to set something up before revealing it. There's Annotate to draw over your screen, a Timer, and Give Control to hand the screen to a student— more on that in Level 2. Home takes you back to the app, and Hide tucks the toolbar away. The timer is great for keeping activities on track, and it stays on screen while you share. From the floating toolbar, select Timer, then set the length with the plus and minus buttons, or type straight into the minutes and seconds. Pick where it sits on the display and press Play. As it counts down, a blue bar shrinks alongside the time so students can see at a glance how long is left, and you can top it up with the +1-minute or +5-minute buttons Or pause and stop it at any point. In the last 5 seconds, the bar turns yellow, and at 0, the display shows Time's up! with a short chime. On a device that shows the full app instead of the floating toolbar, you'll find the timer in the lower toolbar. In the whiteboard, it's in the top right. From the floating toolbar, select the expand arrow for more. Adjust the display volume, switch on Movie Mode, which adds a short delay to smooth out video playback, and Privacy Mode, which stops students capturing screenshots of the display. When you're finished, just select Stop. If you're in the app and not in the toolbar, all of these tools will be shown along the bottom of the app. The Vivii Whiteboard turns your display into a blank canvas. Or a backdrop for your lesson. From the room's homepage, select Whiteboard. It opens to a fresh page or brings back your previous boards if you've used it before. Down the left side are your drawing tools. Use the pen or highlighter— select either to change color and thickness— the eraser to rub things out, and the select tool to move, resize, or rotate anything on the page. Draw Shapes adds arrows, circles, and stars. Insert Text adds typed text, and Undo, Redo, and Clear are there whenever you need them. One of the whiteboard's most useful features is backgrounds. Click Background to open VeVe's library, which includes lined and graph paper, dot grids, handwriting guides, music staves, column organizers, even Venn diagrams. Choose Apply to Board to add it to the current page, or Apply to All Boards to use it everywhere. You can also bring in your own backgrounds. Under Background, select Upload Image or PDF and browse your device for the file you want. Images work in JPEG or PNG format. Upload a PDF and every page comes in as its own separate background, so you can load a whole worksheet or slide deck and annotate over each page in turn. Your uploads are saved under the Custom tab, ready to reuse in any lesson. Need more space? Click the plus icon to add boards, up to 20, and use the arrows to move between them. And when you've made something worth keeping, open the menu and choose Download Image or save it straight to Google Drive, OneDrive, or OneNote. Those same tools are just as useful for marking up whatever's already on the display, and that starts with a screenshot. While someone is sharing, select Screenshot to capture the classroom display. On a laptop, it's saved to a Vivi folder inside your pictures. On a tablet or phone, it goes to your camera roll, and a quick notification confirms it's saved. Students can take screenshots too, which is great for capturing notes. If you'd rather they didn't, switch on Privacy Mode to pause screenshots at any time. Remember, Privacy Mode lives in the floating toolbar or along the bottom of the app when you're sharing. Once you've captured the display, you can draw right over it. There are 3 ways to start annotating. Select Annotate from the floating toolbar to draw over your live screen. Choose Annotate from the screenshot notification, or press and hold the screenshot icon until the Annotate option appears. You'll notice the annotation tools are exactly the same as the whiteboard tools we just covered— the same pen, highlighter, shapes, and text— so you already know how to use them. Mark up a diagram, highlight a key line, circle the answer, then save or share your annotated image just as you would a whiteboard. And that's the basics! You can now log in and join your room, share your screen or a single window, bring your lessons to life with the whiteboard, and capture and annotate anything on the display. When you're ready to go further, student screen sharing, polls, streaming content, and more. We'll see you in Level 2. Happy teaching!