Vivi Digital Signage (CC)
Megan Kirsch from Vivi walks through the digital signage platform: uploading media, building playlists, and scheduling displays for schools and organizations. Learn how to set up and manage your signage from start to finish.
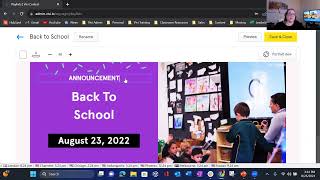
Hello and welcome to our VIVI Digital Signage training. My name is Megan Kirsch. I am the Professional Services Specialist here with vivi. That's just a fancy way to say trainer. I work alongside the Customer Success Team to provide training and other resources to make everyone successful with using VIVI in their organizations and classrooms. Before we get started, I do want to let everyone know that this session should take about 30 minutes or so and we are going to be covering the following topics. So we're going to start off with a brief overview of vivicentral and then dive right into the three main steps to create, schedule and display your digital signage within your buildings. If you are new to VIVI and have not yet heard much about us or still are unsure of what we do, allow me to give a little introduction. The VIVI solution is essentially at its most basic form, a wireless screen mirroring solution. It's comprised of three components. The first is the hardware, which is the lovely little blue box has two little antennae. This box connects directly to the display through an HDMI cable and directly to the school's Internet, ideally through Ethernet or Wi Fi. If a display does not have a VIVI box connected to it, digital signage will not display. The second component is the app or the control tool. This is what teachers and students can download for free on any platform to navigate through the various features within the VIVI app in order to control the classroom display. We will not be talking about the app today, but the third part, which is where we're going to be living for our session today, is vivicentral. And vivicentral is the administration platform. This is where all the users are determined and all the settings are configured. But this is also where digital signage is structured and scheduled and so we're going to go ahead and get logged in again. Vivicentral is the cloud based dashboard in which digital signage is managed. You will need to ask your IT administrator for the correct URL specific to your district. I am pulling up my specific VIVI central account for my training school. Mine might look a little bit different from what the rest of you see. If so, that's because of the fact that I am considered an IT admin within my fictitious school. But as I mentioned, there's three main parts to setting up signage and the first is going to be Media. I'm going to click on my media header and when you do, you're able to see all media that's been added to your organization and depending on how this is set up and structured by The IT admins individuals may just have access to a particular folder or two, or they have access to everything that can be determined at a district level. For my purposes, I like to show how to create folders and add media. So let's pretend you are coming in and you're new to Vivi, or you personally are new to Vivi, not just the school, and you want to create a folder. You'll select Create folder from the upper right corner and give it a name. So I'm going to pretend that I am the fine arts director for my high school. So I'm going to do Fine Arts High School create. All right, and now my new folder's at the top. I'm going to click on it. And now I am in my folder. I can go to the edit permission section and add permissions so only specific individuals have access. You just add permission, select your user and go from there. I'm not going to do this because again, it's just me. But you have the ability to also create subfolders by continuing to create a folder within each folder. Or you can just start adding media. I'm going to select Add Media and go through the different options that you have for uploading content to Vivicentral to use for digital signage. You can add an image which is a stagnant image saved to your device. It's typically a PNG or JPEG file. You can add saved videos as well. So if you have any saved like MP3, MP4 content that you would like to upload, maybe someone recorded a school play or a sports event and you or an assembly and you want to include that, you can add that file. Same concept with audio files. You can add a video link direct from another Source. So consider YouTube or Vimeo. You can just take the link and paste it in and utilize it. That way. We also have the ability to add live streams. So maybe there's a particular organization that your school's interested in, or maybe really into science and nature and you want to follow some live streams that some zoos offer, you can do that website URLs. If you want to add your school's web page or Twitter page, athletic page, fine arts page, whatever content you like from a website, you can send the URL directly and that will display in digital signage. A lot of our schools that we've partnered with utilize Google and Google Slideshows. You may have used Google Slideshow in the past for your signage needs. Good news is you can continue to do so if that's a format that you're comfortable with and really like how that's structured. You can organize your signage within Google Slideshow and upload the entire slideshow to Vivicentral. And same thing with PowerPoint. For today's purpose, I'm just going to go ahead and select Add an Image. We're just going to do the most basic structure each. Just so you know, each file type you select will have slightly different options here to toggle and manage based on the file format. Since we're utilizing this image for digital signage, I'm going to select Signage as my type. I'm going to go to choose File. It opened up into my picture file, which is what I wanted. And I'm going to go ahead and select this Back to School Open House image. My image automatically loads in both a landscape and portrait orientation because VIVICentral can't tell how you've structured your displays, so it gives you the option to toggle settings for both. Go ahead and go through your options and determine what option you like best. And once you're done, you can go ahead and hit submit. You'll have a progress bar followed by a green check you can close. And now you have uploaded an image successfully to your media folder. And for my example, it was my Fine Arts High School folder. So we're good to go there. And here's a little preview. I'm going to go back to Media and just to show you, in my Fine Arts folder, I have my Back to School Open House image. So we're good to go. You essentially would just repeat this process for all your media items that you wish to upload. And once you're done and you're satisfied with what you have, we're going to go ahead and navigate to signage. And first we're going to go through the Playlist section. So I'm selecting Playlist. In the middle of the page will be all the playlists you've previously created. Since we're starting fresh, we're going to select Create Playlist from the upper right corner and the page that appears will provide the ability to start creating a playlist. I like to joke that this is very similar to any playlists any of us have created over the years. On our computers, on our ipods, whatever. So it's really following those same similar conventions. We're going to start off with giving it a name. I'm going to call this my Back Back to School high school fall 23 playlist. All right, right below the naming box, there are four segments of content that you can pull from and we're going to show examples of each. We start off initially in our media folder, so these are items that we ourselves have purposely uploaded to Vivicentral to use. I'm going to go to my Fine Arts folder that I created and uploaded my Back to School open House image and click the plus sign. And now that item is under the Playlist folder or header. I'm going to hit the Home button to go back because there's some folders containing additional information I'd like to use, such as my lunch menus and let's see here. Oh, I want my. My Bell schedule and I think I'm good. All right, we're just gonna go with these three media items for now. The next option is playlists. You can leverage pre existing playlists that you've created and build those into new playlists. What that means is you don't have to continuously add the same media items over and over and over again to new playlists. Because of that, I do recommend if there's particular content that you're planning to use regularly throughout the year, making it its own playlist and then merging that into anything else that you do to add and tweak based on the season, the time of year, the theme you're running. It might save you some time. And I'm all about saving folks some time. So for example, I created an early dismissal playlist for when early dismissal is occurring. So I'm just going to go ahead and add my early dismissal playlist right on into this new one. The next category to choose from are widgets, and these are built in widgets that VIVI has offered up within digital signage, and it allows you to sync a calendar, clock, news timer, or weather into your signage playlist. I'm a big fan of the clock. Being able to know what time it is is never a bad thing. And also the weather. Feel free to add whichever ones you want and don't add whatever ones you don't like. One thing to keep in mind, each widget has its own settings that you will have to go in and toggle and I'll show that here in just a moment. The last option that you can use is templates. VIVI went through and built in some templates on just some very generic topics that you can essentially use and edit and add to your own playlist if you'd like. Sometimes there might be an update or a notification that you need to get out to the school population sooner than later. Some of us are faster than others when it comes to creating visually appealing content. And so if you're in a pinch or you're just not that creative and that's okay. Feel free to leverage one of our templates. I'm going to go ahead and select this back to school template because I have a Back to School dance that I want to promote. So when you open up a template, it'll ask you or let you know you're going to need to edit the template. Click OK in the screen that appears. You can then go through and edit your content. So I'm gonna do a welcome back. We're gonna say back to school dance. We'll do from 6pm, 6pm to 8pm and we'll say it is. Well, we'll pretend it's today. And I got this out well before today. All right. So welcome back, Back to School dance and all of that. So technically, if you wanted to change this image out, you could. The colors, those are stagnant. But you can upload your own image. You can preview the template if you want before sending it out. So, for example, I just hit preview and now I can see what it looks like. I'm satisfied with that. Awesome. I'm going to save and close. Now, when you save a template, it does take a little bit longer for the file to save, unlike everything else. So don't be alarmed, just be a little patient. You will get a success message if everything was done correctly. And now you have your template in your playlist. So now I have all the content I wish to have shown in my playlist. You can manually move things, you can drag and drop and reorder things however you want to do. There is a timing factor that you will need to pay attention to. The timers next to each individual item pertain to how long will that image be on your display before moving on to the next. So you want to consider this when you're going through the timer. If there's a lot of words on the content, you're going to want to probably give folks some more time to read it as opposed to being just a very visually full image. Maybe not as much time. You can at the top here alter the default duration for everything. So I'm changing the default from 10 seconds to 15 hitting apply to all. Now everything's 15 seconds. Keep in mind, my early dismissal playlist did not change and that is because those settings for timing were already determined when that playlist was created. So I don't need to change anything. If you're uploading media content like video, audio, previous Playlists, links from websites like video links, it will automatically calculate the duration for you. You don't have to change it. If you're using Google Slides, though, you will have to set up your presentation in Google, make note of how long that presentation takes and add that factor into your settings. So there's a little bit more manualness when it comes to Google. Now, as I mentioned with our widgets, so my clock and my weather widget, there are some settings that I have options to. For clock, the option is do you want to show an analog, digital or both versions of the clock? I'll choose both. And with weather, you're going to have to indicate where you're located so the correct weather appears. I'm going to choose my country and my state and my city. Excuse me. Because we are an international company, our unit of measurement defaults to metric. So just make sure you change that or feel free to answer questions about Celsius all day long. And you can then toggle whether you want to show daily or hourly weather. So I've made my choices. I like how I'm set up. Notice now I have the option to hit create. And now my playlist that I plan to use is created. I now can see that I have seven items in total for a duration of two minutes. I'm good to go. When I go back to the playlist section under signage, I can see my playlist, which is right here, is listed. So now that I have the what and it's all grouped and organized the way I want, I am able to move on into scheduling my playlist. So I'm going to go ahead and hit signage and the middle of the screen here is going to show all your signage schedules that you've set up. I've currently turned all of mine off, so none of mine are active. So if we scroll to the top, you will see a Create Signage Schedule button. And that's what you're going to do whenever you're creating a new signage schedule. And with the pages that appear, we're just going to follow the screens. First is a name, whatever you want to call this. So I'm going to start off with High school. Back to School poll 23. All right, so there's my name. Scroll down right hand side. Next. Now destination is important. Depending on how your organization is structured, you might be assigned a particular signage group. And that means certain people can update signage for certain displays. Other organizations go purely off of location. It really just depends on how your IT administrator has chosen to set you up. So you'll choose accordingly. I'm going to go off of location because I'm just going to send this out to my entire school and hit next. Because we did the heavy lifting with creating our playlist already, all we need to do because by default it's going to toggle to choosing a playlist is scroll until you find your playlist. So here's the one we just created. I'm going to highlight and hit next. Now, this screen is what determines when it's running, how long it's running, and when if it should stop. So it's going to run off a basic calendar system. So you're going to choose your start date and you do have the ability to schedule this in advance as well, which is nice because you can plan ahead. So I want my back to school playlist to let's say run from right now until next Friday. So I've got starting today, I'll do my start time at 7am My end time will do 4pm repeat. I'm gonna select daily and now I can select the days I want it to run. I'm going to deselect the weekend because no one's there and because I know my end date, I'm going to choose until click in that box and a new calendar will pop up and I get to select my end date. So as I've set things up right now on this screen, this schedule will run from today until next Friday between 7am and 4pm Monday through Friday. Now, under the priority section you have low, medium and high. That refers to if you start to schedule quite a lot of playlists and they might overlap or maybe you want them to run during a particular time, like let's say the lunch hour. You switch up your schedule and you have a couple different playlists that you're running right after another, you're going to want to make sure you toggle their priorities. So low happens last, high happens first and select as you should precedence. Now this has to do with whether or not you want your signage to interrupt what happens in the classroom. So depending on how signage groups and or rooms are determined, you will have to pay attention to this. If you're running something while a teacher is using digital signage. Well, I'm sorry, while a teacher is using their display and you're trying to run digital signage and you select interrupt, your schedule will interrupt their screen, but they have the ability to override it. If you select interrupt and lock, it will interrupt their screen and they can't get around it until it's done playing. So some things to consider if none is selected, it'll only run on the devices that nothing's currently happening on. So you can choose your the best the best route for you when everything's set up to your liking. Click Next. The last screen is an overview page to make sure you've got all your details as you wish. And when you're done, you're going to hit submit. We want to see that no conflicts detected. That means there shouldn't be any reason why your schedule shouldn't run. And over my shoulder here my classroom display. In my tiny zoom window, my signage schedule has begun. In the Signage Schedule page again, you have a whole synopsis of what you've determined. If you ever need to edit anything you just did, you can do so with this yellow edit button. When I go back to the signage page, we can see the schedule I just created and that it's actively looping and it's active at any point. You need to turn it off. Just turn it off. You can toggle it back on when you're ready to turn it back on, so you have a lot of flexibility with that. So that is digital signage. I know we went rather quick and there's a lot of information involved, but practice makes perfect if you take it a step at a time, I promise you it'll be easy to get down and master in no time. As you start to become more acclimated and familiar with digital signage through vivi, you might find shortcuts that work best for you or best practices that cut down on your time. You're more than welcome to do whatever makes the most sense for you as long as the end goal is reached. How you get there is entirely up to you, but I want to thank you all for your time. If you have any questions, my contact information is on the screen. You can also reach out to your dedicated Customer Success Manager and I hope everyone has a great day. Take care.