Michael Energi walks through managing items in Per Diem's Merchant Dashboard for Square POS. Learn how to assign items to categories, feature them with tags, set up modifiers and upsells, mark items out-of-stock by location, and generate deep links to items in the mobile app.
Chapters
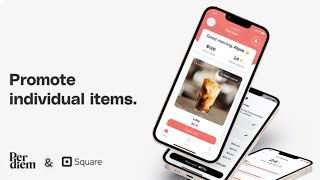
Foreign. Hi, I'm Michael Energi from Tripardium.com and today I'm going to be showing you how to manage items within the Per Diem Merchant Dashboard. So all you want to do when you log into your account is go to the side menu here and click on items. And within the items page, you're going to see a list of all your items categorized based on different categories. So for you to find options to make changes to anything regarding your item, you would have to select the item and then you get to see this floating menu here. So you can edit the item, you can promote the item, you can assign to category. So let's just start with the first option here, which will be to assign to category. So this is how you can assign an item to a category. You click that button and you can assign this item to any of the category here. And all you need to do is just hit add. Gonna cancel that. And if you also want to promote this item within your mobile app, all you have to do is just hit promote item and then you can enter the tag. So within the homepage of your mobile app, what happens is that you're going to add this item to the list of promoted or featured items that are being shown on the homepage. And within that section or the container where the item is showed, there would be a tag there to. You can call it anything. You can say top choice or you can say chef's choice. You can call it anything. So it will be displayed on the promoted item within the app. So I'm just gonna cancel this. You can also edit the item. Now all you have to do is look out for this model. Once you hit the edit item button, you cannot make changes to the name or the description. Those are being taken from Square directly. But you can also change the category from here. Following this list, you can search and then this is the image. You can also get a link to this item and it's available for users that are on version 3.6 and higher. So this is the link to this particular item within the app. So you can share this with anybody. And if they have the app, once they click on the link, it's going to take them directly to the items page within the app. You can also decide to promote from here directly. Another thing that you can set up within the items area is the modifiers. So here you can decide to hide this modifier from the item and you can also decide to customize it. So if you decide to customize it, what it means is that you have the ability to enable modifier quantity selector. So customers will be able to add multiple single modifiers. So within the app for this specific modifier, they can increase the quantity for a single modifier that is being displayed for them to view. So that is how you can. And the final thing is the product tags. You can also set tags. Bestseller, Bread, Muffin, you can actually set tags here and you can separate those by using a comma. So I'm just going to commit call this bestseller and separate it using a comma and then you can add bestseller and you can also remove. So that is how you set up the product tags and that is how you edit your item. So you can upsell this item on your mobile app by simply turning on or off this toggle. And what that does is that every time a customer adds an item to their cart, this item will also be shown to them so that they they can add to their carts or they can as well buy this item, you know, before they finally check out. So that is pretty much the options. If you click on three dots here, you can also decide to mark this item as out of stock. Once you hit that button, you get to set the location that is out of stock for and then save. I'm just going to cancel this. Pretty much. That is how you manage items within the per diem merchant dashboard. If you want to clear your selection, all you have to do is click the clear selection button here and it's going to clear your selection. So thank you.